How to Bill Patient Clinic Claims
Ready to bill through the Patient Claims billing channel? Follow along to learn how.
Need to learn more about Patient Claims first? Click here for more.
To get started, from the Patient Record, we are going to click on the Bill Patient button.
![]()
You can also use the hotkey ‘B’!
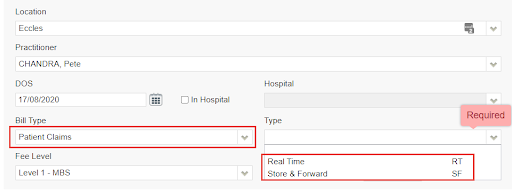
This will take you to the Clinical Billing page, where you’ll need to select the:
- Location: the location where the service took place. If you only have one, it will be defaulted
- Practitioner: the practitioner who performed the service. If you only have one, it will be defaulted
- DOS: date of service
- Bill Type: Patient Claims
- Type: ‘Store & Forward’, or ‘Real Time’ – more on this below
Store & Forward vs Real Time
The primary difference between these two types of Patient Claims is that:
- With Real Time, your invoices are sent to Medicare in real time, as they are created. That is, they do not go into a batch that you then manually send off at the end of the day. They do end up in a batch however.
- Whereas with Store & Forward, invoices enter a batch for later transmission. This is how all other Bill Types such as Eclipse, Medicare, and DVA behave.
Some things to note about Real Time
- Should you need to delete an invoice after creating it, you have until the close of business that day to delete it, via the software. This is called ‘Same Day Delete’
- However, if you realise you need to delete an invoice the next day or later, you will now need to contact Medicare and ask them to delete/ ignore the invoice on their end
- If you realise you need to delete an invoice and it has already been paid, again, you will need to contact Medicare and process a refund.
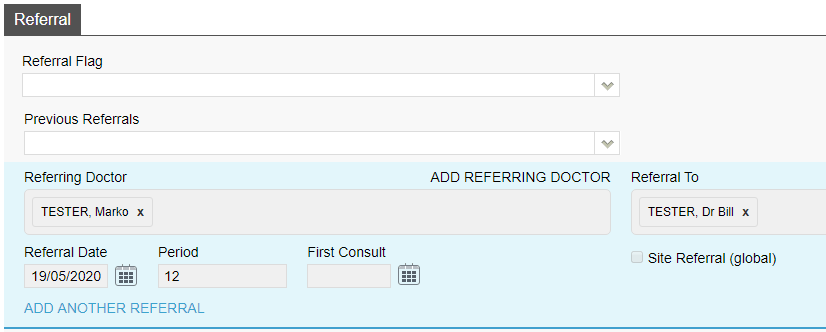
Referrals
The last step before we can begin billing is to enter any needed referral information. If this does not apply to you, click on Add Items and proceed to the next section.
Otherwise, simply fill out the Referral section as seen below. If you only have one referring doctor for this patient, they will be automatically selected here (provided it has not expired).
Once you are done with the above segments, click on the green Add Items button in the bottom left corner of your screen.
![]()
You will arrive at the Clinic Billing page. Here we can see a brief overview of previous information for the patient, and where we can bill an invoice.
It is as easy as typing in the item you need and selecting it. There are two different ways to search for the item as shown below:
- Search for the item number itself.
- Search for a word in the description. This can either be at the start, or anywhere within the description!
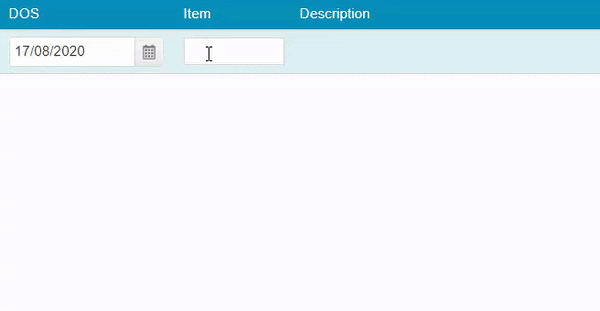
Notice that for Patient Claims, the Date of Service (DOS) can be changed in an invoice.
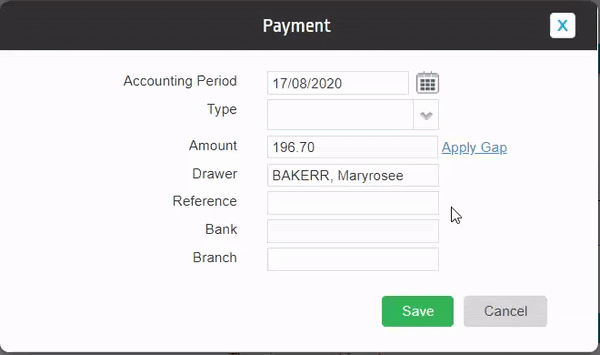
Applying Payment
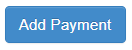
Once you have added all your desired items, you can add payments captured from the patient onto the invoice using the Add Payment button.
This will present you with a pop-up to enter the payment information. The total invoice amount will be prefilled in the Amount field.
So, you may simply allocate the payment type and hit save as below:
Once you have entered all your items and payments as desired, click on the Review Charges button to proceed to the final page of billing.
![]()
Clinic Review Charges
You may notice that this page looks nearly identical to the previous Clinic Billing page. The only real difference is that you can no longer add or change items, and there are additional buttons at the bottom.
You will also be able to see the Total Charges for the items you have billed like so:

Lets go over the options on this screen:
![]()
Edit Item And Charges: Realised you have made a mistake? click this button to go back to the previous page and fix it up!
Cancel: Cancel out of this billing. This will take you back to the Patient Screen.
Save: Save this invoice, send it to the Claiming Medical section, ready to send.
If Save & Print is selected, it will also be printed.
You’re all done! You have successfully billed a Patient Claims invoice. Now, head over to ‘Claiming Medical’ and send it off.
Not sure how to send off your claims? Click here for more on Claiming Medical.

