Hospital Adjustments
Adjustments via the Adjustments Screen
If an adjustment is required for refund, write off, incorrect billing purposes etc it can be done using the Adjustments Screen or from the patient History / Episode screen. Both options are explained below.
Making the entry from the Adjustments Screen
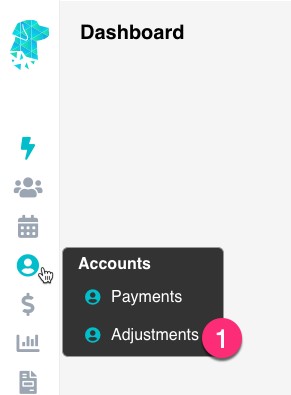
- Go to Accounts in the main menu & select Adjustments

- For multi-location systems, use the drop down to select the relevant Location
- Enter the required Transaction Date if it differs from the current date
- Use the Type dropdown to select the required transaction type e.g., write off, incorrect billing, discount, refund etc.
- If Refund is selected as the Type, the Payment Type field will be displayed so the method of the transaction can be documented. For all other journal / adjustment Types this field will not be necessary & won’t be displayed
- Type the required information in the Drawer field
- Use the Reference No., Bank & Branch fields, if the facility work instructions require, to document additional information regarding a bank cheque for refunds etc
- Click “Click to Search for an individual Account” and the search box will be displayed to find the required patient. (If processing this adjustment from the Episodes Screen any outstanding invoices will automatically be displayed)
- Once a patient is selected, the invoices with an outstanding amount will be displayed
- Use the Show All Invoices option to display invoices that don’t currently have an outstanding balance
- Type the amount to be refunded in the Allocated column
- Once you have moved from the Allocated field the system will show you the Possible Balance of the invoice, following the adjustment
- Once all details have been confirmed & are correct click Save

Making the entry from the Episode Screen:
- Search for the patient using the Search field or by selecting the required admission date & theatre
- Right-click on the appointment & select Episodes
- Once in the Episodes screen ensure that the correct date of admission is selected
- Then use the Invoice Options drop down on the right of the screen to select Adjust Invoice
- You will be redirected to the Adjustments screen where you can follow the instructions above from step 2.