Billing DVA Community Nursing (Clinic)
So you’re ready to bill DVA community nursing patients. Follow along to learn how.
It all starts with patients so click on the Patients tab and select a patient.
Next, before you bill, you will need to enter the dates for the 28 day cycle. Click on the Other tab on the patient’s record and enter the admission date as well as the start date of the 28 day cycle.
![]()
Once finished, hit Save.

At this point, you are ready to bill.
However, it is a good idea to first run the Online Patient Verification to ensure the correct patient details are entered, as they are known to DVA.
To learn more about the Online Patient Verification, Click here
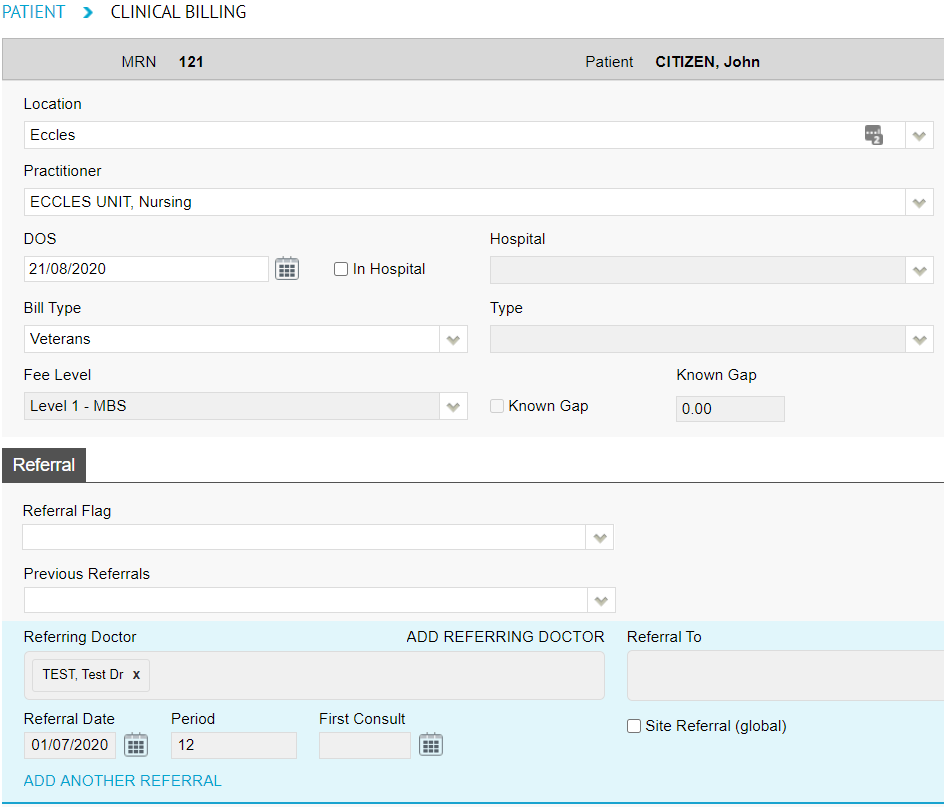
When you’re ready to bill, click on the Bill Patient button or hit ‘B’ on your keyboard as a shortcut!
While you may notice that there are more fields than shown above, for Community Nursing, we will only be focusing on a few.
Please note that most of these fields are drop down menus.
- Location: the location where the service took place. If you only have one, it will be defaulted
- Practitioner: the practitioner who performed the service. If you only have one, it will be defaulted
- DOS: date of service
- Referring Doctor
Note: The Bill Type will automatically be selected as Veterans, given the patient has a veterans card number on their record.
Additionally, If you only have one location and practitioner setup in the system, these too will automatically be selected. This is usually the case for most community nursing organisations.
So, all you need to enter is the Date of Service (DOS). The date in this field will always be prefilled as today’s date. Therefore, in almost all cases, you will need to change this date. The date of service should be the first day of the 28 day claiming cycle.
For more information on this, click here to read more on the DVA website
Conditional: if you have entered a referral on the patient’s record and do not see it in the billing screen, you may click on the ‘Previous Referrals’ drop down to view all previous entered referrals and select the desired one.
Once you have filled in the above fields, click on the Add Items button. You’re nearly done!
You will now be presented with a pop up asking you to enter the nursing hours for this period of care (current 28 day cycle). Enter your nursing hours and hit ‘Save’.
Note: hours are only required to be reported when core items are billed. They are not required if you are billing consumables only.
That said, if you are not billing your core items with the consumables, you will need to bill the core items first, before billing the consumables to avoid rejections.
Forgotten to add some hours, or want to check what you’ve entered? You can invoke the nursing hours pop up again by hitting the ‘CN Info’ button.
![]()
Next, go ahead and enter your desired item(s) in the below field:
Once you have entered all your desired items, click on:
- Review Charges
- Save
All done! A batch has now been created within Claiming – Medical and will be ready to send off.
If you do not know how to send a batch, see our handy guide here!