Health Fund Fees (Clinic)

Disclaimer: Altura Health recommends periodically checking these settings to ensure they are correct. Your fees will not update if these settings are incorrect. You are responsible for maintaining and ensuring these fees are set up correctly.

Tired of updating your Health Fund Fees every time a change occurs?

If Fydo is setup correctly, your health fund fees will automatically be updated! Simply follow this quick 5 minute guide, and never worry about your fees again!

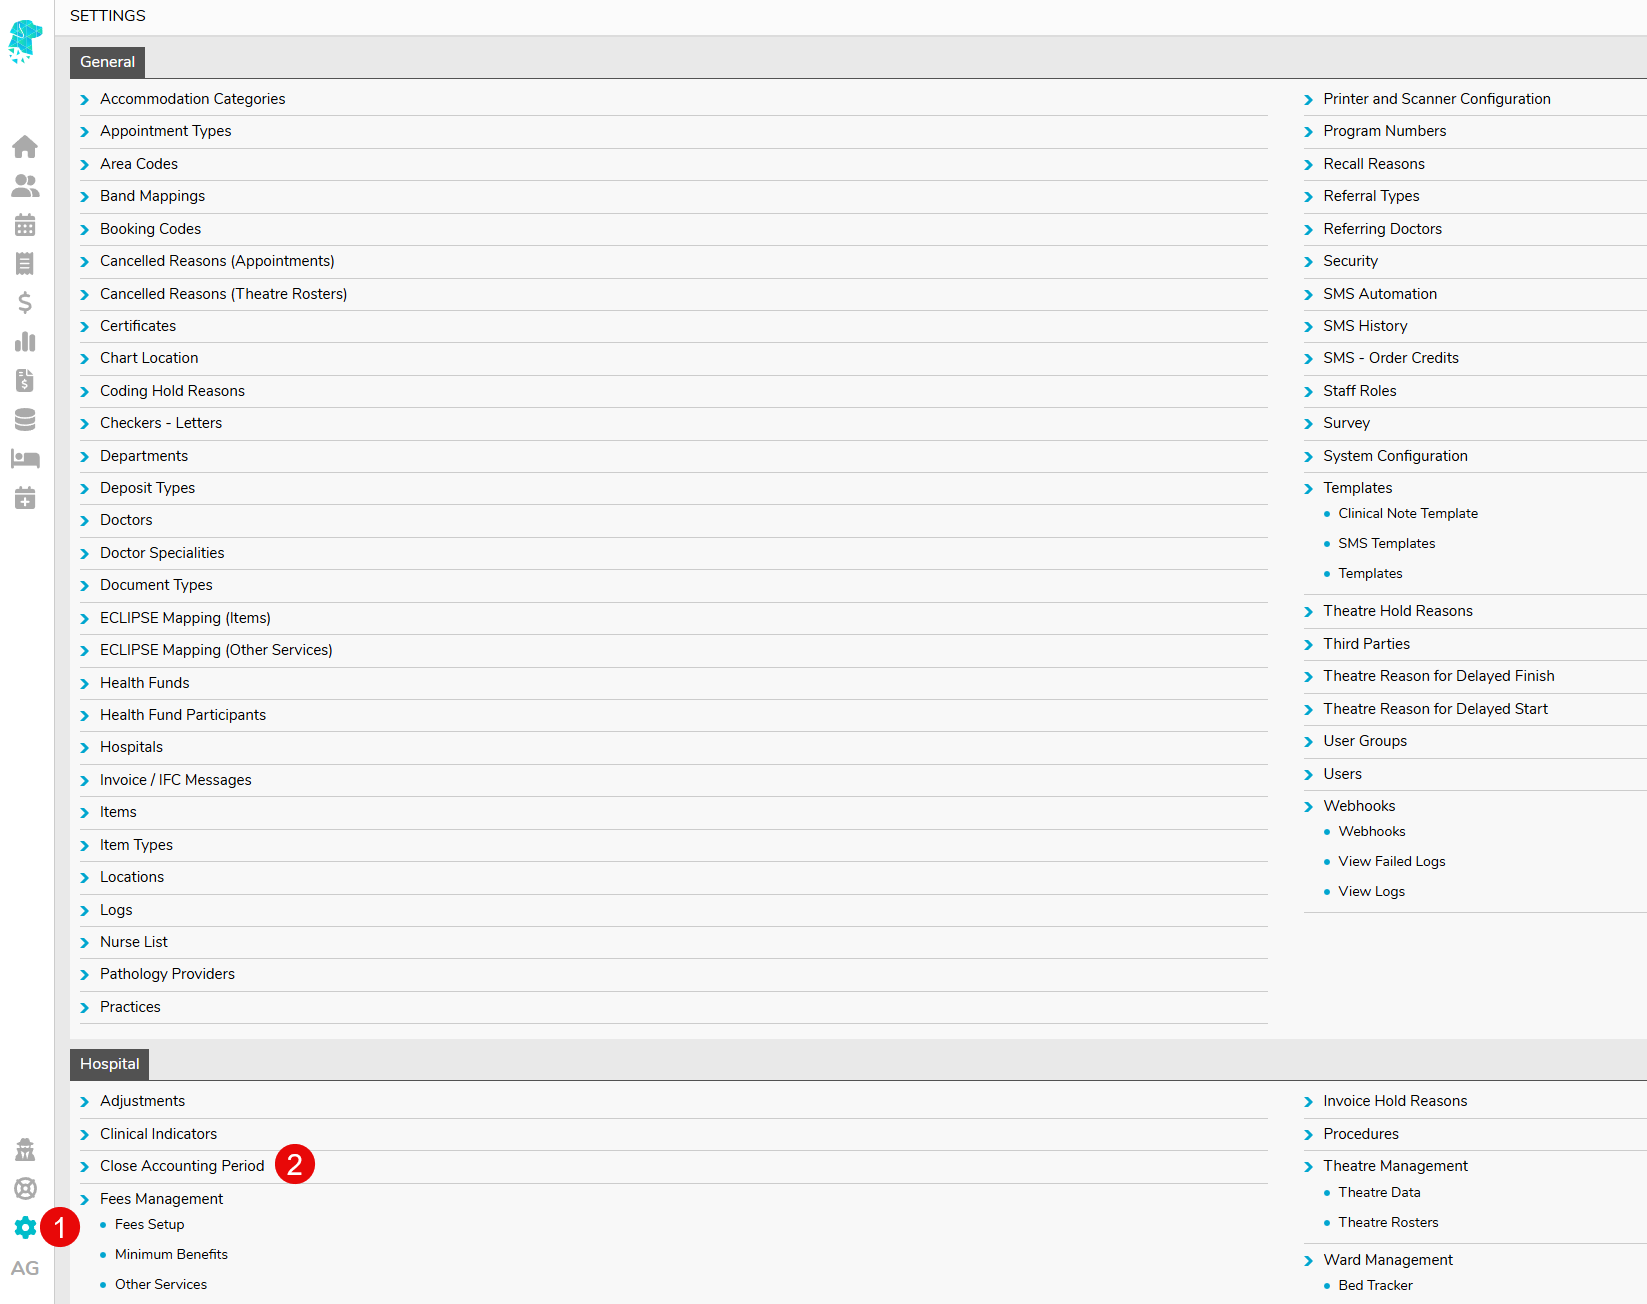
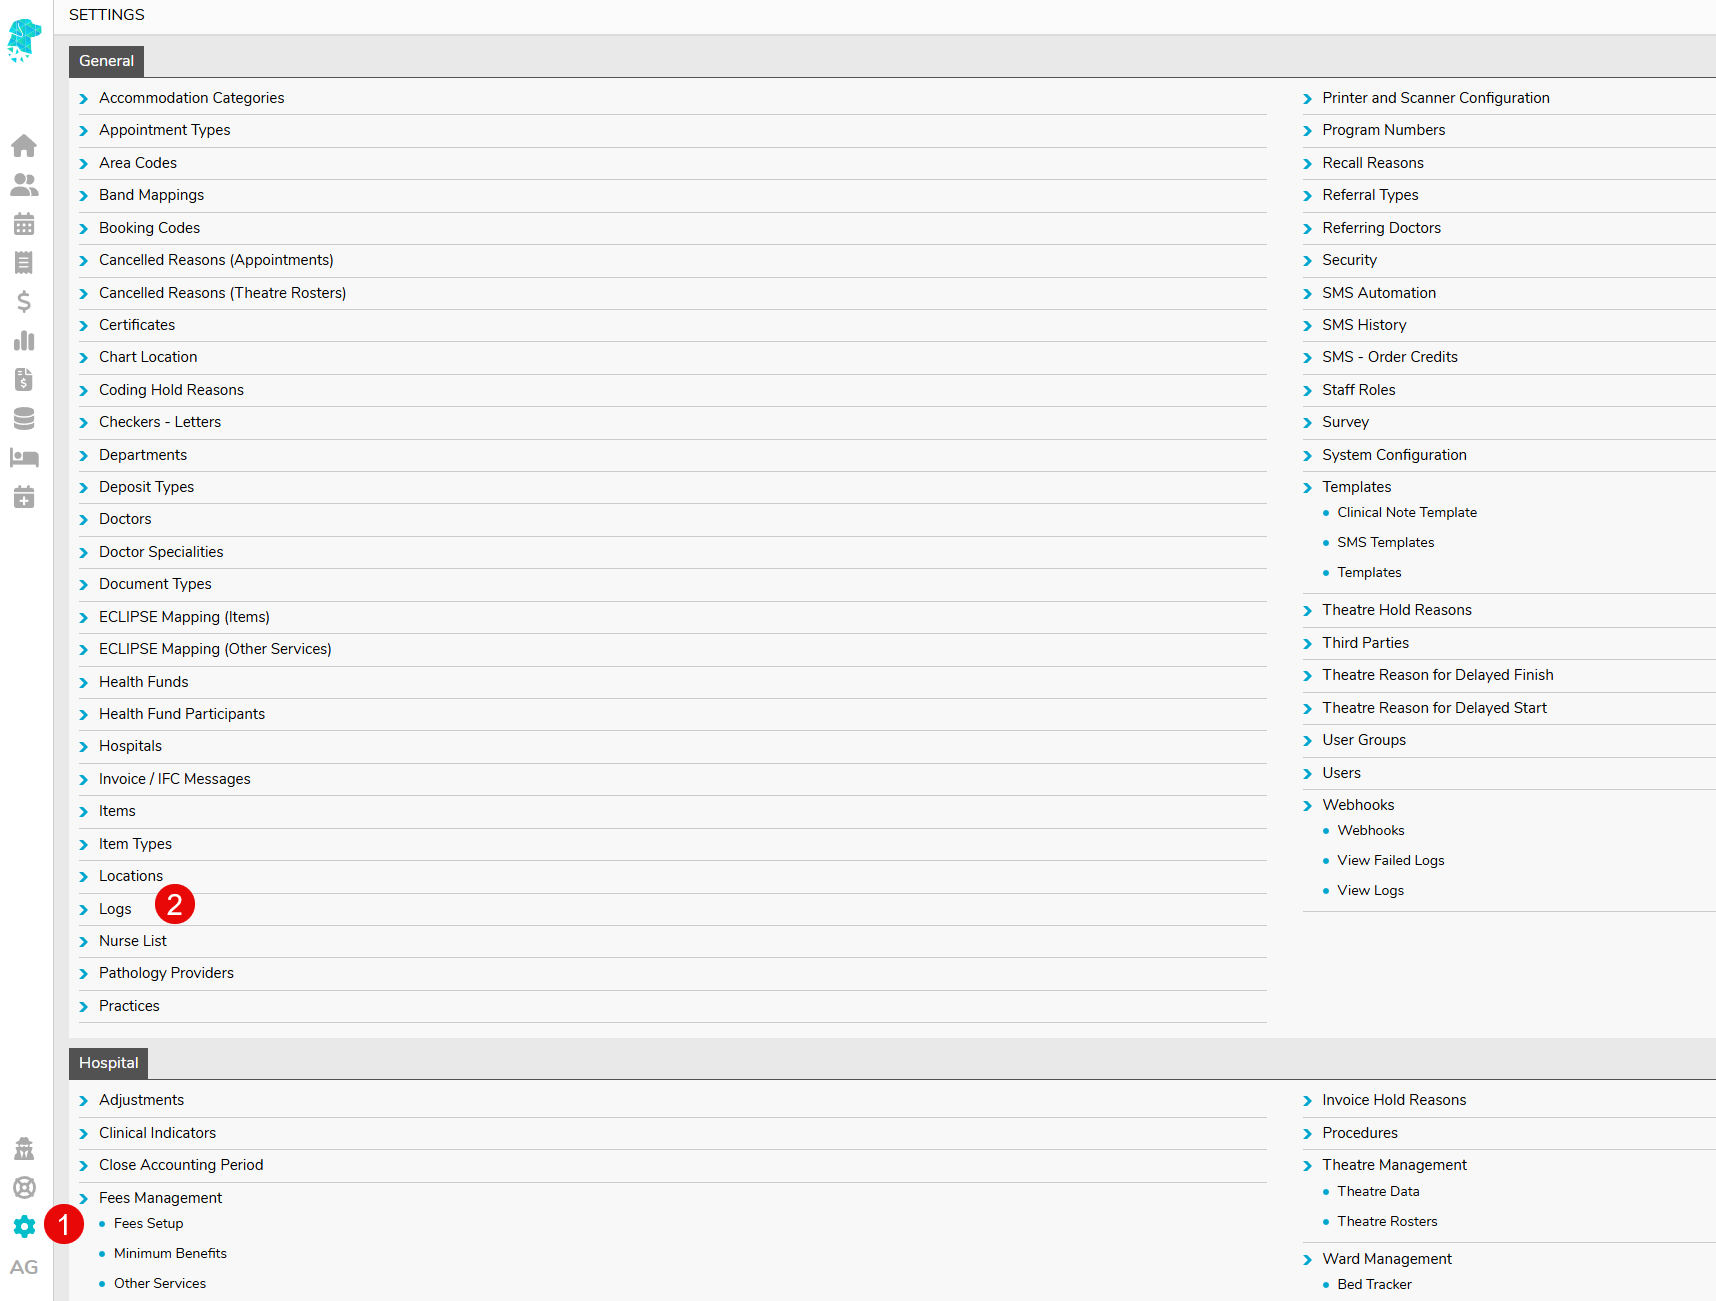
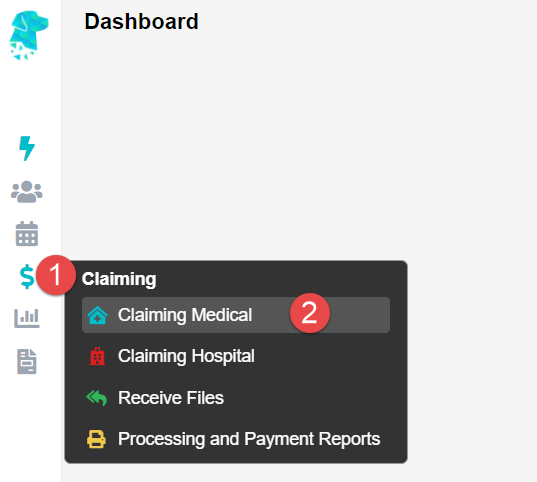
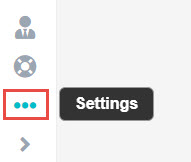
First, lets head to Settings, found on the bottom left hand side of Fydo.


Then select Fee Levels, found underneath Fee Management
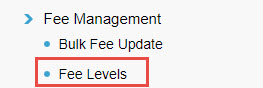

Fee Levels

You will now arrive at the Fee Levels settings. This page displays all of the current Fee Levels within Fydo, and lets you edit them as needed.

Now, lets select Edit from the top right hand corner of the page.


To setup automatic fee updates, we just need to change a few settings for each health fund.
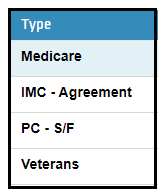
  • Fund
  • State (If Applicable)
  • Fee Type (If Applicable)


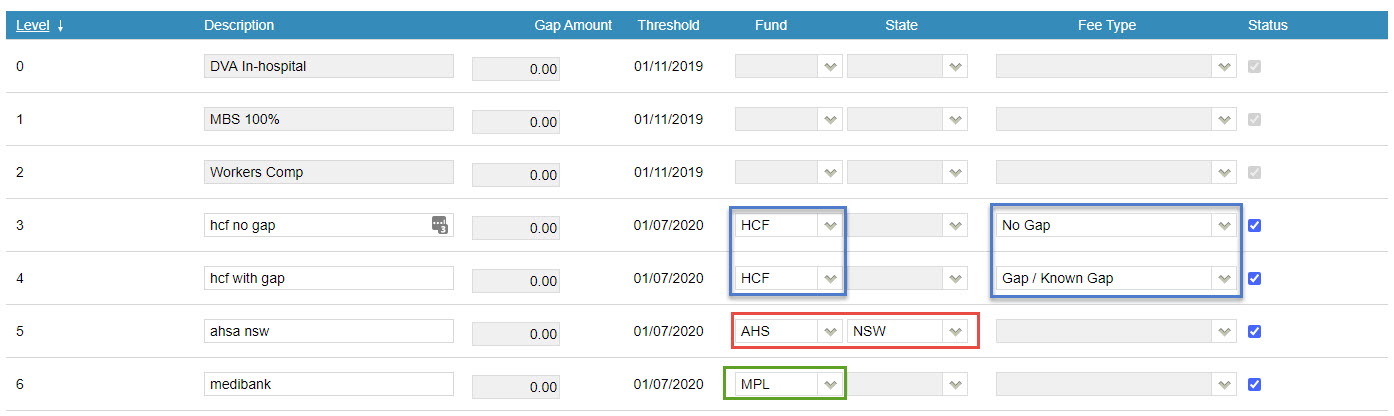
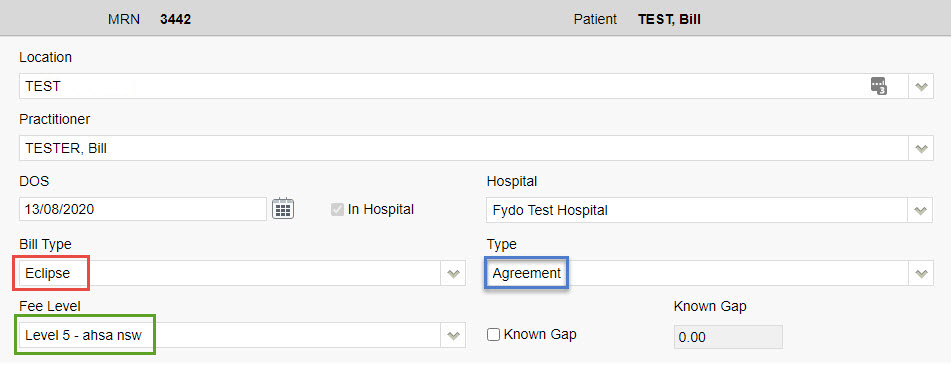
Fund – This is a simple one, simply select the corresponding fund from the list. In the above case, I selected HCF for both of my HCF fee levels, AHS for my Alliance (AHSA) fee level and MPL for my Medibank Private level.

State – This will only apply to Alliance (AHSA), BUPA and GU Health. Select the state you require fees for. In the above case, I opted for the NSW fees.

Fee Type – This will only apply to HCF and HBF. Simply select if you need the No Gap or the Known Gap fees. In the above case, I have a fee level for both, though you may only have one.

Once you have completed the above, click the Save button.


All done! You can now rest easy, while we take care of the rest. Your Health Fund fees will automatically update as soon as we have the latest fees, usually every 2-3 months.

Disclaimer: ACSS recommends periodically checking these settings to ensure they are correct. Your fees will not update if these settings are incorrect. You are responsible for maintaining and ensuring these fees are set up correctly.

You can find the fees that Fydo will import here.


Medicare and Fund Contacts – Dealing with Rejections

Medicare & DVA

Organisation Phone/ Email
Medicare P: 1800 700 199F: 02 9895 3190
MBS Interpretation P: 13 21 50E: askMBS@health.gov.au
DVA P: 1300 550 017

Health Funds

Fund name Contact for clinics Contact for hospitals
ACA Health
ECLIPSE code: ACA
HCP code: ACA
P: 1300 368 390
acahealthit@acahealth.com.au
P: 1300 368 390
acahealthit@acahealth.com.au
Alliance (AHSA) P: 03 9813 4088
access@ahsa.com.au
 
AHM
ECLIPSE code: AHM

HCP code: AHM

P: 1300 524 456
Eclipse@medibank.com.au
P: 1300 560 680
Eclipse@medibank.com.au

AHM and Medibank have the same support team

Australian Unity
ECLIPSE code: AUH

HCP code: AUF

P: 1800 035 360 P: 1800 035 360
dgilder@australianunity.com.au
BUPAE
CLIPSE code: BUP

HCP code: BUP

P: 134 135F: 1300 130 623 for sending claims manuallydr.billing@bupa.com.au

Only for sending claims with Problems / Rejections

gapscheme@bupa.com.au

Only for if you are unable to fax

P: 134 135
gordon.barrett@bupa.com.au
CBHS Corporate Health & CBHS Health Fund
ECLIPSE code: CBC & CBH

HCP code: CBC & CBH

P: 1300 654 123
providers@cbhs.com.au
P: 1300 654 123
access@cbhs.com.au

Alternatively
julie.mckinnon@cbhs.com.au

Hunter Health Insurance
(Formally known as ‘Cessnock’ or ‘CDHBF Health’)

ECLIPSE code: CDH

HCP code: CDH

P: 02 4990 1385
enquiries@hunterhi.com.au
P: 02 4990 1385
CDH.BenefitsFund@Hunterhi.com.au
CUA Health Limited
ECLIPSE code: CHF

HCP code: CPS

P: 1300 499 260 cuahealth@cuahealth.com.au P: 1300 499 260 
cuahealth@cuahealth.com.au

Alternatively
karen.coventry@cua.com.au

Defence Health
ECLIPSE code: DHF

HCP code: AHB

P: 1800 656 329 P: 1800 656 329
providerrelations@defencehealth.com.au
Doctors Health Fund
ECLIPSE code: AMA

HCP code: AMA

P: 1800 226 586 P: 1800 226 586
lesley.rutter@doctorshealthfund.com.au 
Emergency Services Health (also managed by Police Health)

ECLIPSE code: ESH

HCP code: SPE

P: 1300 703 703 
F: 1300 151 152
P: 1300 703 703 
providerenquiries@eshealth.com.au
GMHBA
ECLIPSE code: GMH

HCP code: GMH

P: 1300 446 422
F: (03) 5222 7478
P: 1300 446 422
Jamie-LeeGardham@gmhba.com.au

joannesheldon@gmhba.com.au

GU Health (FAI)
ECLIPSE code: FAI

HCP code: FAI

P: 1800 249 966
corporate@guhealth.com.au
providers@honeysucklehealth.com.au
HBF
ECLIPSE code: HBF

HCP code: HBF

P: 1300 810 475
expresspayqueries@hbf.com.au
P: 1300 810 475
lorraine.hort@hbf.com.au
HIF(Health Insurance Fund of Australia Limited)

ECLIPSE code: HIF

HCP code: HIF

P: 1300 134 060
claims@hif.com.au
P: 1300 134 060
michelle.peacock@hif.com.au
HCF
ECLIPSE code: HCF

HCP code: HCF

P: 1800 670 302
medicoverenquiry@hcf.com.au
P: 1800 670 302
MFarlow@hcf.com.au (Maria) 

Alternatively

dfernandez@hcf.com.au (David)

Health Care Insurance
ECLIPSE code: HCI

HCP code: HCI

P: 1800 804 950 P: 1800 804 950
jamie.gillam@hciltd.com.au
Health Partners
ECLIPSE code: SPS

HCP code: SPS

P: 1300 113 113 P: 1300 113 113
hospitalclaims@healthpartners.com.au

davids@healthpartners.com.au

Health.com.au
ECLIPSE code: HEA

HCP code: HEA

P: 1300 199 802 P: 1300 199 802
hospitalteam@health.com.au 

Alternatively

Catherine.Ngo@health.com.au 

Gemma.Oliver@health.com.au

Latrobe
ECLIPSE code: LHS

HCP code: LHS

P: 1300 362 144
E: info@lhs.com.au
P: 1300 362 144
tan@lhs.com.au
Medibank
ECLIPSE code: MPL

HCP code: MPL

P: 1300 130 460 P: 1300 130 460
medibankhospital.network@medibank.com.au
Mildura
ECLIPSE code: MDH

HCP code: MDH

P: 03 5023 0269
providers@mildurahealthfund.com.au 
P: 03 5023 0269
eclipse@mildurahealthfund.com.au
MO Health
ECLIPSE code: MYO

HCP code: MYO

P: 1800 333 004 P: 1800 333 004
Vaibhav.Makin@aia.com
Navy Health
ECLIPSE code: NHB

HCP code: NHB

P: 1300 217 736
query@navyhealth.com.au
NIB
ECLIPSE code: NIB

HCP code: NIB

P: 1300 853 530
medigap@nib.com.au
Overseas Claims: internationalclaims@nib.com.au
P: 1300 853 530
hospitaleclipse@nib.com.au

provrel@nib.com.au

Nurse and Midwives
ECLIPSE code: NMW

HCP code: NMW

P: 1300 344 000
submit.claim@nmhealth.com.au
P: 1300 344 000
EclipseClaims@nmhealth.com.au 

Alternatively

George.Drakakis@nmhealth.com.au dianne.roe@teachershealth.com.au

OneMediFund
ECLIPSE code: OMF

HCP code: OMF

P: 1800 148 626
F: 1300 673 406
P: 1800 148 626
info@onemedifund.com.au
Peoplecare Health Insurance
ECLIPSE code: LHM

HCP code: LHM

P: 1800 808 690 P: 1800 808 690
info@peoplecare.com.au
Phoenix Health
ECLIPSE code: PHF

HCP code: PWA

P: 1800 028 817 P: 1800 028 817
enquiries@phoenixhealthfund.com.au

info@peoplecare.com.au

Police Health (also managed by Emergency Services Health)

ECLIPSE code: POL

HCP code: SPE

P: 1800 603 603
F: 1800 008 554
P: 1800 603 603
providerenquiries@policehealth.com.au
Queensland Country
ECLIPSE code: QCH

HCP code: QCH

P: 1800 813 415 P: 1800 813 415
rharding@qccu.com.au 
TUH(Queensland Teachers)

ECLIPSE code: QTU

HCP code: QTU

P: 1300 360 701 P: 1300 360 701
alice.caldwell@tuh.com.au
Reserve Bank health
ECLIPSE code: RBH

HCP code: RBH

P: 1800 027 299
F: 1300 309 704
P: 1800 027 299
info@myrbhs.com.au
RT Health
ECLIPSE code: RTH

HCP code: RTE

P: 1300 886 123 (option 5)
access@rthealthfund.com.au
P: 1300 886 123
hospitals@rthealthfund.com.au
St Lukes
ECLIPSE code: SLM

HCP code: SLM

P: 1300 651 988 P: 1300 651 988
general@stlukes.com.au
Teachers Federation
ECLIPSE code: TFH

HCP code: NTF

P: 1300 728 188 P: 1300 728 188
elizabeth.cashman@teachershealth.com.au 

Alternatively, try: 

EclipseClaims@teachershealth.com.au 

George.Drakakis@nmhealth.com.au 

dianne.roe@teachershealth.com.au

Transport Health
ECLIPSE code: TFS

HCP code: TFS

P: 1300 806 808 P: 1300 806 808
hospitals@transporthealth.com.au
Westfund
ECLIPSE code: WFD

HCP code: WFD

P: 1300 937 838
medicalbenefits@westfund.com.au
P: 1300 937 838
sharpg@westfund.com.au


Closing the Accounting Period

Closing the ‘Accounting Period’ refers to locking down your financial figures up to a given date (usually the end of the month) so that they cannot be changed

We do not recommend closing the accounting period for the last month, on the first day of the current month. Rather, give yourself seven to ten days to get your figures to a point where you are happy. That is, after all rejections and adjustments are made. 

In other words, it ensures that the figures seen on your revenue report run out of FYDO match the figures seen on your bank account, to the cent. And that those figures then cannot be amended in FYDO. 

So let’s see where the accounting period is closed.

Start off by going over to settings.


Then, click Close Accounting Period.


Enter the date you wish to lock your figures to and hit Save.


I should also mention that this action is recorded in FYDO’s audit log, so you can see who closed the accounting period and when.

To view the audit log, go to Settings, then click on Logs.


You will see a log similar to this when the accounting period is closed.


Adding MBS items – Clinic

Want to know how to add items into Fydo? Follow the below steps and you’ll be billing them in no time!

First, lets head to Settings, located in the lower left hand corner of Fydo.


Then select Items, this will display a list of all your current items.

To add a new item, lets click the yellow Add Item button.


Simply enter the item you need in the Number field as below, found under the Item Details.


You will see the Procedure name be automatically filled.

Now just click on the green Save button.


All done! The rest of the information regarding the item will automatically be added from information via the Medicare Benefits Schedule online Website.

Things such as:

  • Fees (Medicare and DVA rates)
  • Description
  • Rule (If it has one e.g Surgical step down)


Eclipse Clinic Billing

Set up your patient and ready to bill? Read ahead to find out how to submit claims to Health Funds via Eclipse.

Important Note: If you have not submitted an Online Patient Verification (OPV) yet for your patient, or you do not know how, see our wiki page here!

To get started, from the Patient Record, we are going to click on the Bill Patient button.

You can also use the hotkey ‘B’!

This will take you to the Clinical Billing page


While you may notice that there are more fields than shown above, for Eclipse we will only be focusing on a few.

Please note that most of these fields are drop down menus.

  • Location: The Location the service took place. If you only have one it will be defaulted.
  • Practitioner: The Practitioner who performed the service.
  • DOS: The Date of Service.
  • In Hospital: A tick-box to indicate if this service was performed in a Hospital, this is required for Eclipse

The main fields to ensure are correct for Eclipse are the highlighted ones above, and outlined below:

  • Bill Type: The type of billing; be sure to select Eclipse
  • Fee Level: Which fees this billing will use. Will default based on the patients record.
  • Type: Needs to be set to either Agreement or Scheme depending on the fund.

The last step before we can begin our billing is to enter any needed referral information. If this does not apply to you, skip to the next section: Adding Items

Otherwise, simply fill out the Referral section as seen below. If you only have one referring doctor for this patient, they will be automatically selected here (provided it has not expired)

If you don’t see a Referral you have added, be sure to check the Previous Referrals drop down menu!


Once you are done with the above segments, click on the green Add Items button in the bottom right hand corner of your screen.


Clinic Billing

You will arrive at the Clinic Billing page. Here we can see a brief overview of previous information for the patient, and where we can bill an invoice.

Billing is as easy as typing in the item you need and selecting it. There are two different ways to search for the item as shown below:

  • Search for the item number itself.
  • Search for a word in the description. This can either be at the start, or anywhere within the description!

Don’t forget, for Eclipse you can easily change the Date of Service within the invoice by using the handy calendar!


Once you have entered all your items as desired, click on the Review Charges button to proceed to the final page of billing.


Clinic Review Charges

You may notice that this page looks nearly identical to the previous Clinic Billing page. The only real difference is that you can no longer add or change items, and there are additional buttons at the bottom.

You will also be able to see the Total Charges for the items you have billed like so:


There are a few different options on this screen:


  • Edit Item And Charges: Realised you have made a mistake? click this button to go back to the previous page and fix it up!
  • Cancel: Cancel out of this billing, this will take you back to the Patient Screen.
  • Save: Save this invoice, prompting the final confirmation before it is send to Claiming – Medical. If Save & Print is selected, it will also be printed.

Upon selecting one of the two save options, you will see the final stage of the billing, the Claimant Screen.


Please note that most of the fields are optional, so if you do not wish to fill them out, simply click on the green Send Electronically button.


Otherwise, you can fill them out accordingly, and select if an IFC was issued.

All done! A batch has now been created within Claiming – Medical and will be ready to send off.

If you do not know how to send a batch, see our handy guide here!


Billing DVA Community Nursing (Clinic)

So you’re ready to bill DVA community nursing patients. Follow along to learn how.

It all starts with patients so click on the Patients tab and select a patient.

Next, before you bill, you will need to enter the dates for the 28 day cycle. Click on the Other tab on the patient’s record and enter the admission date as well as the start date of the 28 day cycle. 


Once finished, hit Save.


At this point, you are ready to bill. 

However, it is a good idea to first run the Online Patient Verification to ensure the correct patient details are entered, as they are known to DVA. 

To learn more about the Online Patient Verification, Click here 


When you’re ready to bill, click on the Bill Patient button or hit ‘B’ on your keyboard as a shortcut! 

While you may notice that there are more fields than shown above, for Community Nursing, we will only be focusing on a few.


Please note that most of these fields are drop down menus.

  • Location: the location where the service took place. If you only have one, it will be defaulted
  • Practitioner: the practitioner who performed the service. If you only have one, it will be defaulted
  • DOS: date of service
  • Referring Doctor 


Note: The Bill Type will automatically be selected as Veterans, given the patient has a veterans card number on their record. 

Additionally, If you only have one location and practitioner setup in the system, these too will automatically be selected. This is usually the case for most community nursing organisations.

So, all you need to enter is the Date of Service (DOS). The date in this field will always be prefilled as today’s date. Therefore, in almost all cases, you will need to change this date. The date of service should be the first day of the 28 day claiming cycle.

For more information on this, click here to read more on the DVA website


Conditional: if you have entered a referral on the patient’s record and do not see it in the billing screen, you may click on the ‘Previous Referrals’ drop down to view all previous entered referrals and select the desired one.


Once you have filled in the above fields, click on the Add Items button. You’re nearly done!


You will now be presented with a pop up asking you to enter the nursing hours for this period of care (current 28 day cycle). Enter your nursing hours and hit ‘Save’.

Note: hours are only required to be reported when core items are billed. They are not required if you are billing consumables only. 

That said, if you are not billing your core items with the consumables, you will need to bill the core items first, before billing the consumables to avoid rejections.


Forgotten to add some hours, or want to check what you’ve entered? You can invoke the nursing hours pop up again by hitting the ‘CN Info’ button.


Next, go ahead and enter your desired item(s) in the below field:


Once you have entered all your desired items, click on:

  • Review Charges
  • Save 


All done! A batch has now been created within Claiming – Medical and will be ready to send off.

If you do not know how to send a batch, see our handy guide here!


Sending Batches – Claiming Medical

All done billing? Great! The next step is to send these batches off. To get started head to Claiming, then select Claiming Medical.


There are a few different Types that a batch can have, depending on what has been billed.

  • Medicare
  • Veterans
  • IMC (Inpatient Medical Claims) – Scheme or Agreement
  • PC (Patient Claims) – Store and Forward or Real Time

No matter the type of batch, they all follow the same simple process to be sent off.


Actions Menu

Before we get started on sending the batch, here is a handy guide to accessing the options for a batch. This will be used at all stages of the batches life cycle, from Open to Payment Received.


As shown above, there are two ways to access this menu:

  1. Left click on the downward arrow in the Action column.
  2. Right click anywhere on the batch line itself.

Both of these methods will display the same menu.


Sending a Batch

To send a batch; first the batch must have the status of Closed, this can be seen in the Status column.

In the case of a Medicare or Veterans batch, the status may be Open. An Open batch means that if you bill any more invoices of the same type, they will be added to this batch. A Medicare or Veterans batch can hold up to 80 invoices before it will automatically Close. 

In a case like this, you will have to access the Actions Menu as seen above, and select Close.


Once a batch is Closed, simply access the Actions Menu once more and select Send Batch.


All done! You will notice the status of your batch will first change to Queued as it is getting ready to go. Then it will become Sent should you refresh the page or come back to it a bit later.


Clinic Bulk Billing

Set up your patient and ready to bill? Read ahead to find out how to submit claims to Medicare via Bulk Billing.

Important Note: If you have not submitted an Online Patient Verification (OPV) yet for your patient, or you do not know how, see our wiki page here!

To get started, from the Patient Record, we are going to click on the Bill Patient button.

You can also use the hotkey ‘B’!

This will take you to the Clinical Billing page


While you notice that there are more fields than shown above, for Bulk Billing we will only be focusing on a few.

Please note that most of these fields are drop down menus.

  • Location: The Location the service took place. If you only have one it will be defaulted.
  • Practitioner: The Practitioner who performed the service. 
  • DOS: The Date of Service.
  • In Hospital: A tick-box to indicate if this service was performed in a Hospital. If you select this the Hospital drop down menu becomes active, allowing you to select the Hospital.


The last step before we can begin our billing is to enter any needed referral information. If this does not apply to you, skip to the next section: Adding Items

Otherwise, simply fill out the Referral section as seen below. If you only have one referring doctor for this patient, they will be automatically selected here (provided it has not expired)


Once you are done with the above segments, click on the green Add Items button in the bottom right hand corner of your screen.


Clinic Billing

You will arrive at the Clinic Billing page. Here we can see a brief overview of previous information for the patient, and where we can bill an invoice.

Billing is as easy as typing in the item you need and selecting it. There are two different ways to search for the item as shown below:

  • Search for the item number itself.
  • Search for a word in the description. This can either be at the start, or anywhere within the description!


Remember for Bulk Billing the Date of Service (DOS) cannot be changed in an invoice.

Once you have entered all your items as desired, click on the Review Charges button to proceed to the final page of billing.


Clinic Review Charges

You may notice that this page looks nearly identical to the previous Clinic Billing page. The only real difference is that you can no longer add or change items, and there are additional buttons at the bottom.

You will also be able to see the Total Charges for the items you have billed like so:


There are a few different options on this screen:

  • Edit Item And Charges: Realised you have made a mistake? click this button to go back to the previous page and fix it up!
  • Cancel: Cancel out of this billing, this will take you back to the Patient Screen.
  • Save: Save this invoice, send it to the Claiming Medical section, ready to send. If Save & Print is selected, it will also be printed.

All done! The invoice has now been saved within a Batch and is now ready to be sent.