Single Sign On (SSO) with FYDO
At FYDO, we are committed to continuously enhancing the security and convenience of our platform for our valued customers. And because of that, we use Single Sign On (SSO) to FYDO! This feature will allow you to access FYDO using your existing credentials from Microsoft or Google, simplifying your login process while maintaining the highest level of security.
SSO is a secure authentication process that enables you to log in to multiple applications with a single set of credentials. By integrating SSO, we aim to provide you with a seamless and efficient log in experience.
When you log in, you will notice two buttons for Microsoft and Google account access, as pictured below.
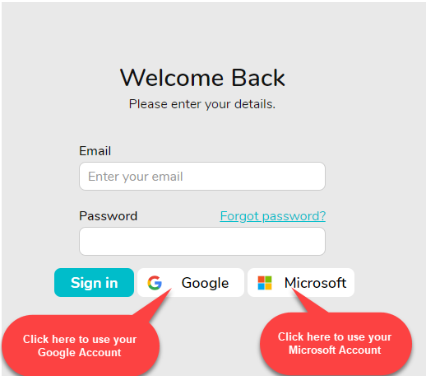
If you are already logged into your browser with either a Google or Microsoft account, you can click on the applicable button to log in. This will take you directly to the FYDO dashboard or the Two-Step Verification Process via SMS, email, or an Authentication App as usual.
Note– The account you use must already be set up in FYDO to proceed.
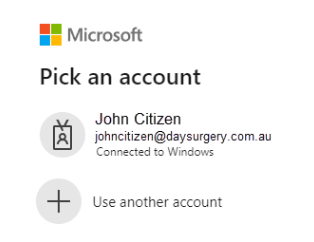
If you are not already logged into your browser with an account, you will be prompted to ‘Pick an account’ or ‘Use another account’ as shown below. You will need to enter your password to proceed.
You may still use your email and password to log in unless your FYDO account subscriber has forced SSO to be used. In that case, you may receive a message at the top of the screen, as shown:

If you receive the message above, please try using the Microsoft or Google buttons. If you still have problems logging in, contact your FYDO account subscriber (the person in charge of FYDO at your facility) before reaching out to Altura Health Support.
If you have forgotten your Microsoft or Google password, please contact your IT department. This issue is separate from FYDO and cannot be addressed by Altura Health Support.
How to enforce SSO in FYDO
SSO authentication can be enforced for all or selected users. Once SSO is enforced, an email invitation will be sent to the applicable user/s, advising them to activate their account via SSO. The user does not need to use the email invitation link; they can go directly to the FYDO website.
Note: Once a user is required to use SSO by their facility, their existing password will be deleted.
To enforce SSO for all users:
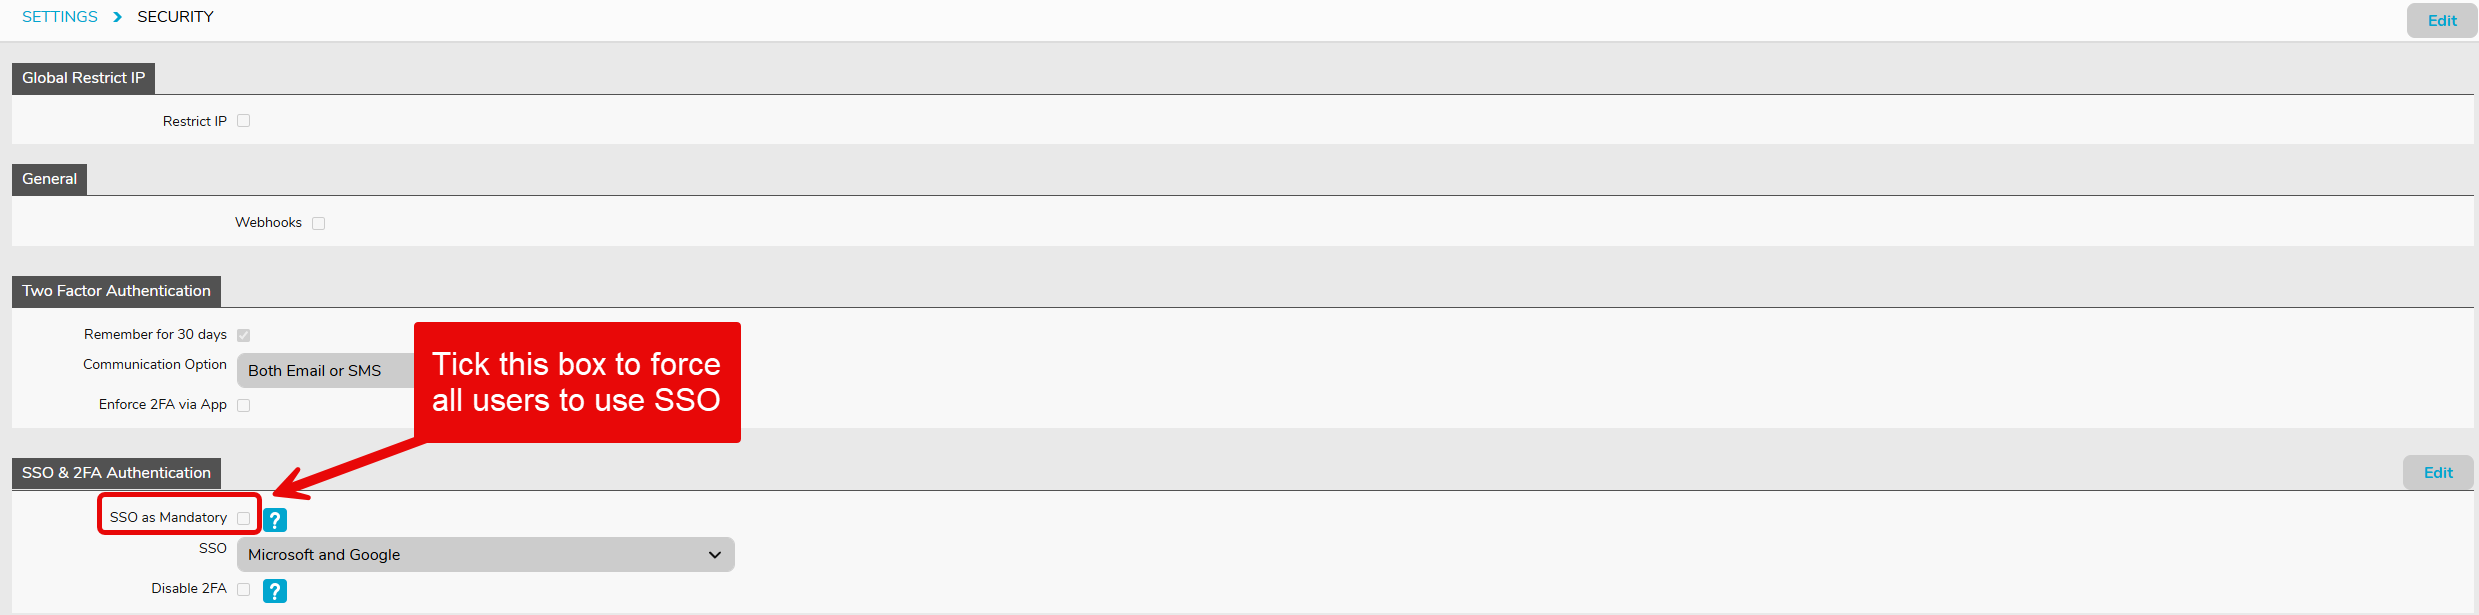
- Go to Settings > Security and click Edit.
- Tick the SSO as Mandatory tick box (as shown below) and click Save.
If, for any reason, some users are unable to authenticate using SSO, they can be reverted back to the standard email/password authentication method.
To revert all users to email/password authentication:
- Simply untick the SSO as Mandatory box in Settings > Security.
To revert specific users to email/password authentication:
- Go to Settings > Users
- Double-click on required user
- Click Edit
- Untick SSO Mandatory
- Click Save
Reverted users will receive another email invitation to set up their new password.
You can see which users have SSO enforced and whether they have successfully authenticated using SSO by going to Settings > Users.
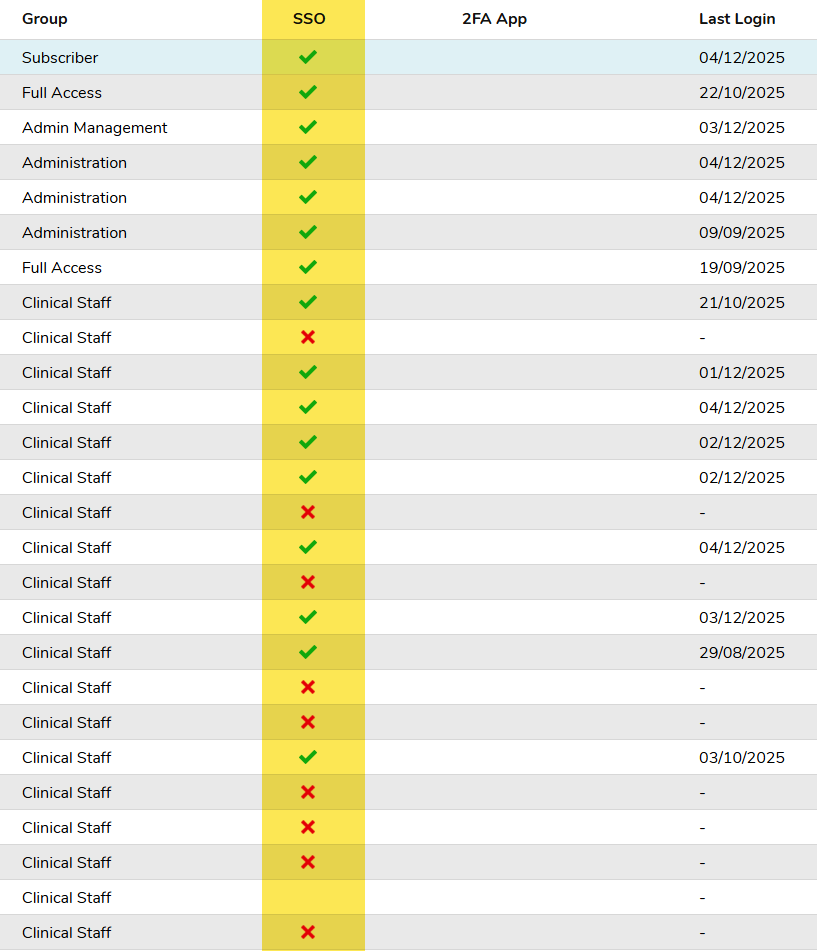
- SSO Blank: User not forced to use SSO
- SSO Red Cross: User forced to use SSO but not activated
- SSO Green Tick: User has activated SSO