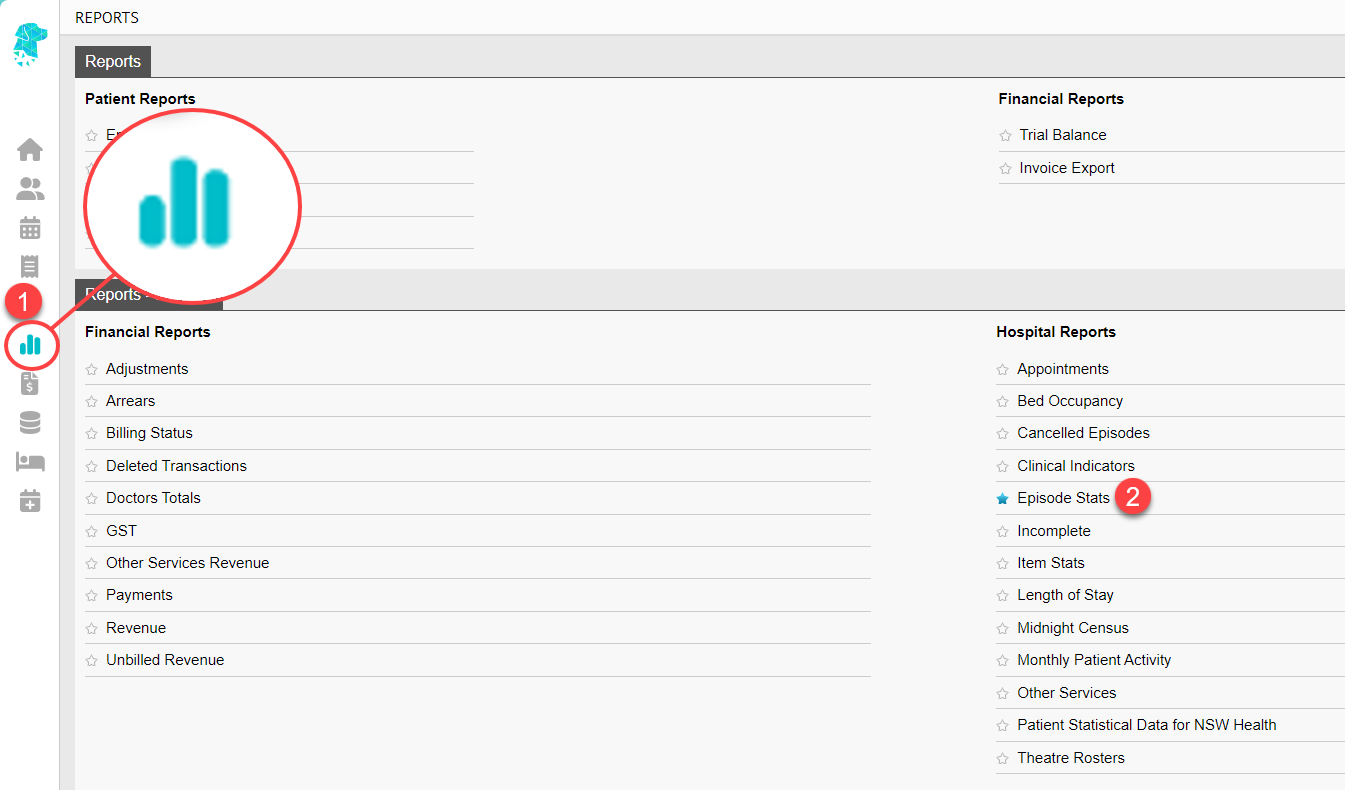
From time to time, it will be necessary to report on Aboriginal & Torres Strait Islander statistics. FYDO makes this extremely easy using the Episode Stats report.
Select Reports from the main menu
Select Episode Stats
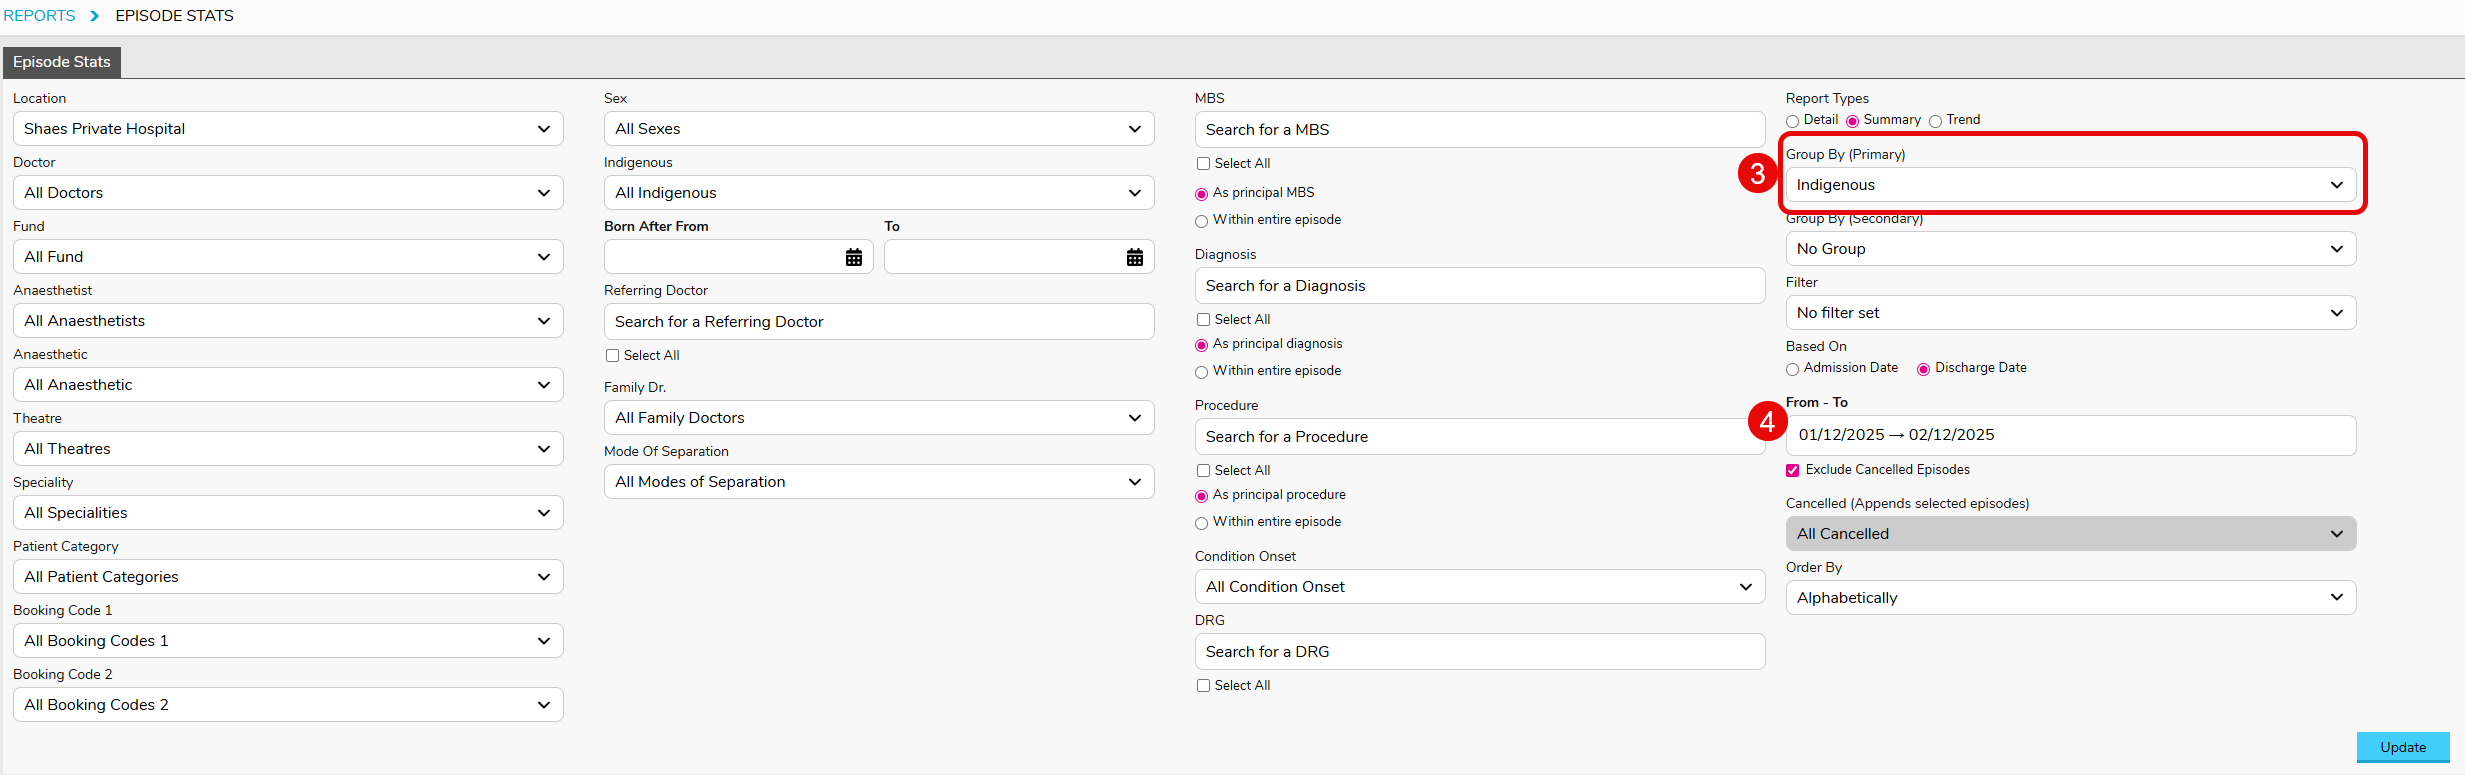
In the Group By (Primary) field select Indigenous
Select the date range required in the From & To fields
Click Update
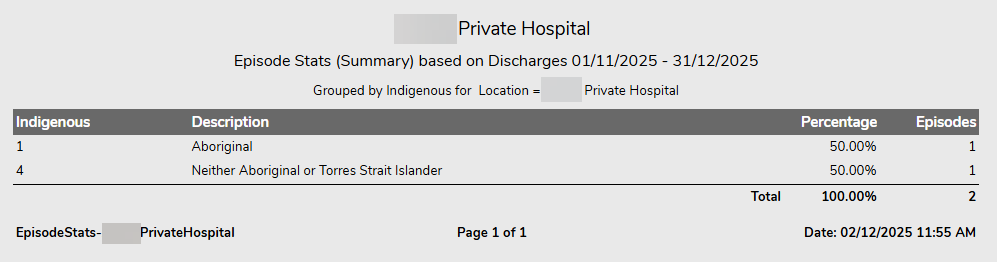
The report will give you the total number & percentage total of episodes that fall under each category.
Unadmit or Undischarge a Hospital Episode
If an episode is accidentally admitted or discharged, the user can Un-admit or Un-discharge following the steps below.
Navigate to the appointment that needs to be Un-admitted and/or Un-discharged
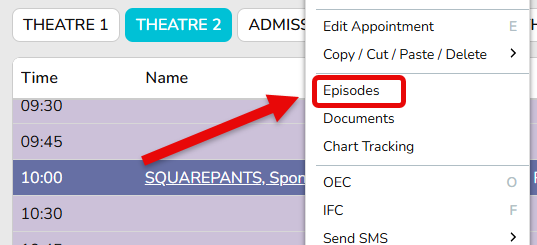
Use the Right Click Menu to select Episodes
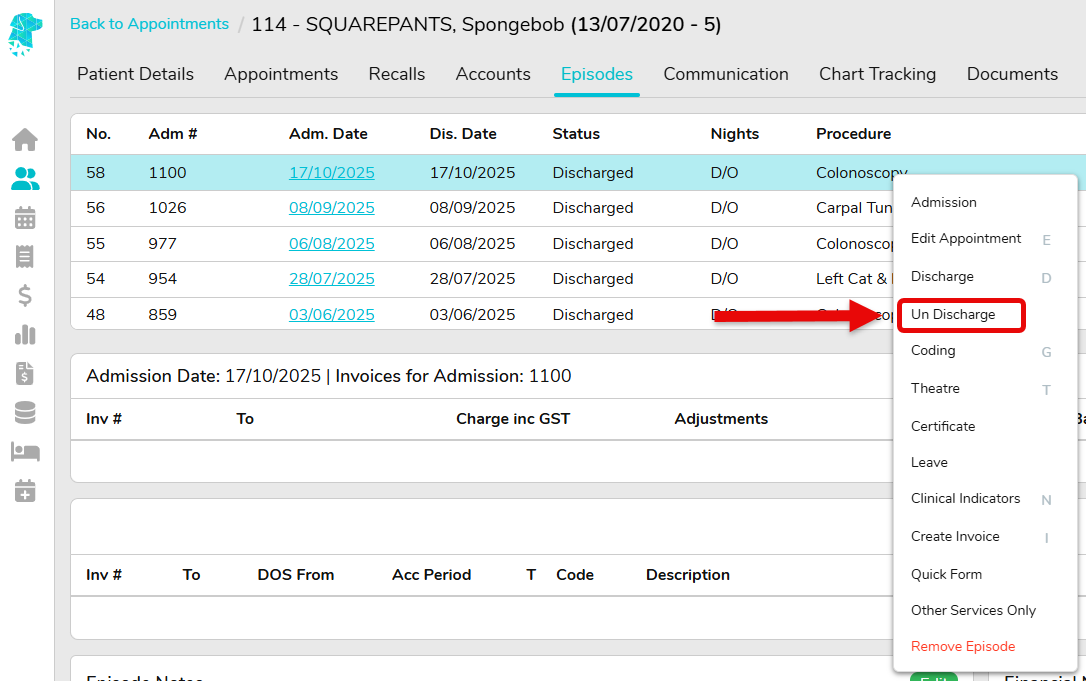
If the episode has been admitted, & discharged, Right Click on the required Episode and select Un-discharge
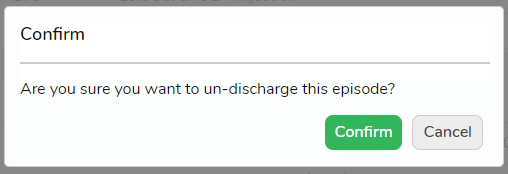
The user will be asked to Confirm that they are sure they want to un-discharge the episode.
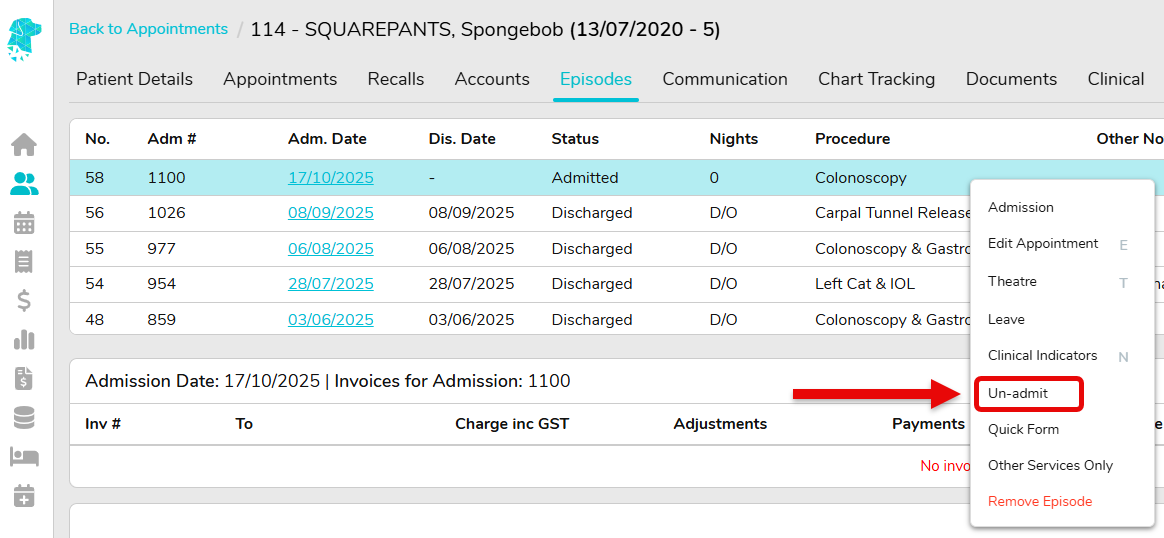
The Right Click process will need to be repeated to then Un-admit the episode.
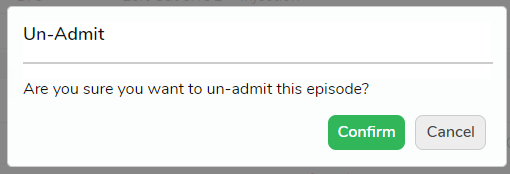
The user will again be prompted to confirm that they want to un-admit the episode.
Once this process has been followed, click Back to Appointments and the episode will have been returned to the status of B for Booked
Hospital Cancer Registry Data
FYDO gives users the ability to enter Cancer Registry information & export the data for ease of submission.
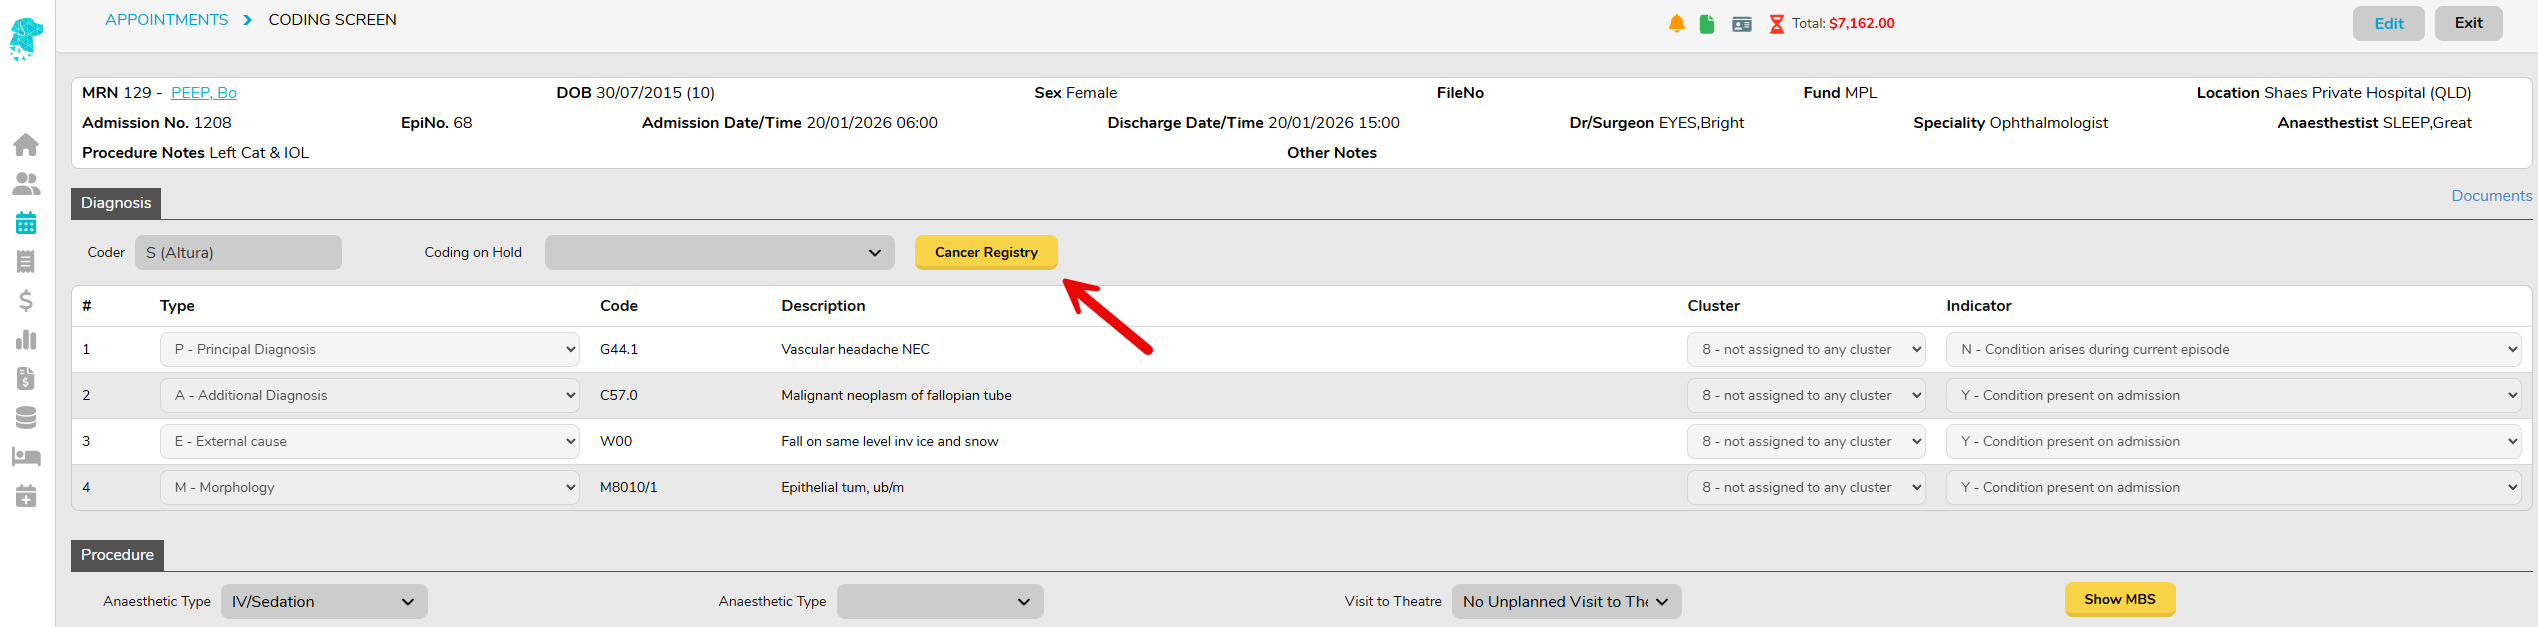
Once the coding has been entered, by following the instructions on Hospital Coding, you are able to click on the Cancer Registry icon.
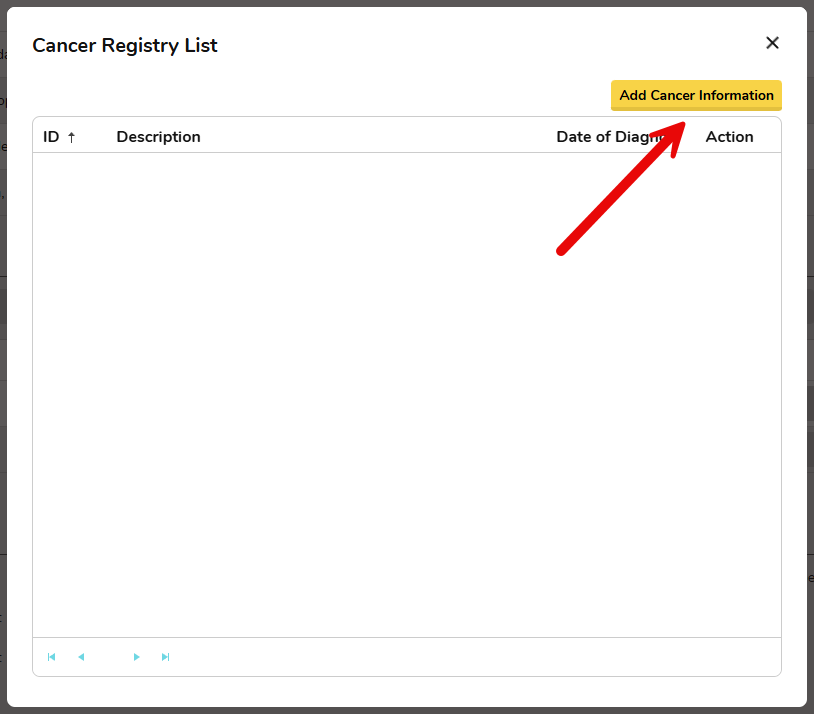
This will open up a screen that allows you to Add Cancer Information.
Once in the Cancer Registry screen, enter all relevant information for your state & click Save.
The Cancer Registry Data can then be exported in the same manner that you export all your monthly data.
Hospital Appointment Screen Custom Views – All View
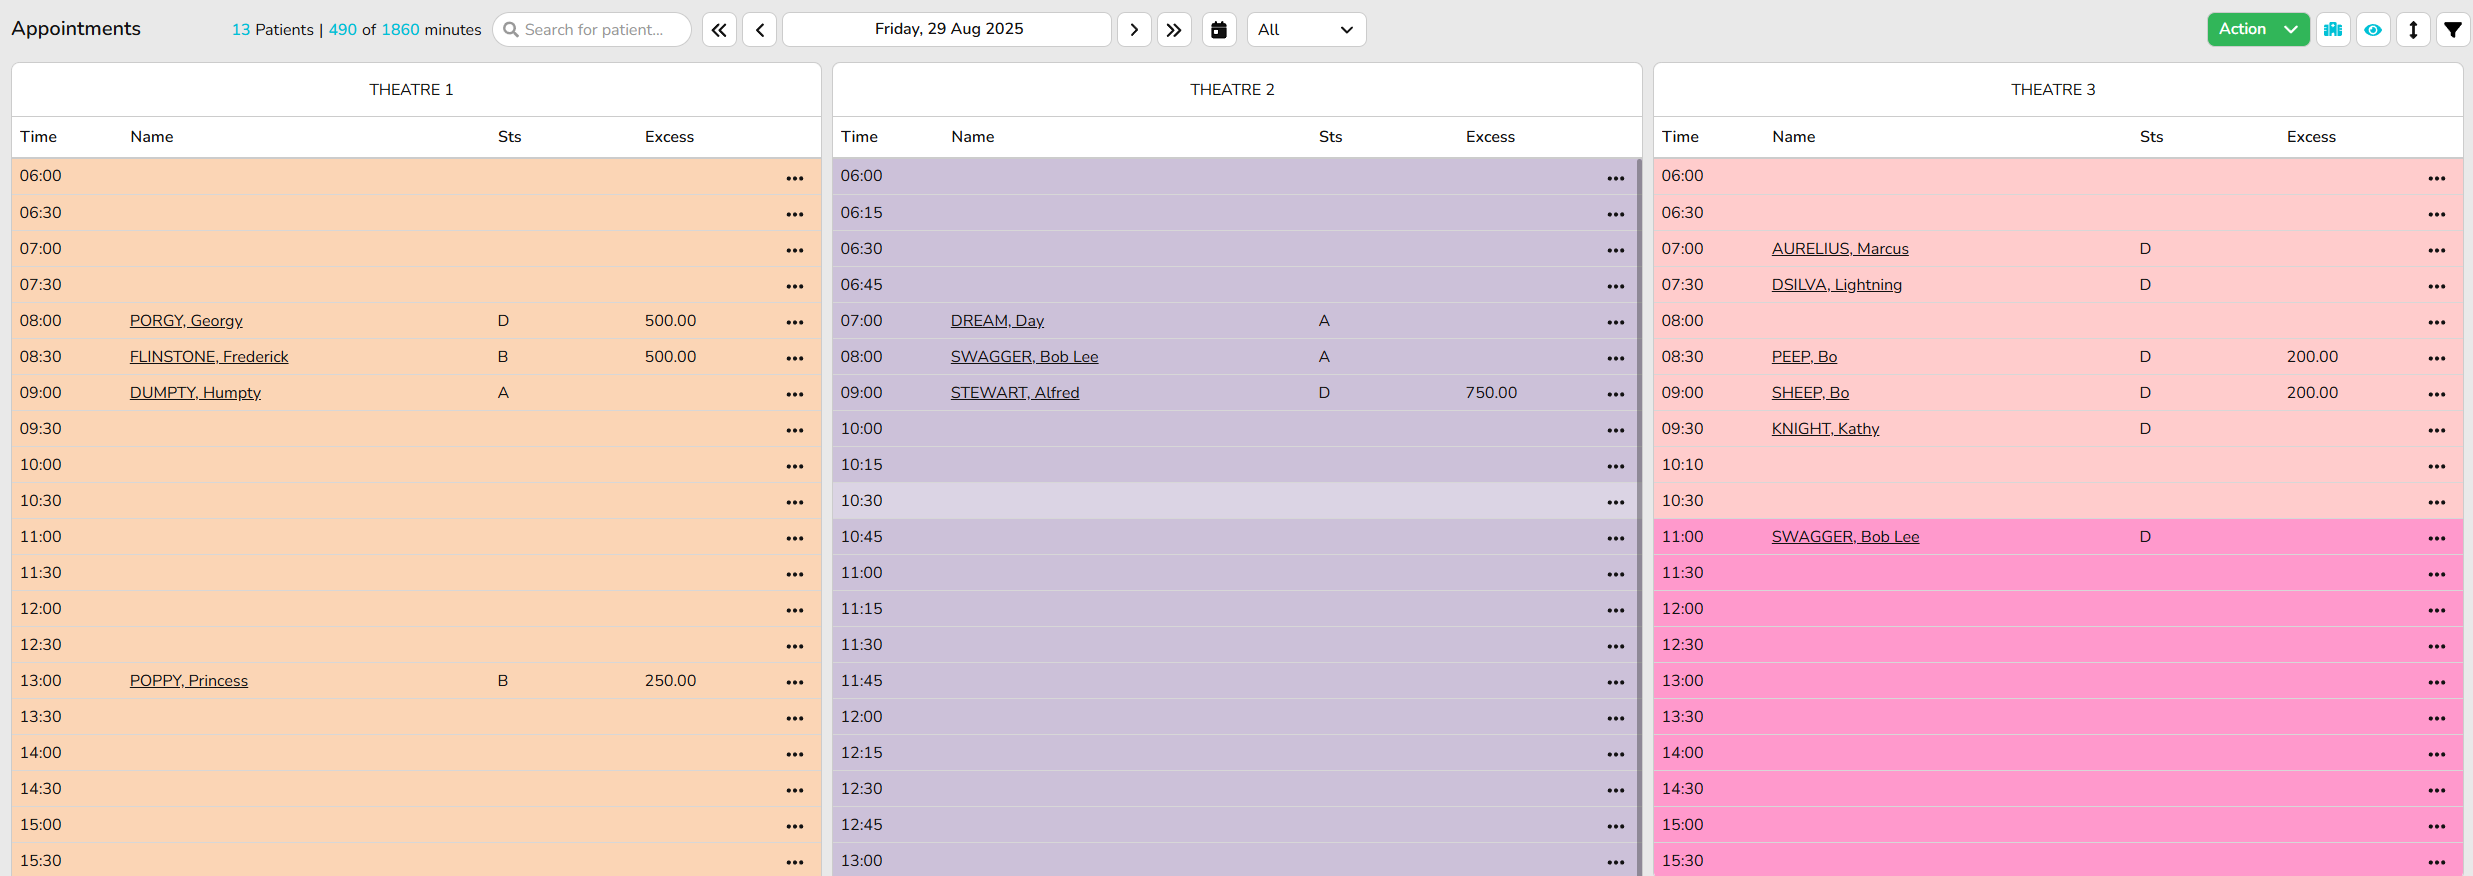
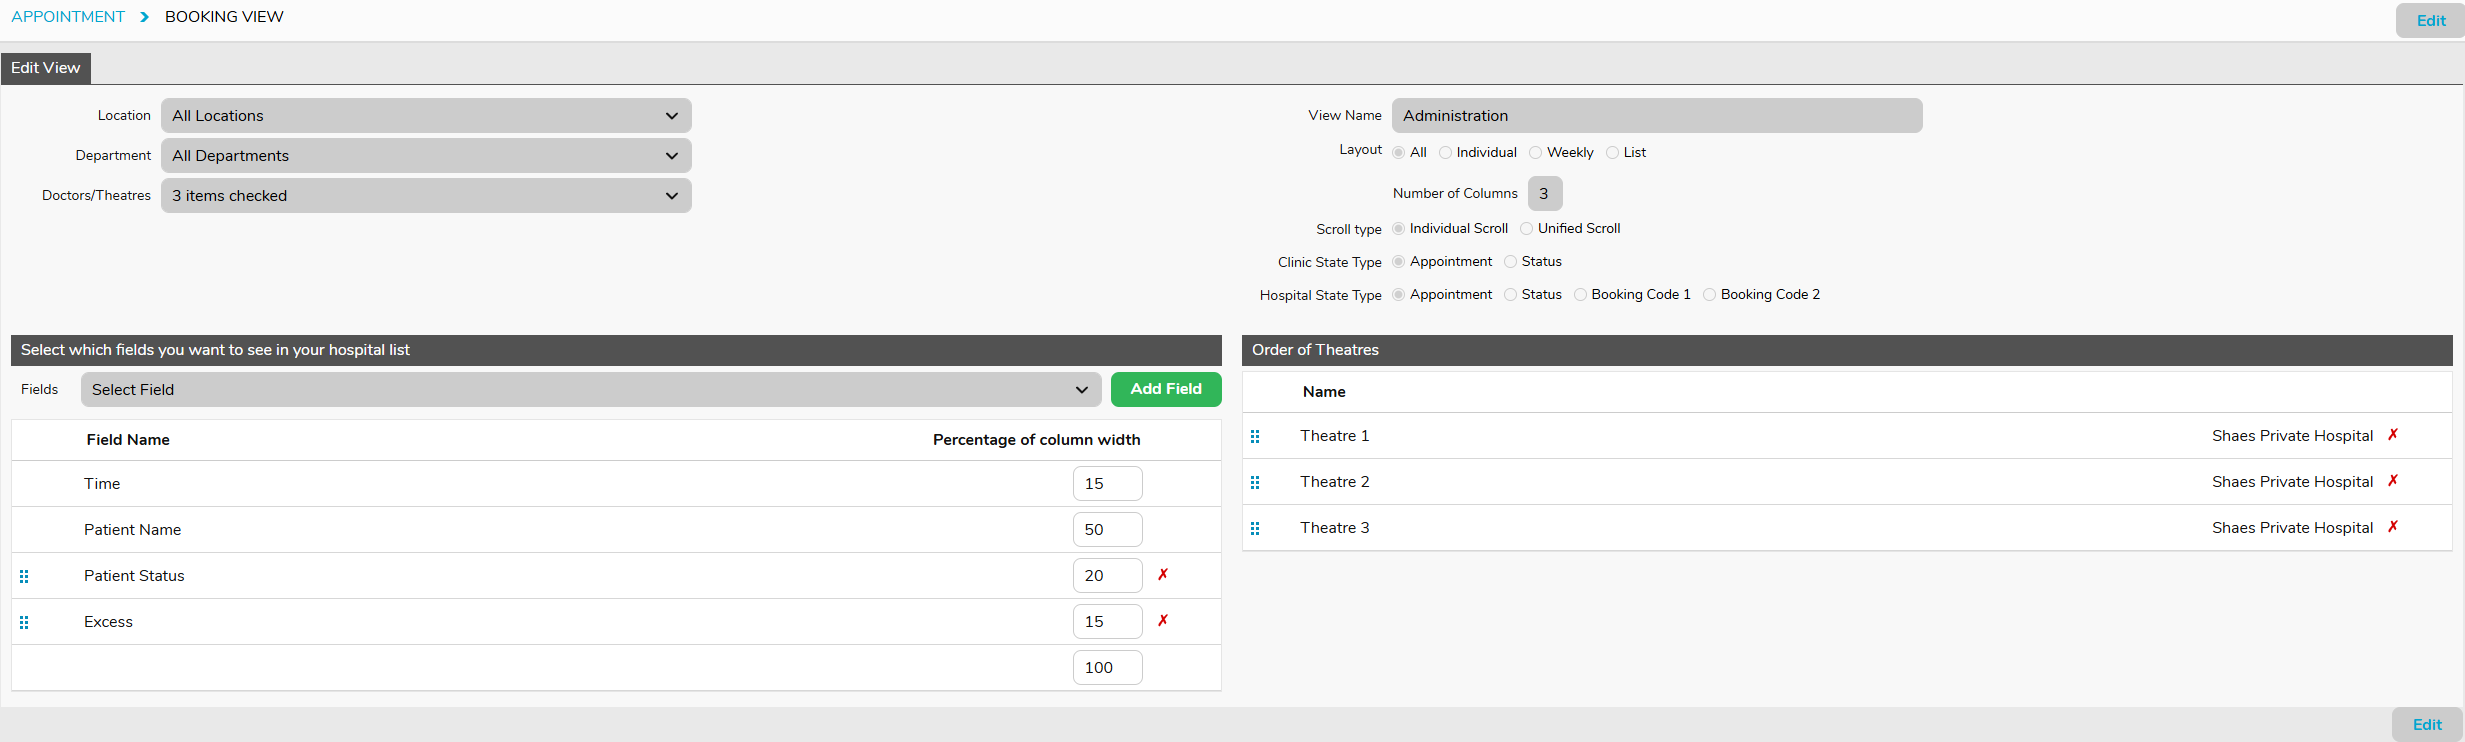
FYDO gives users the ability to customise the Appointments Screen to allow them to view the information that is important to their role. This assists in workflow & efficiency & allows users to view different information depending on the task that they are undertaking. All custom views that are created for each facility are available to all users. Each user is then able to select their favourite view to open as their default. These instructions will provide ideas for different views & the set up required to accomplish them. For further details on how to create custom views please see the page on Creating Custom Views
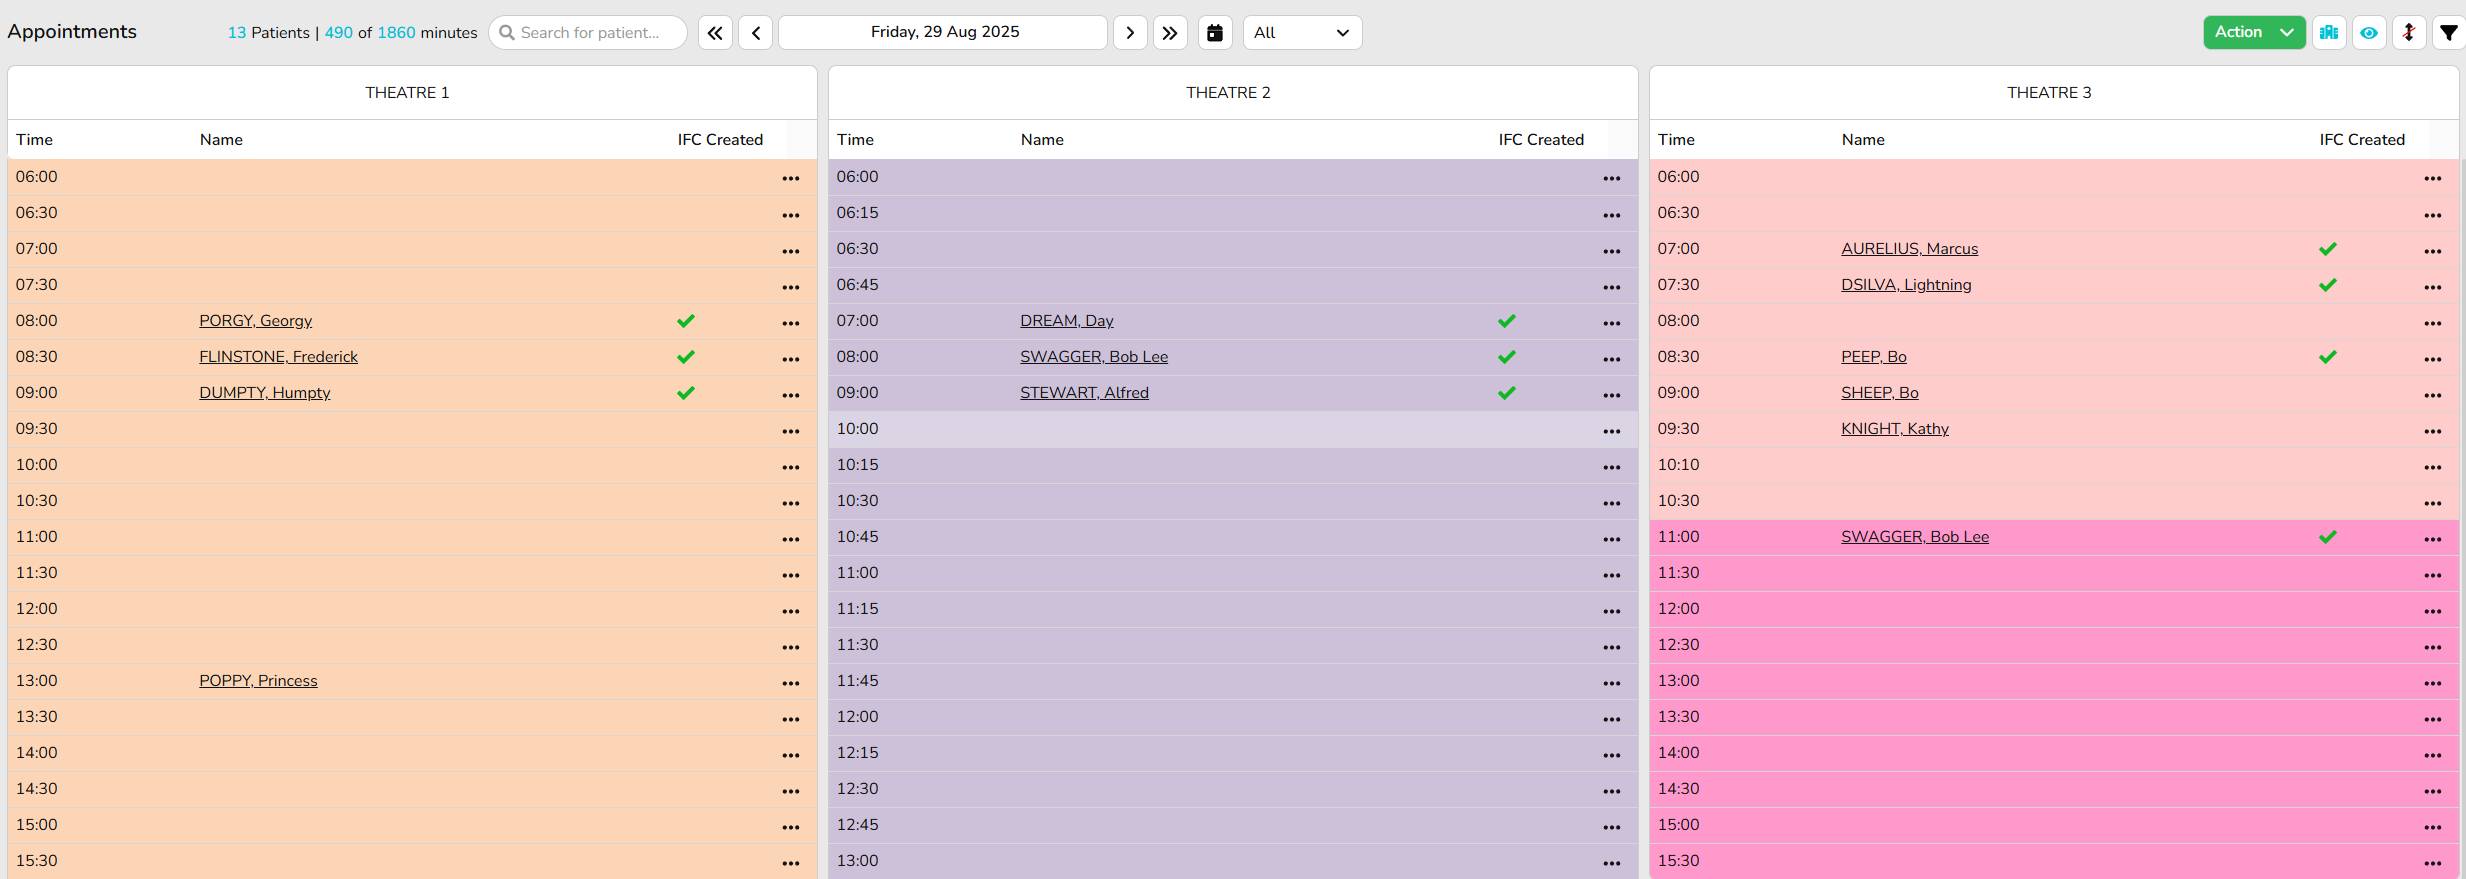
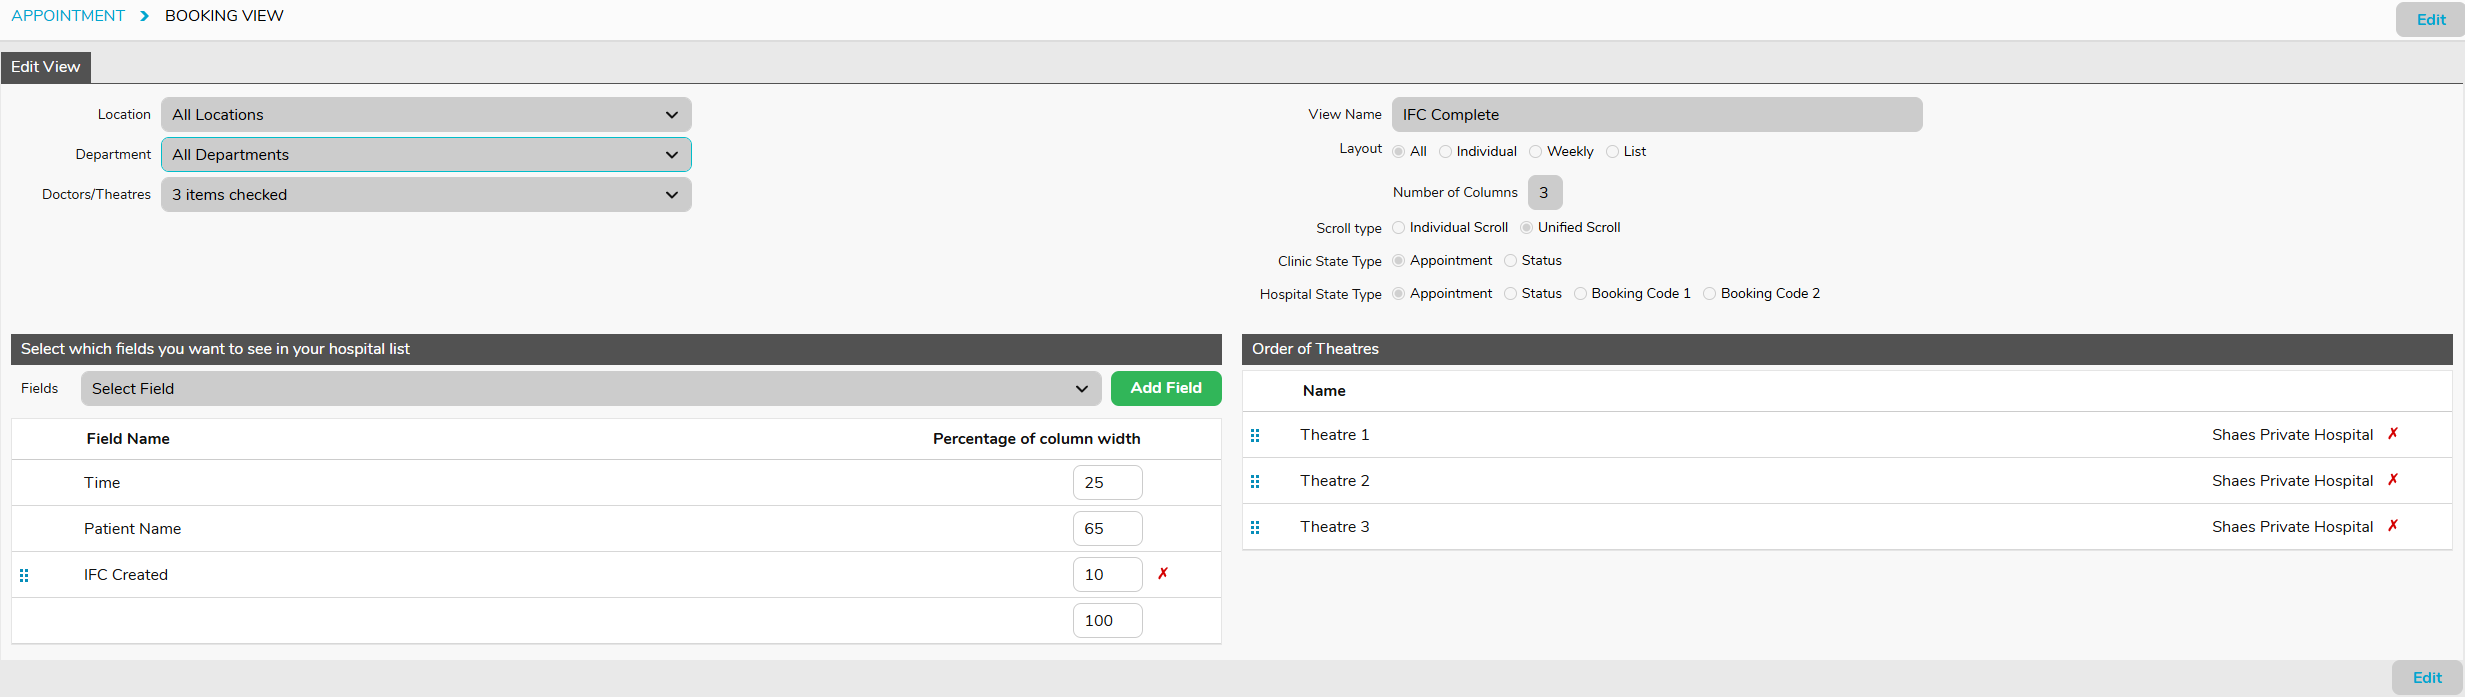
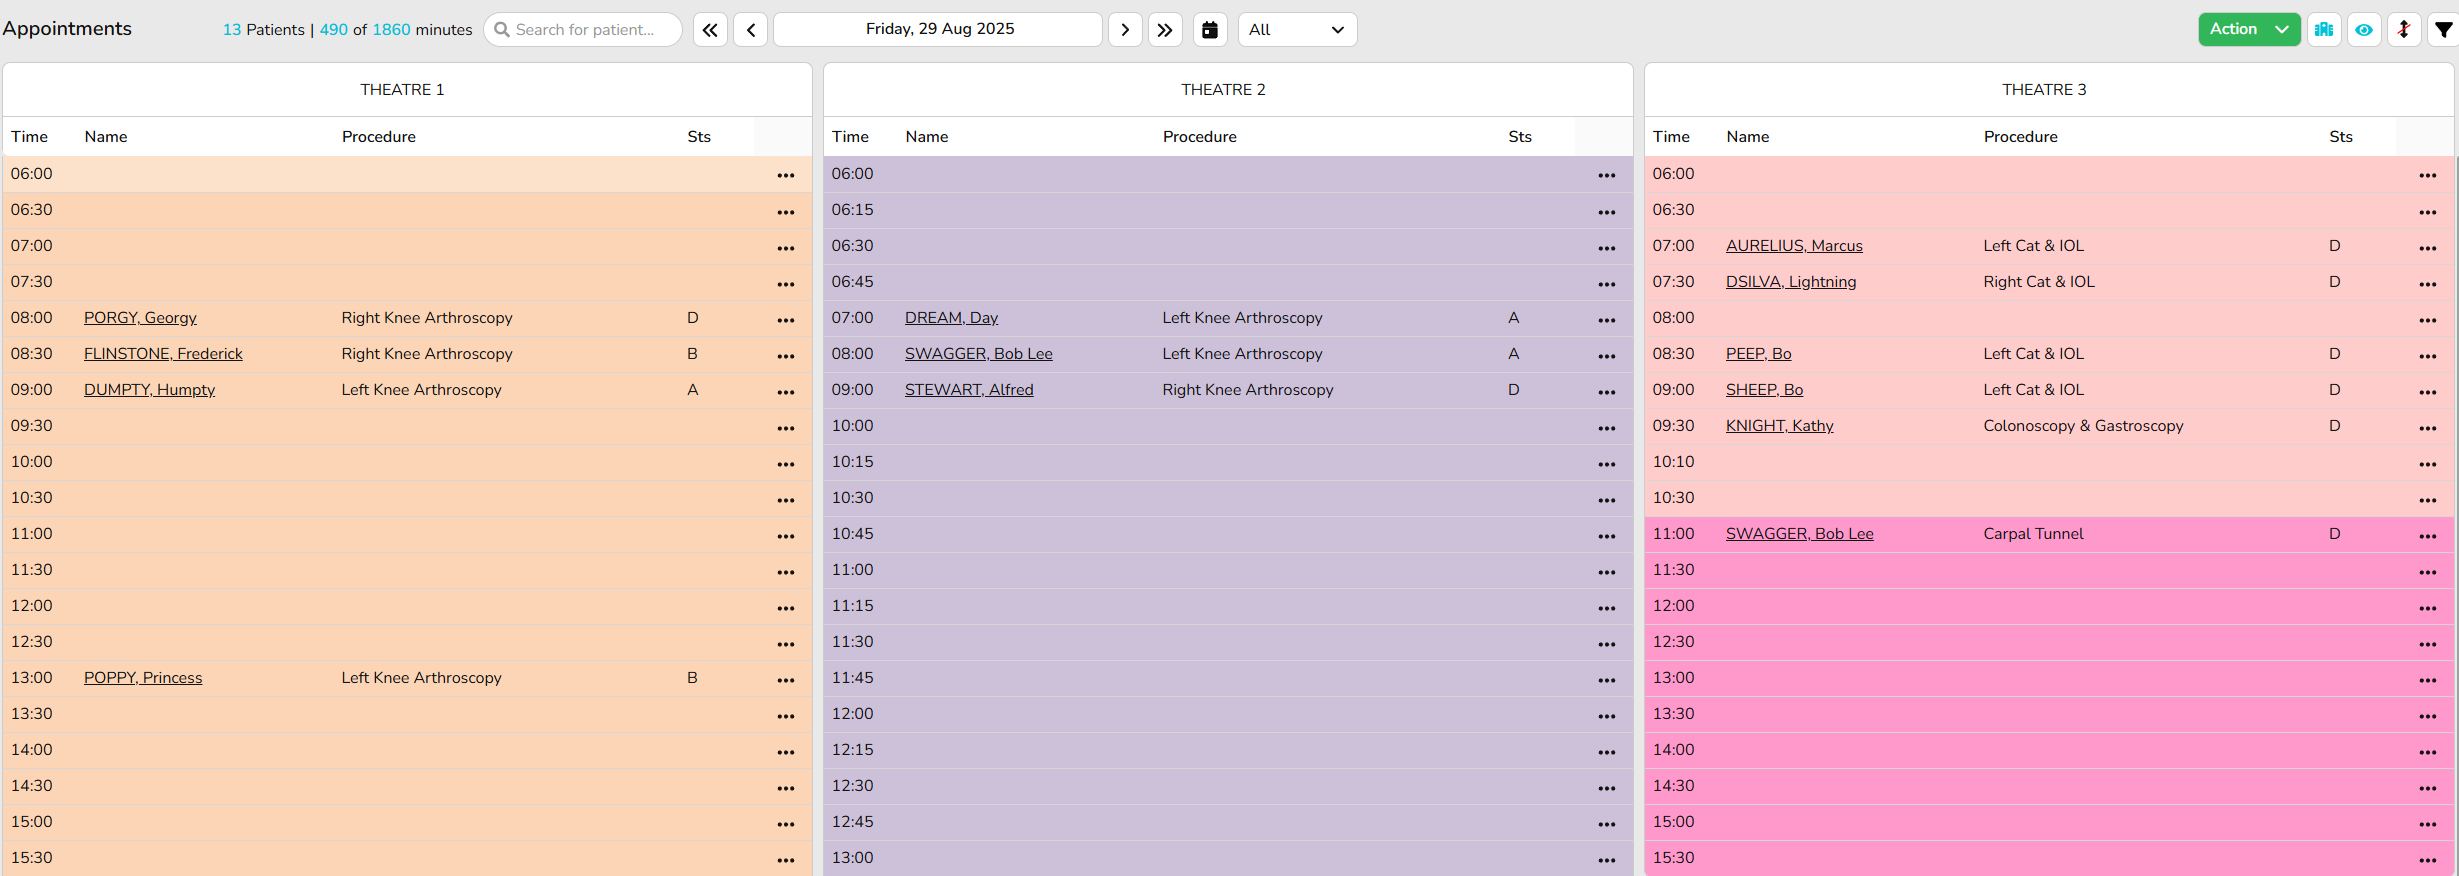
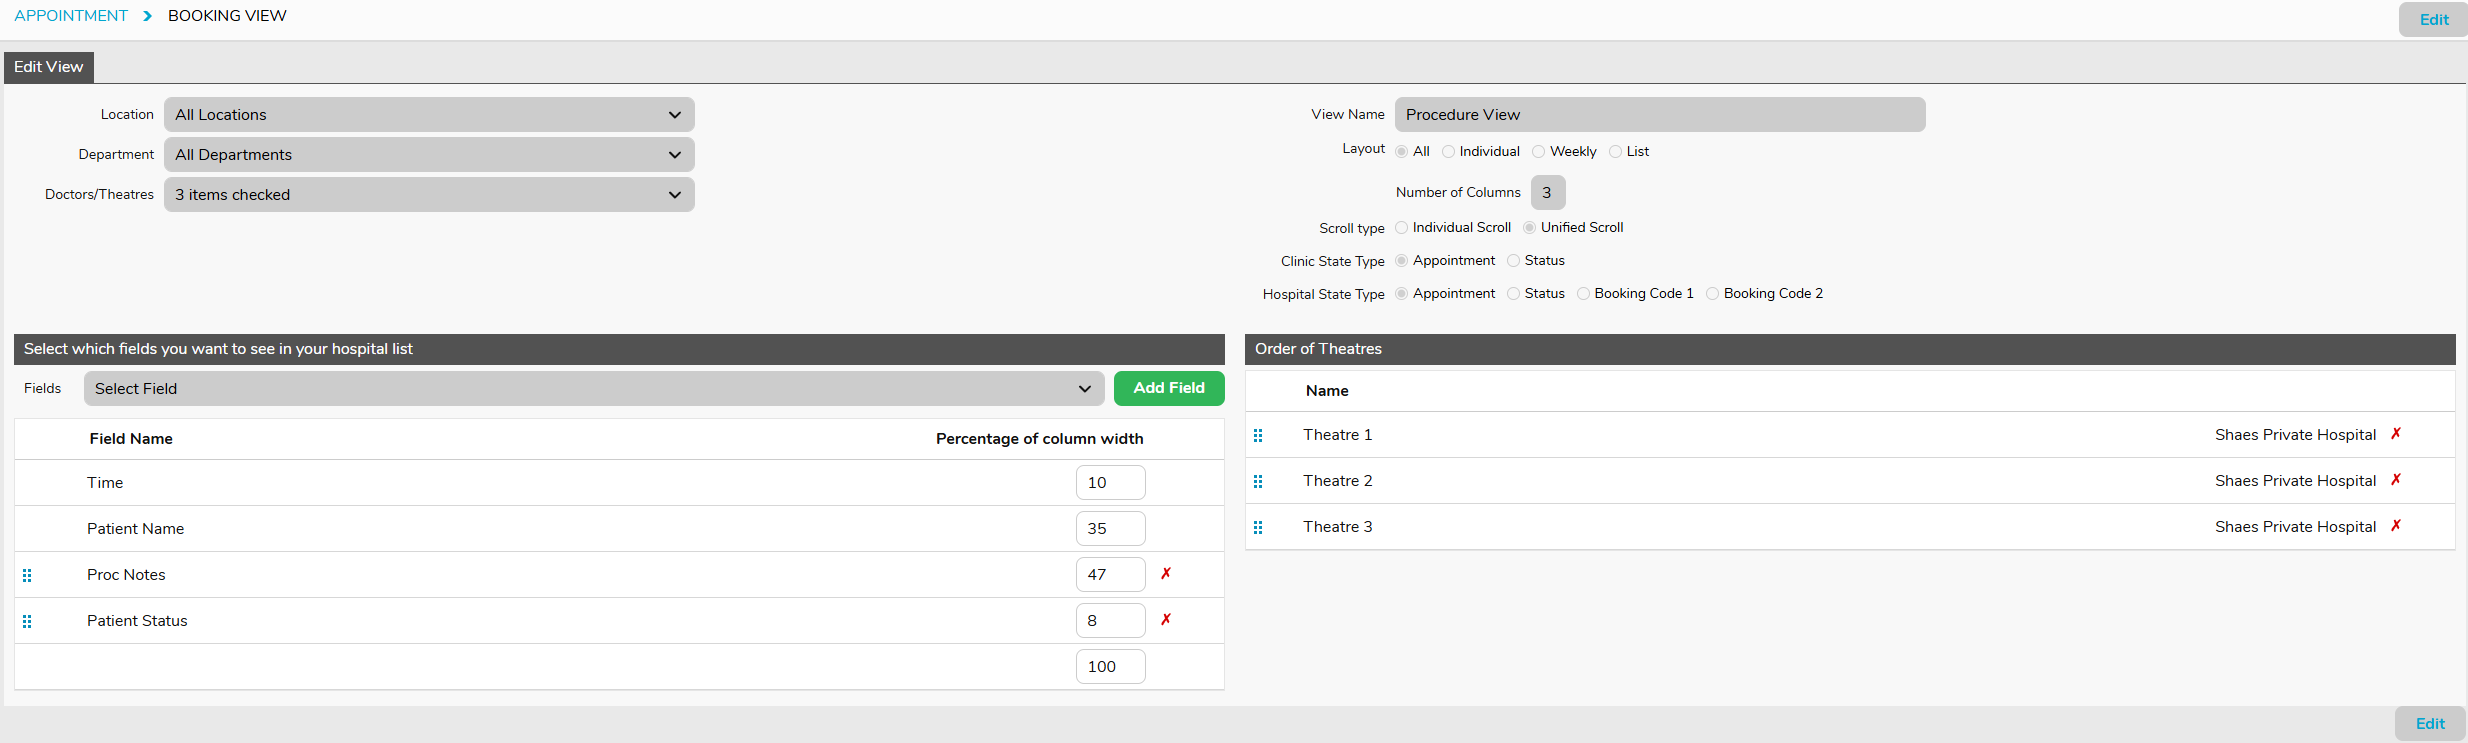
Included below are examples of All View ideas. Please see our other pages on Individual & Weekly View ideas for those view types.
FYDO gives users the ability to customise the Appointments Screen to allow them to view the information that is important to their role. This assists in workflow & efficiency & allows users to view different information depending on the task that they are undertaking. All custom views that are created for each facility are available to all users. Each user is then able to select their favourite view to open as their default. These instructions will provide ideas for different views & the set up required to accomplish them. For further details on how to create custom views please see the page on Creating Custom Views
Included below are examples of Individual View ideas. Please see our other pages on All & Weekly View ideas for those view types.
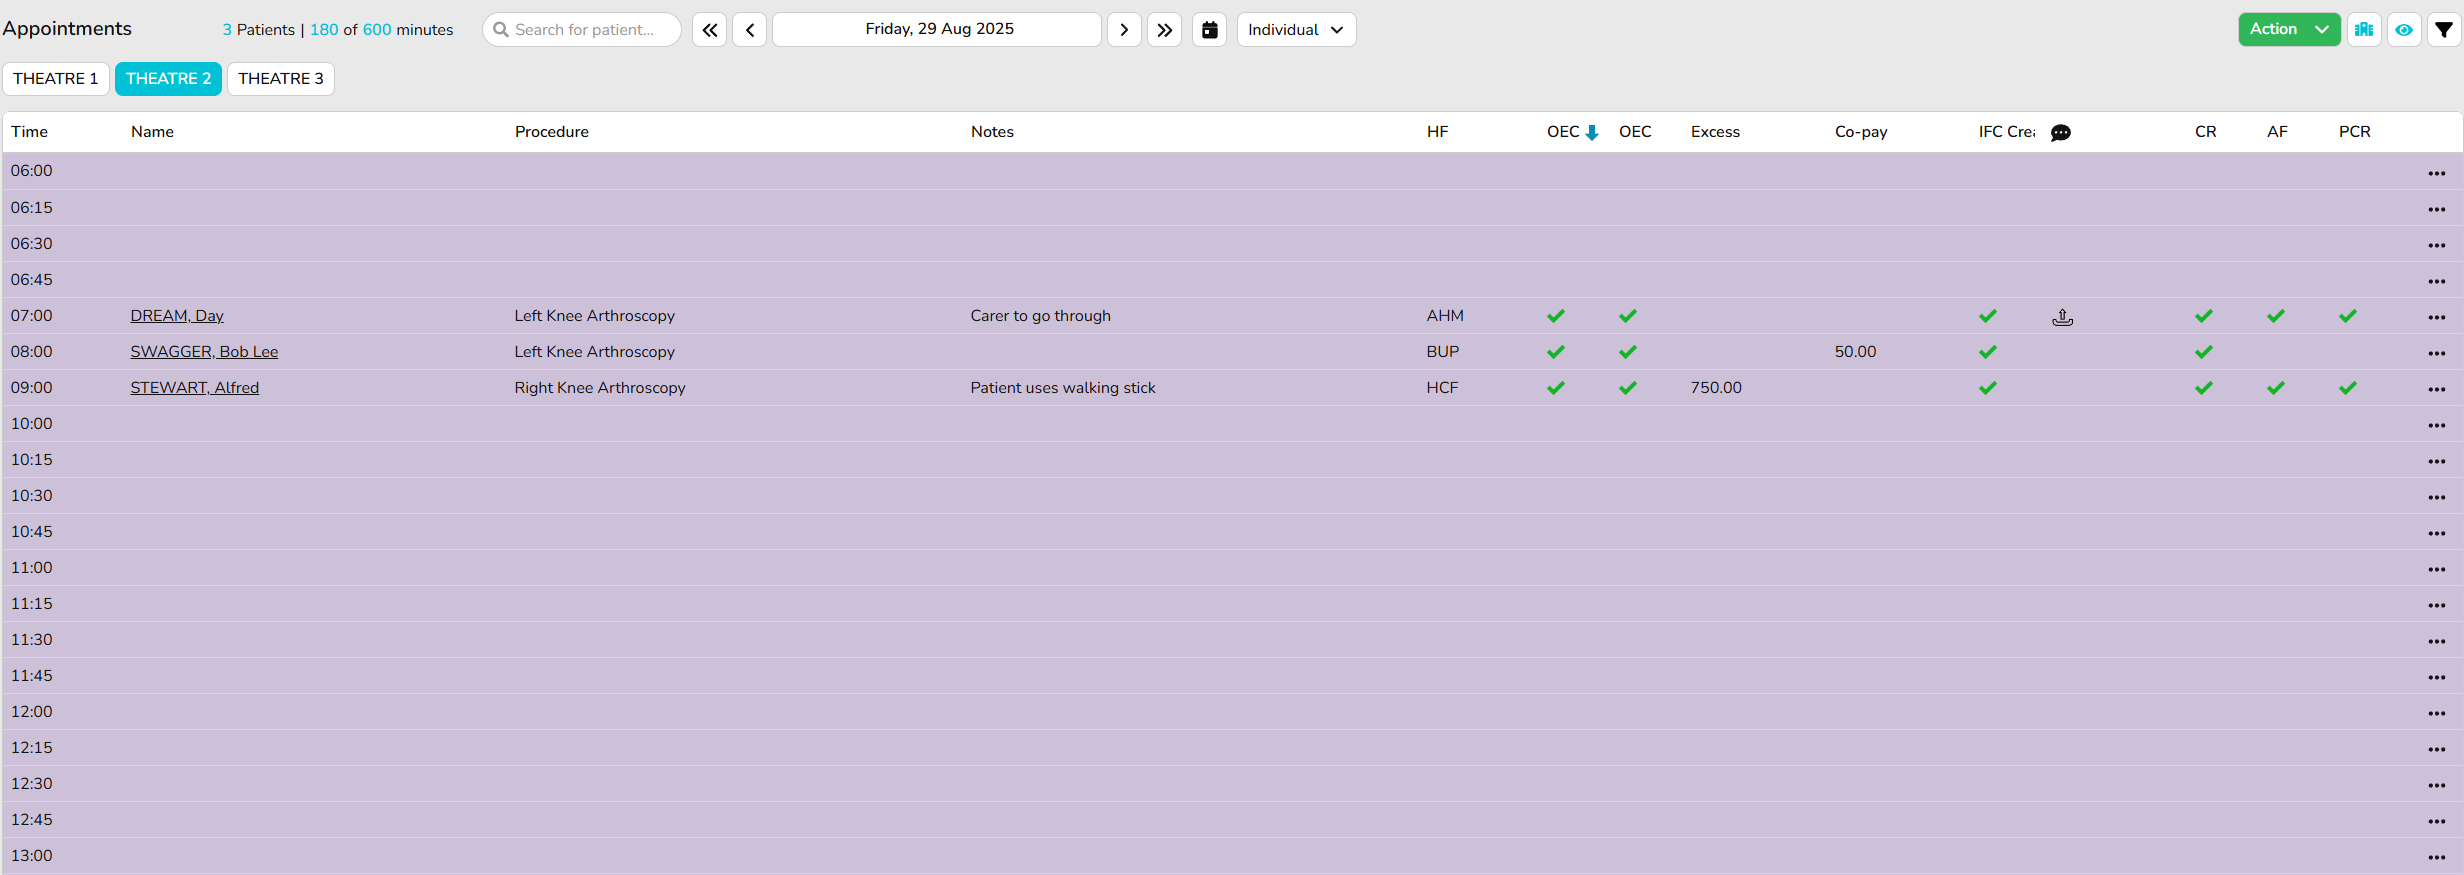
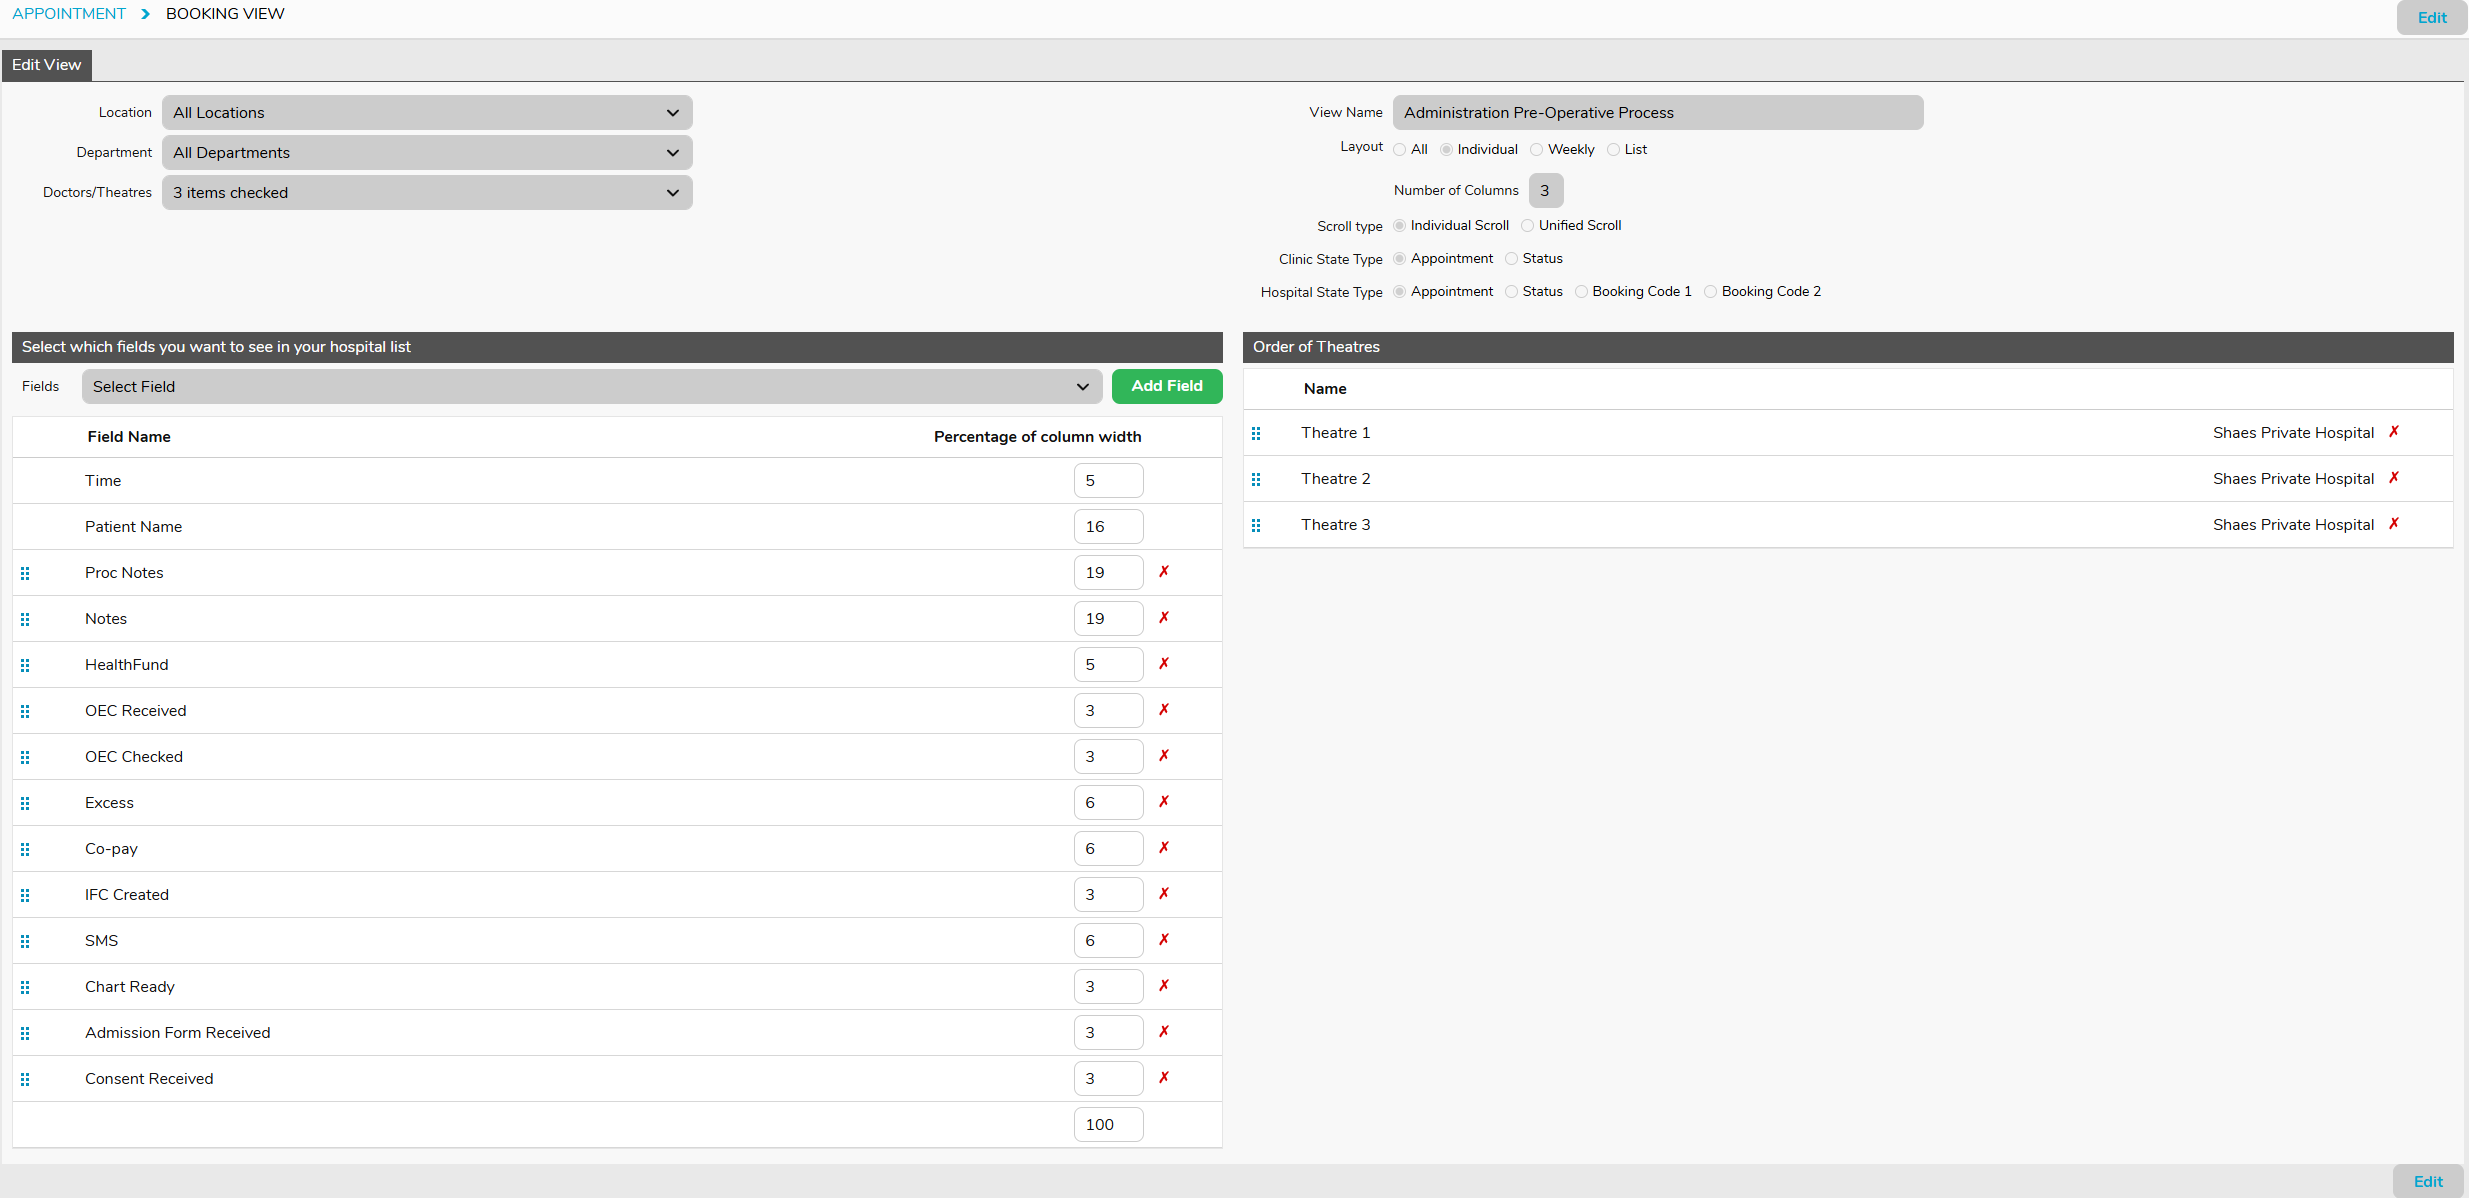
Administration Pre-Operative Process
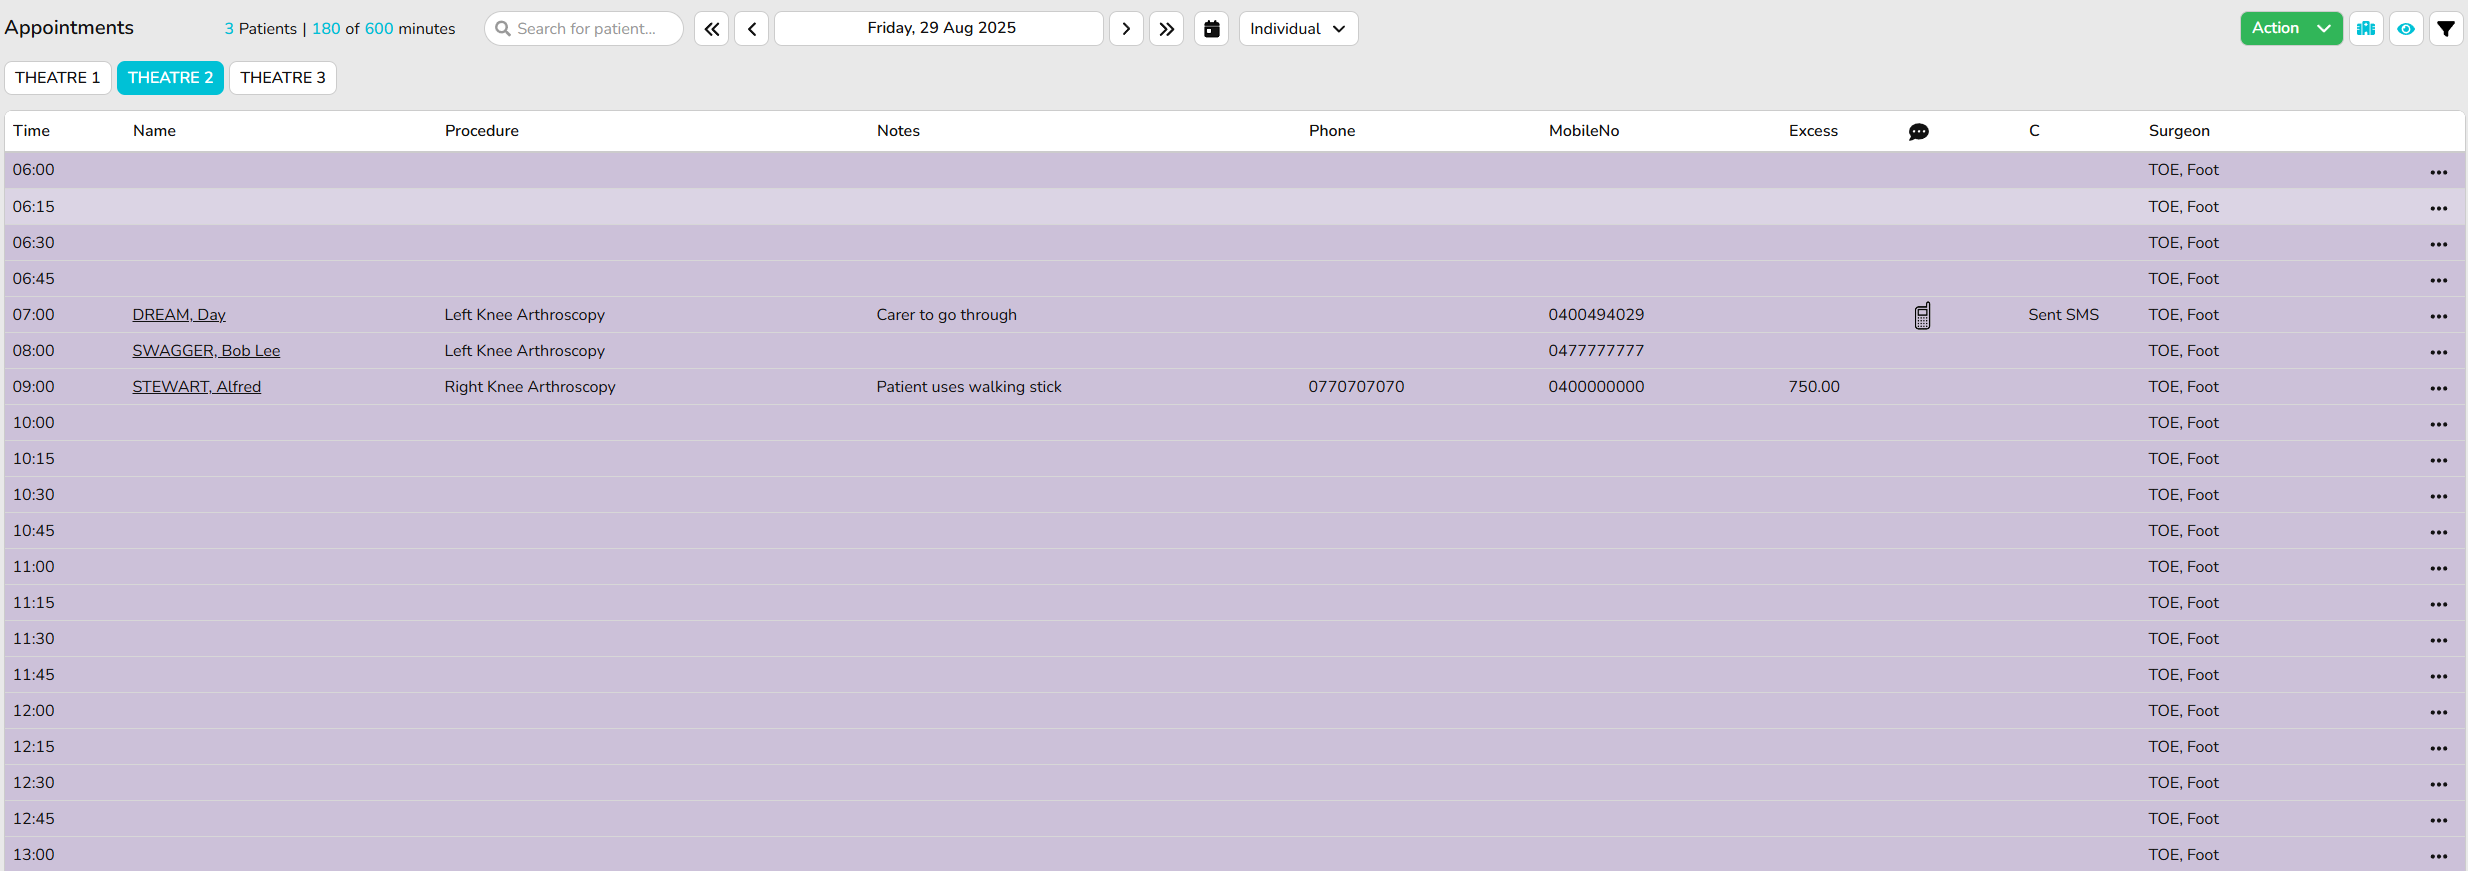
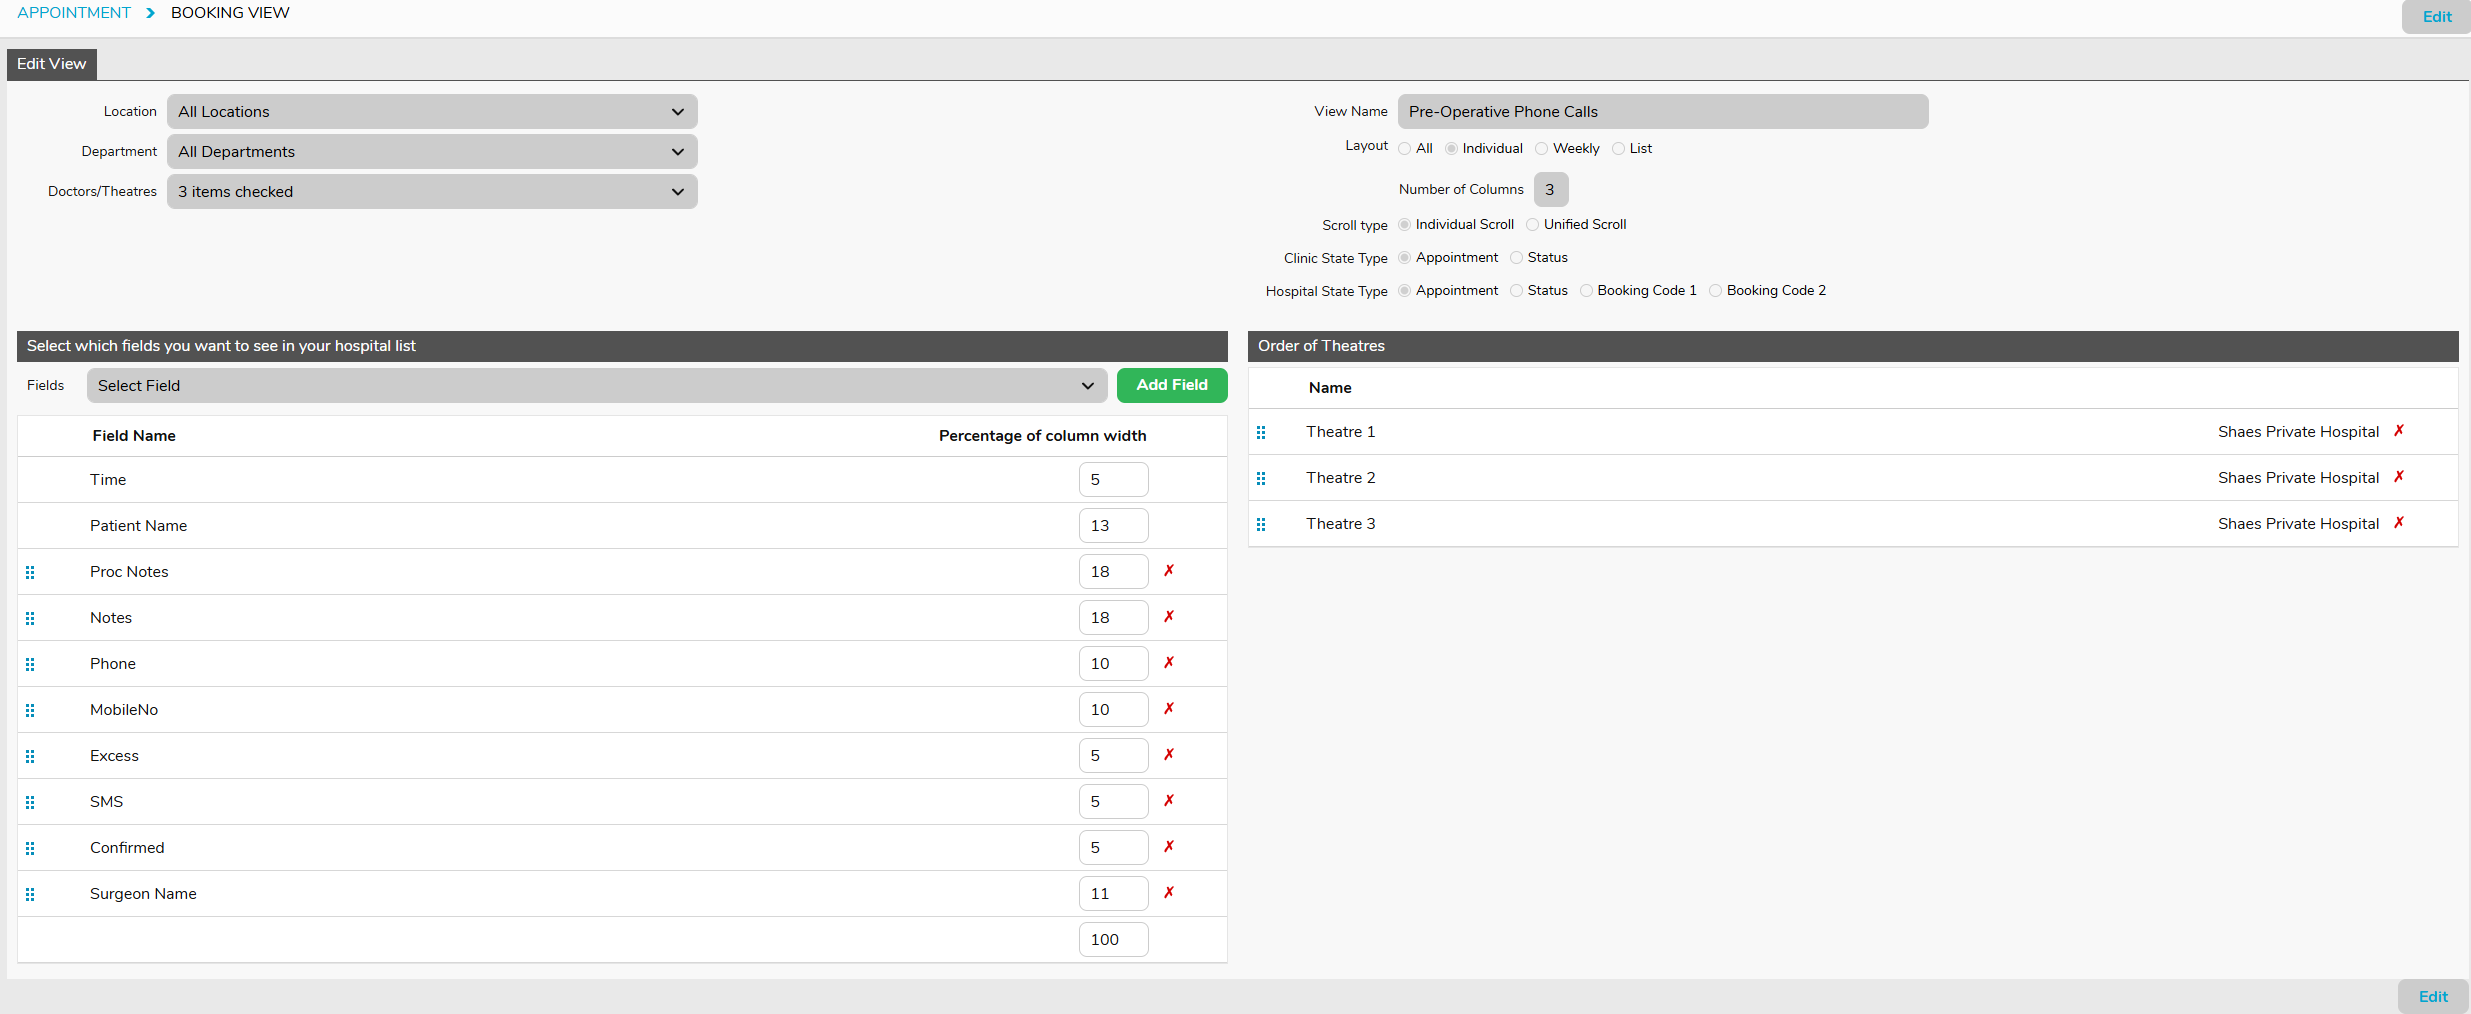
Pre-Operative Phone Calls View
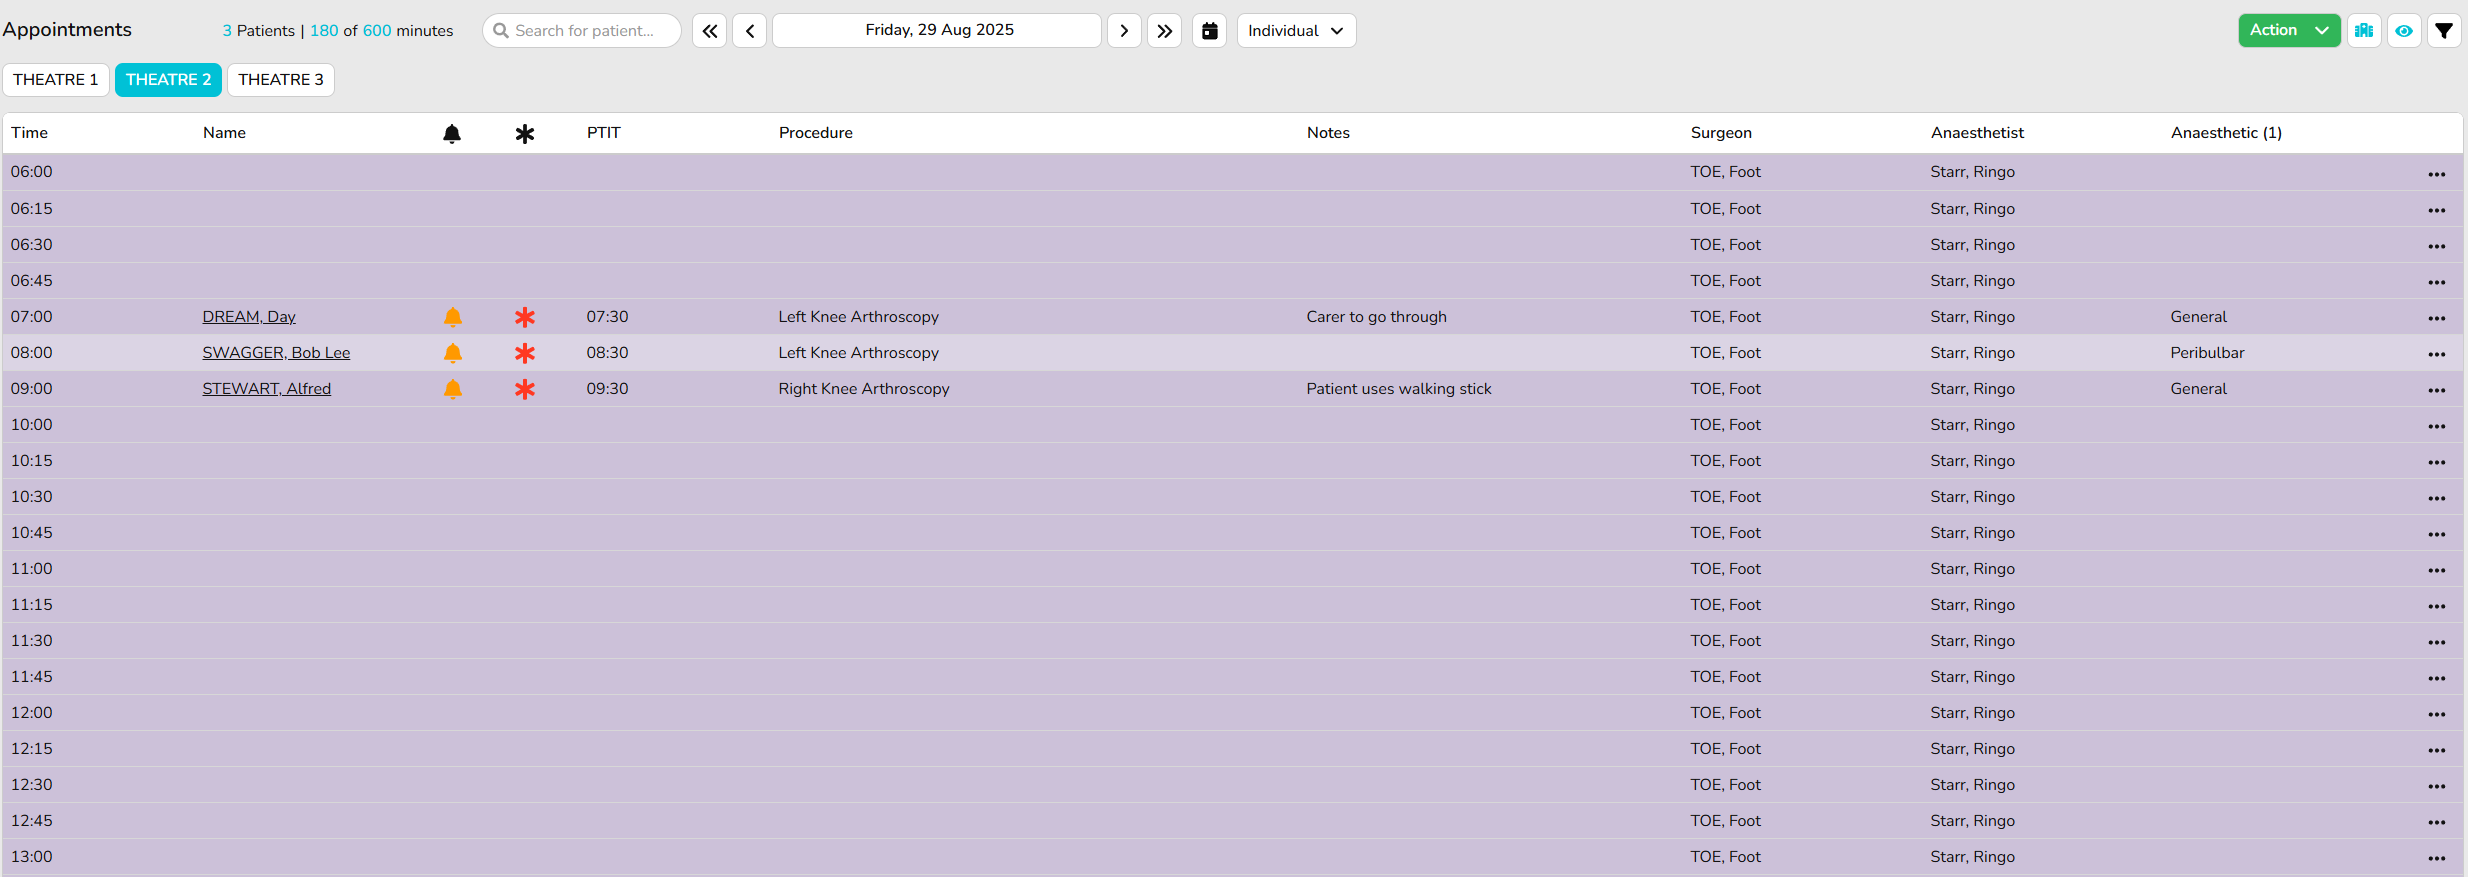
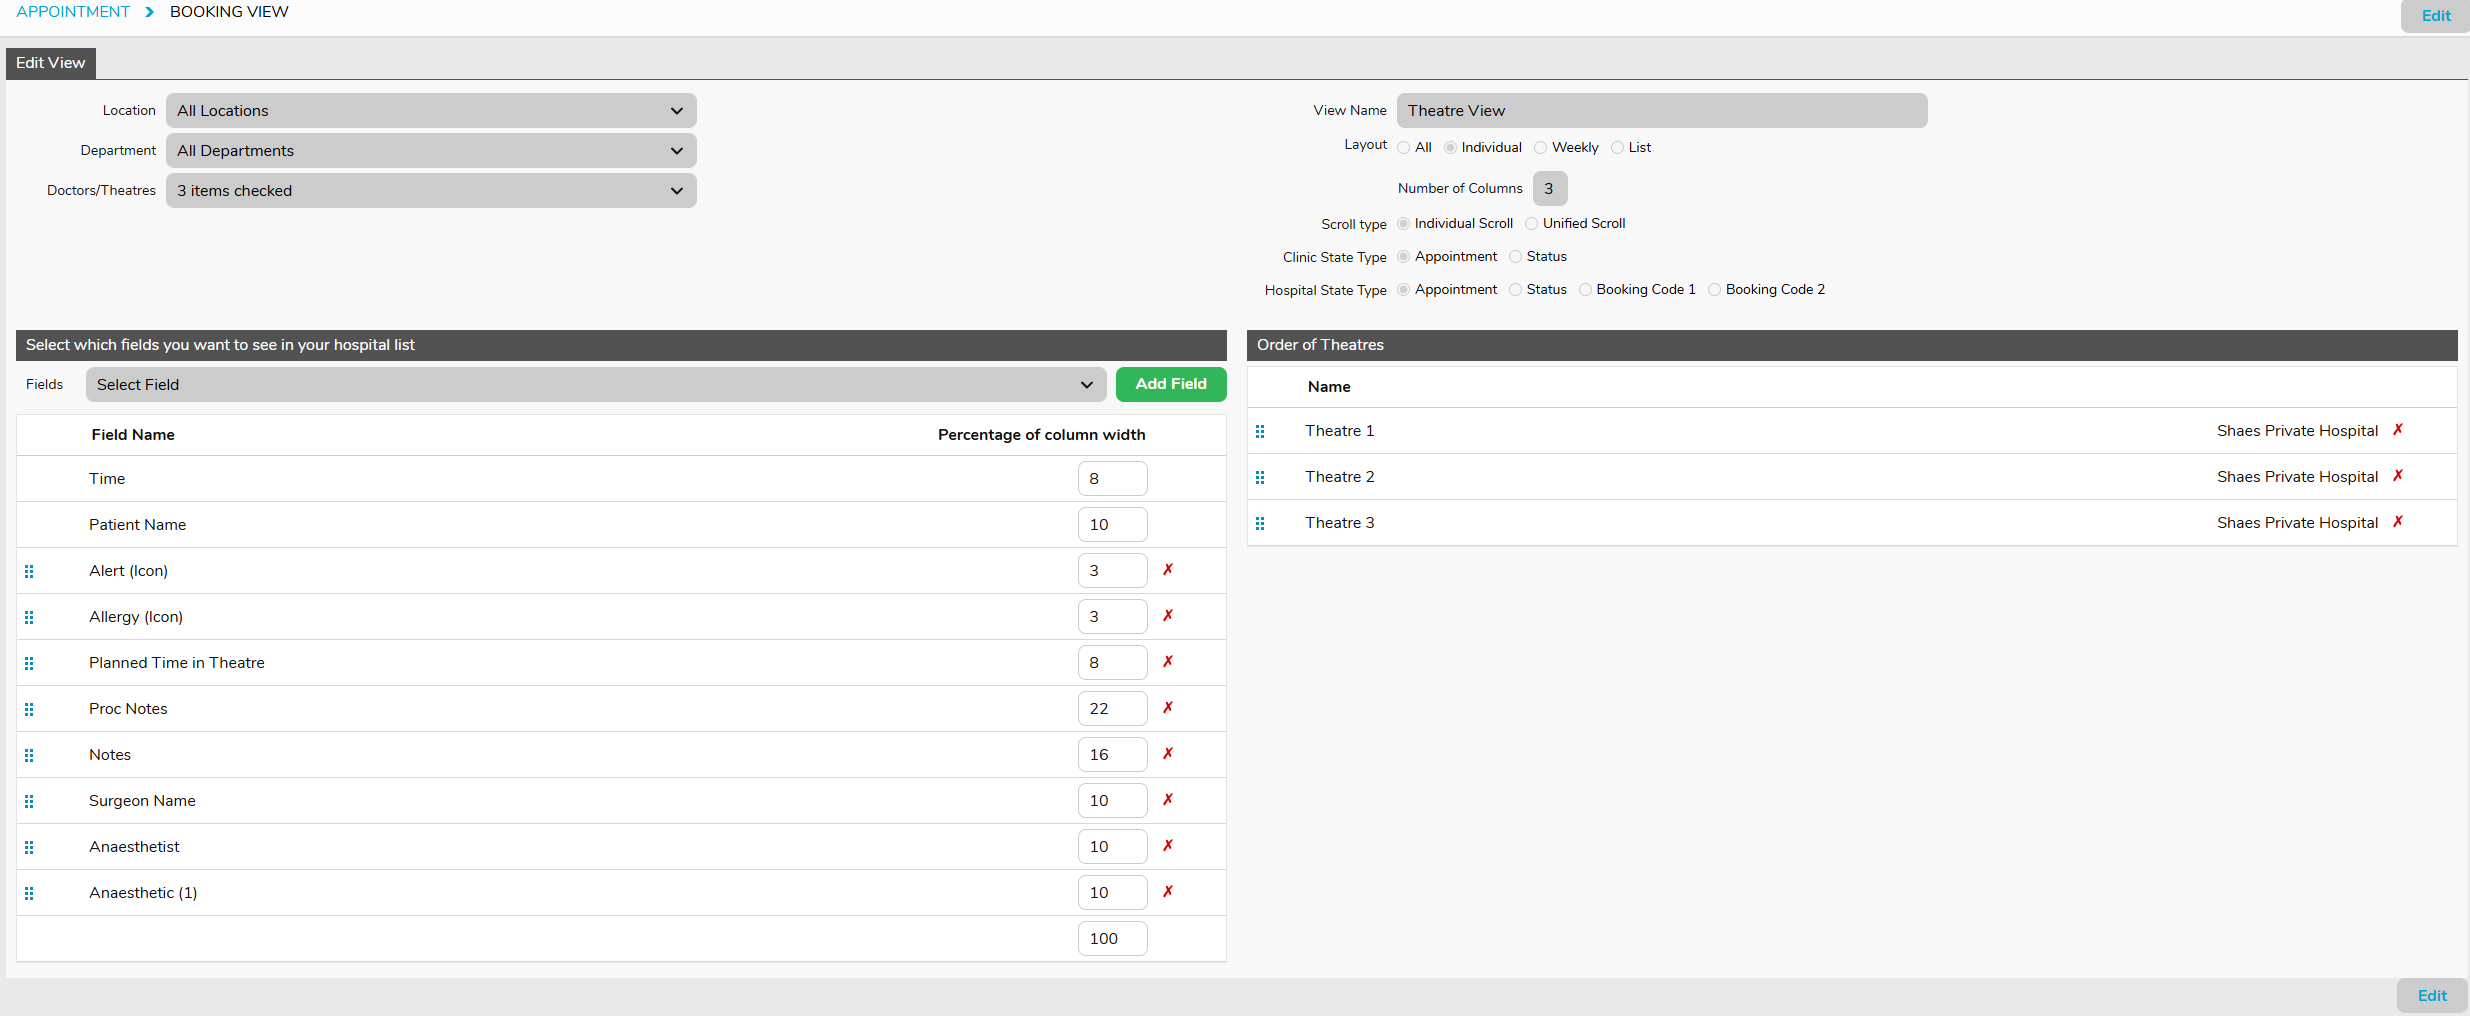
Theatre View
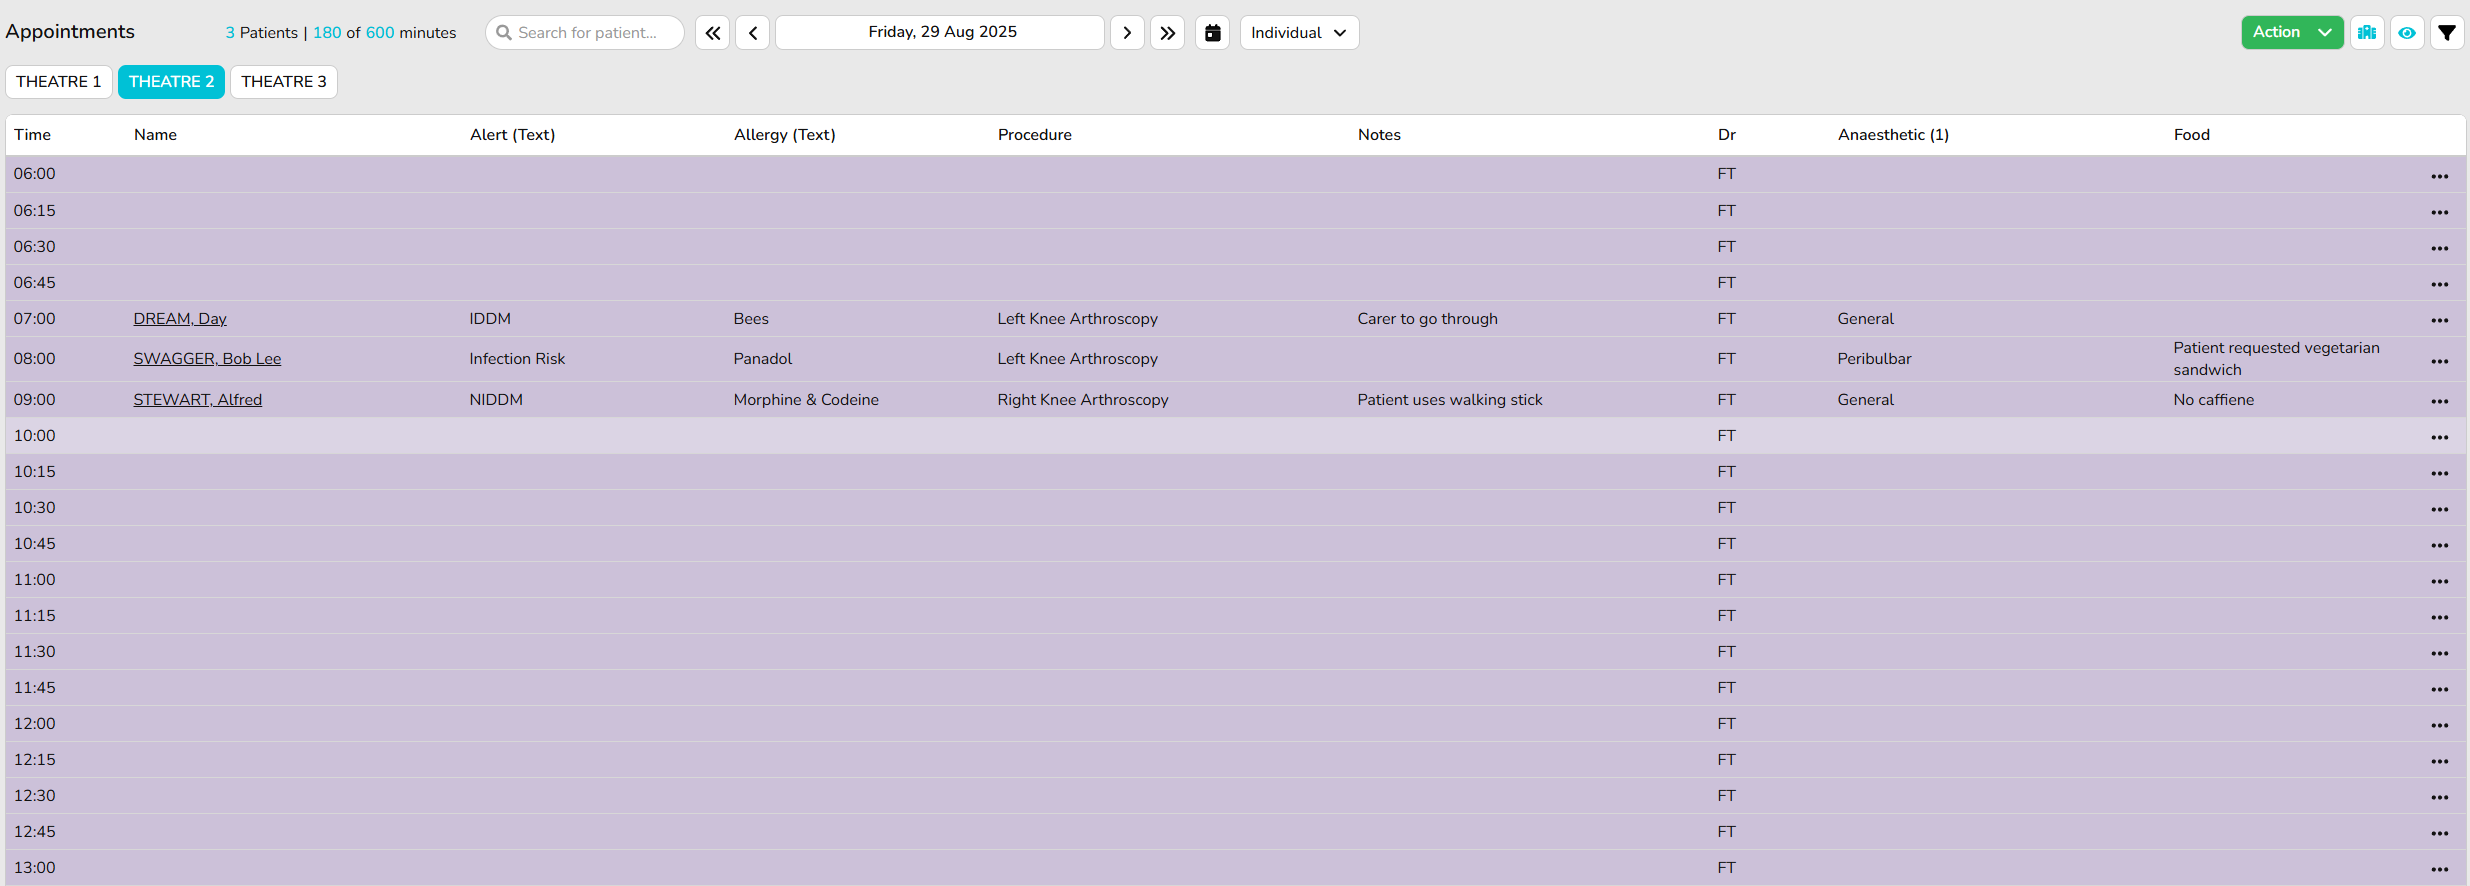
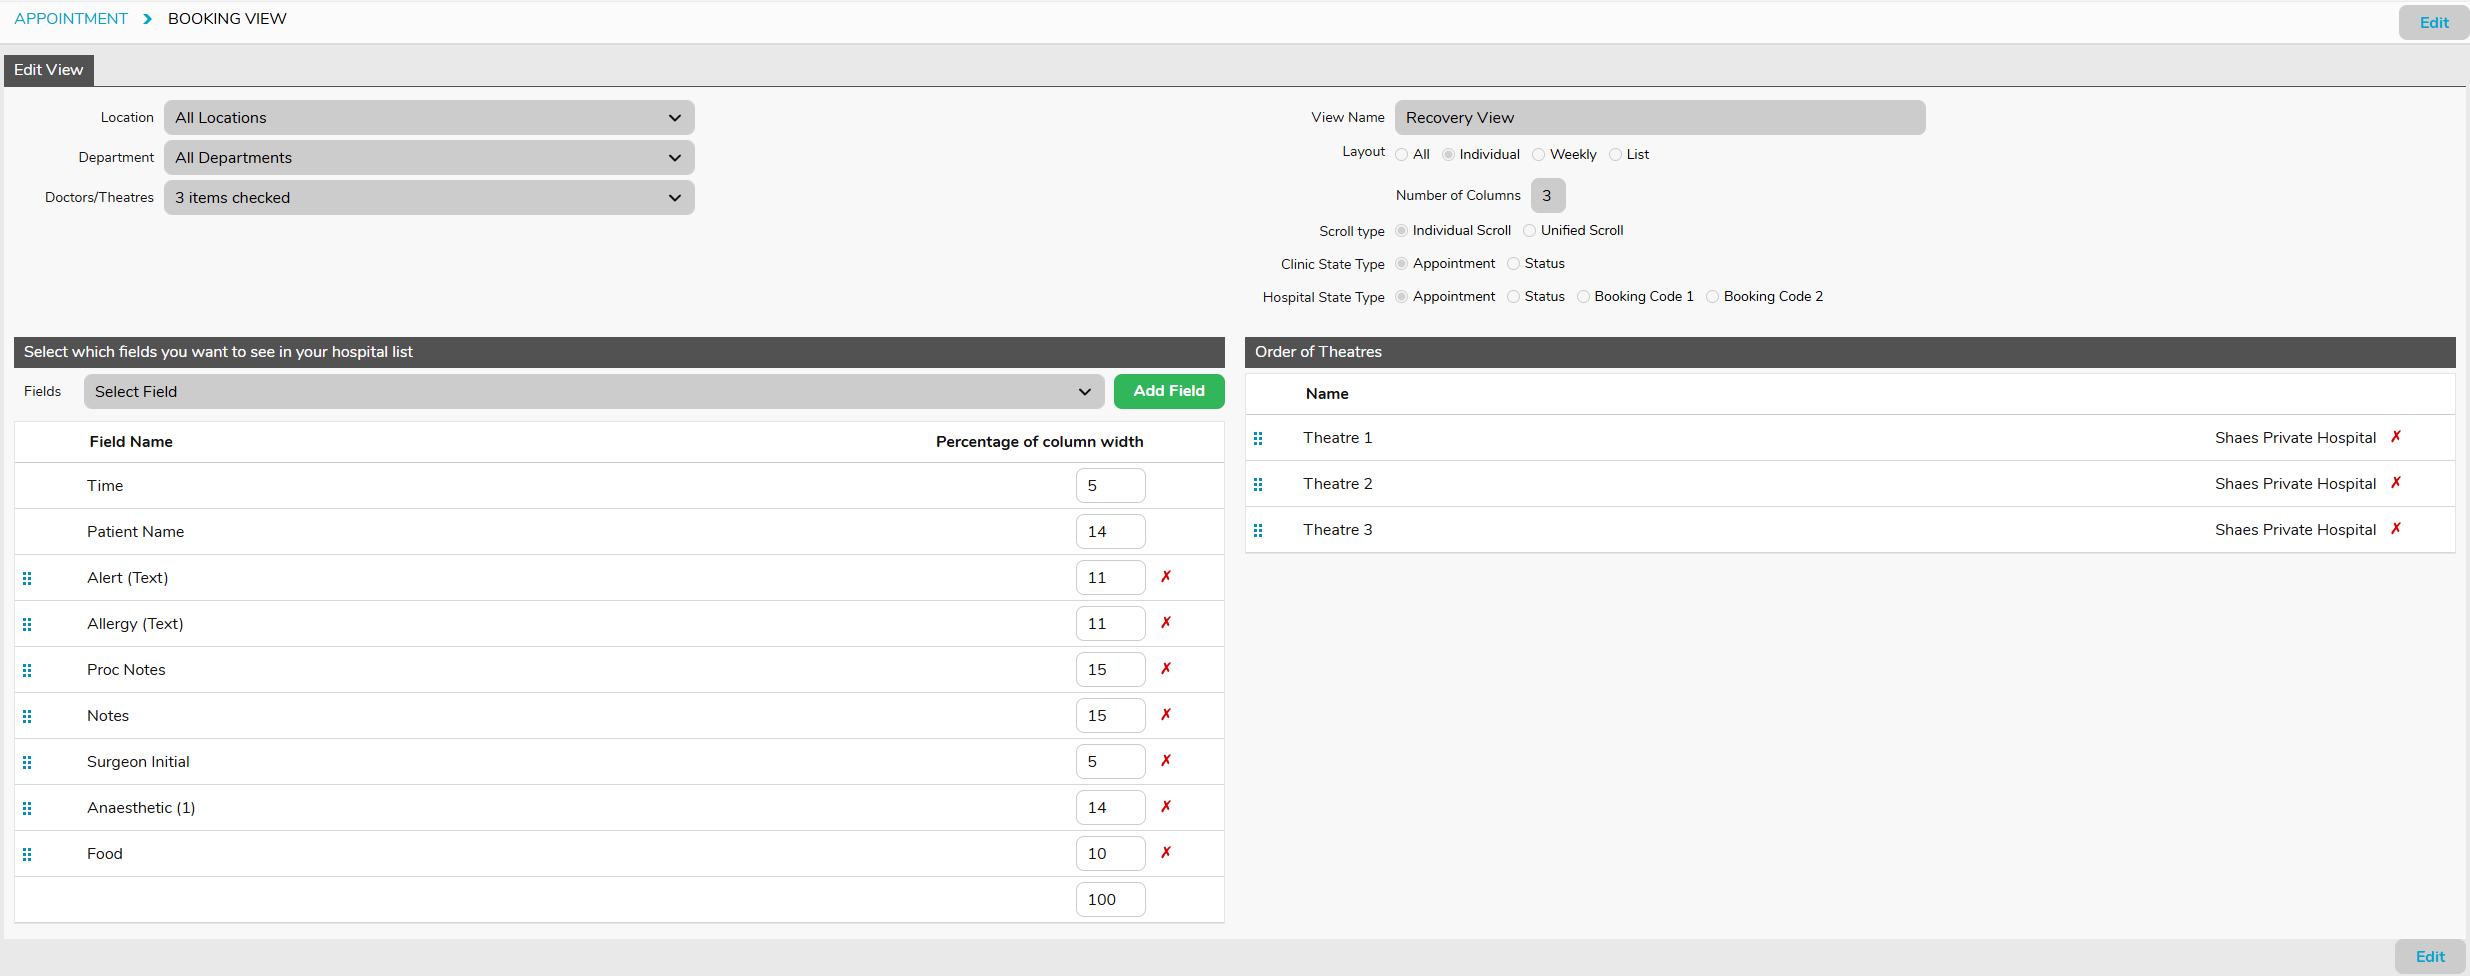
Recovery View
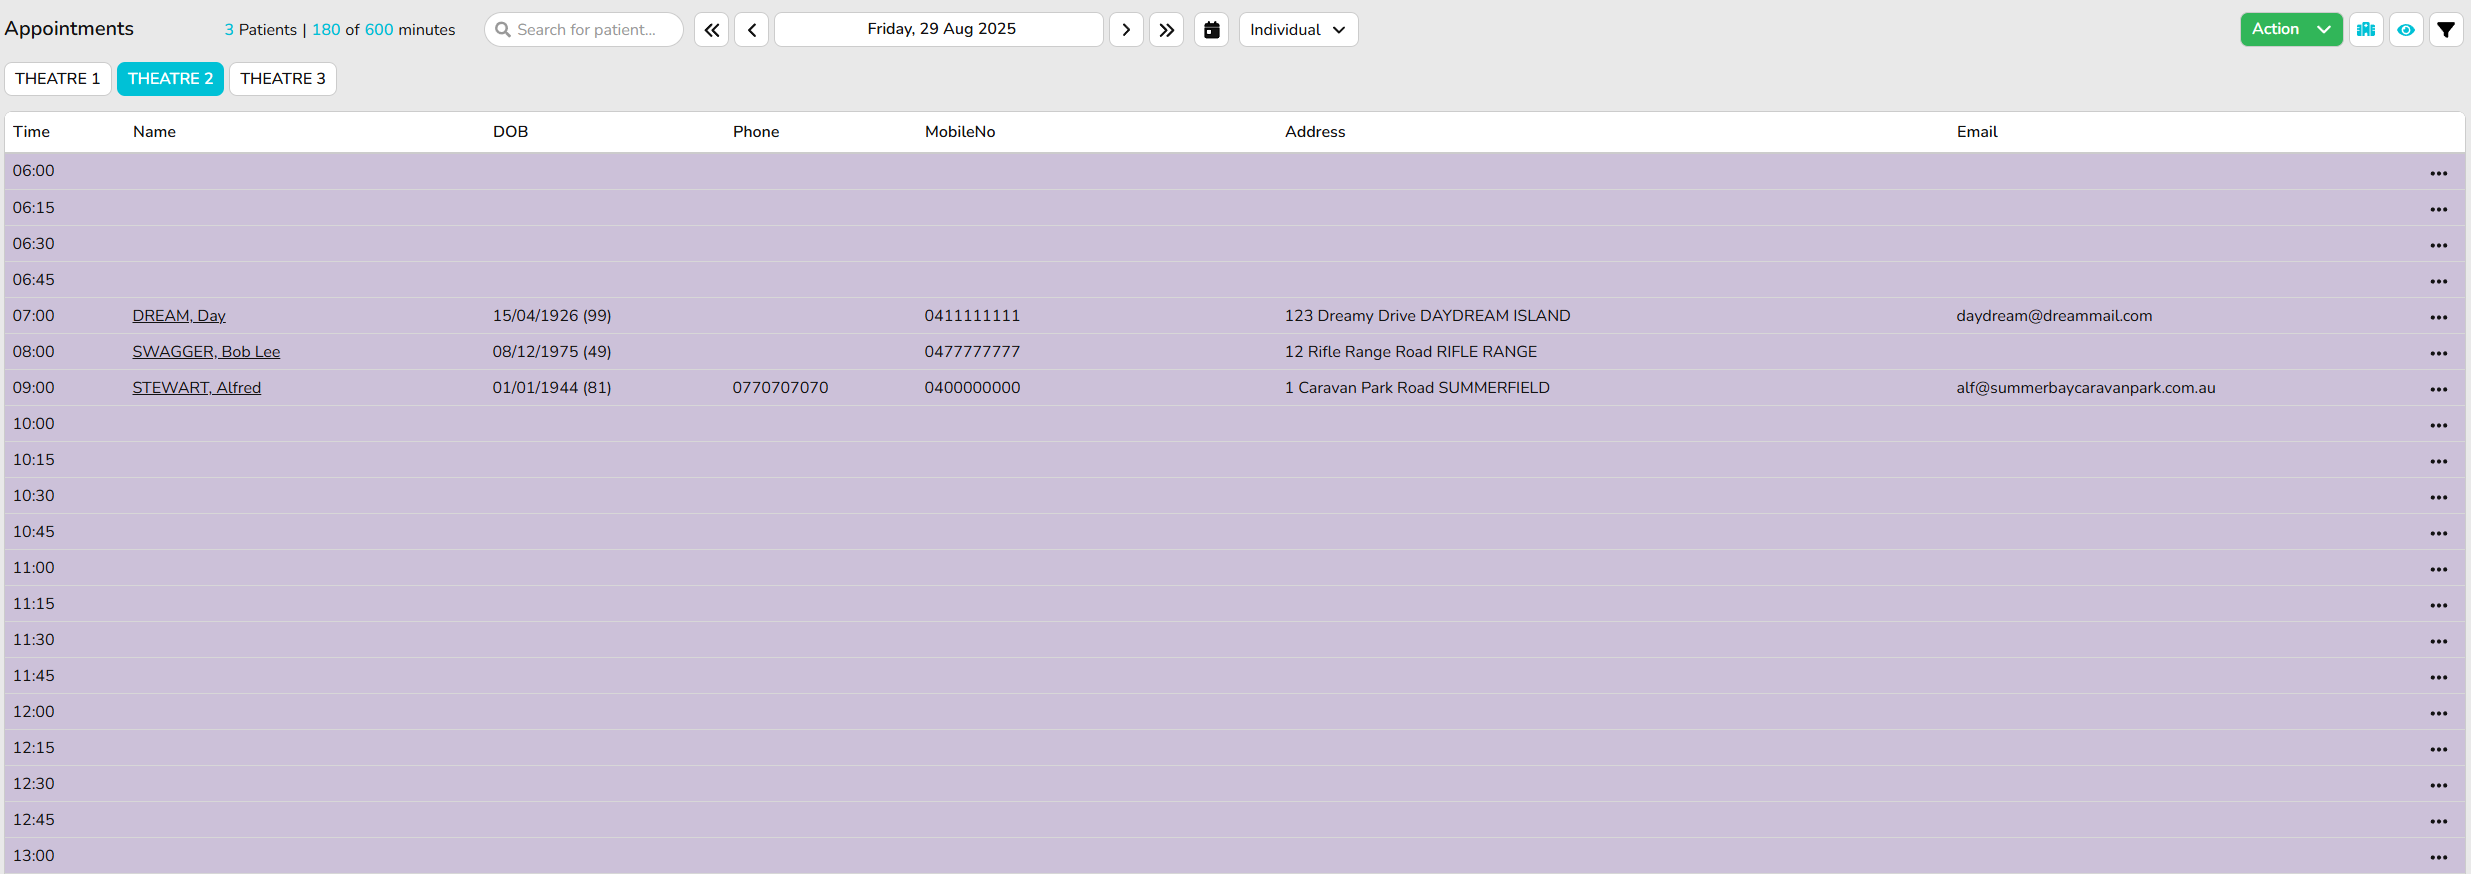
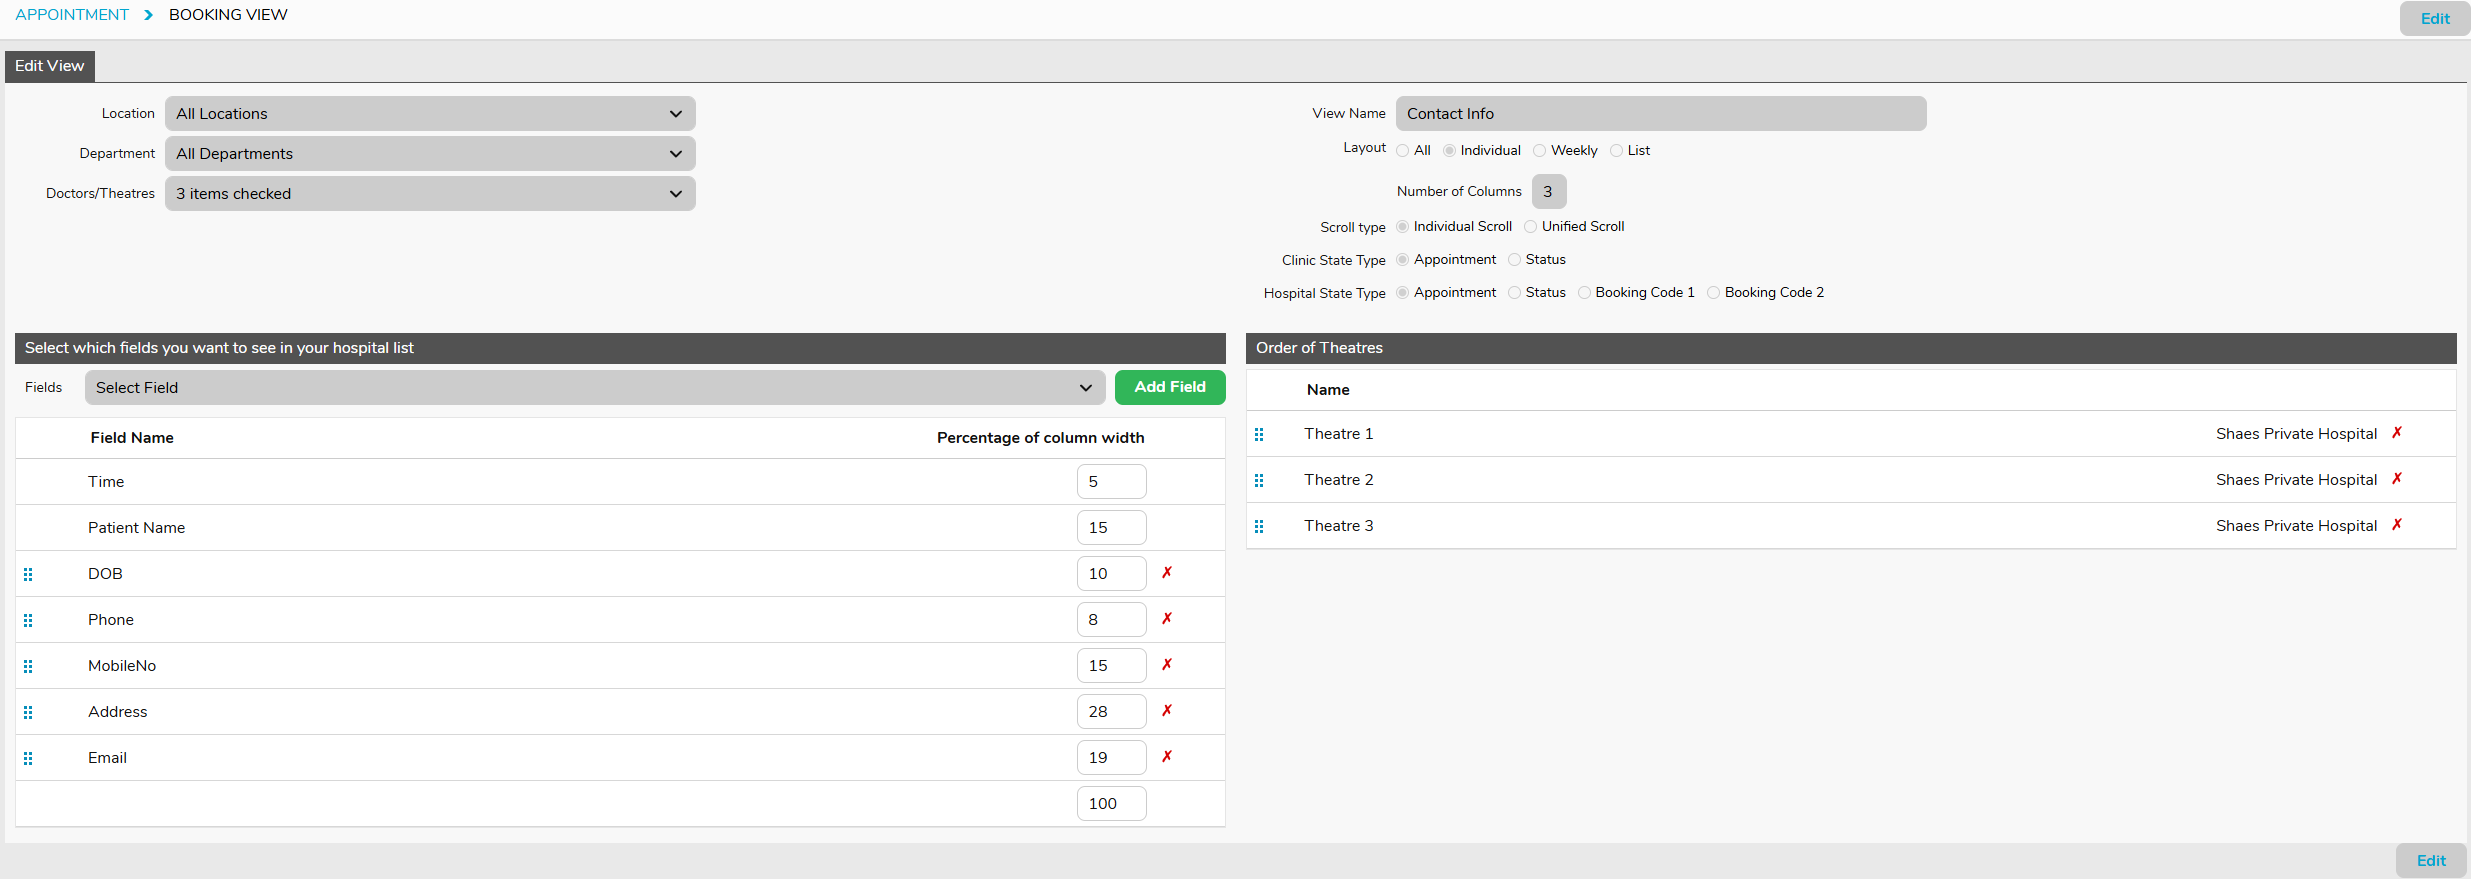
Patient Contact Information View
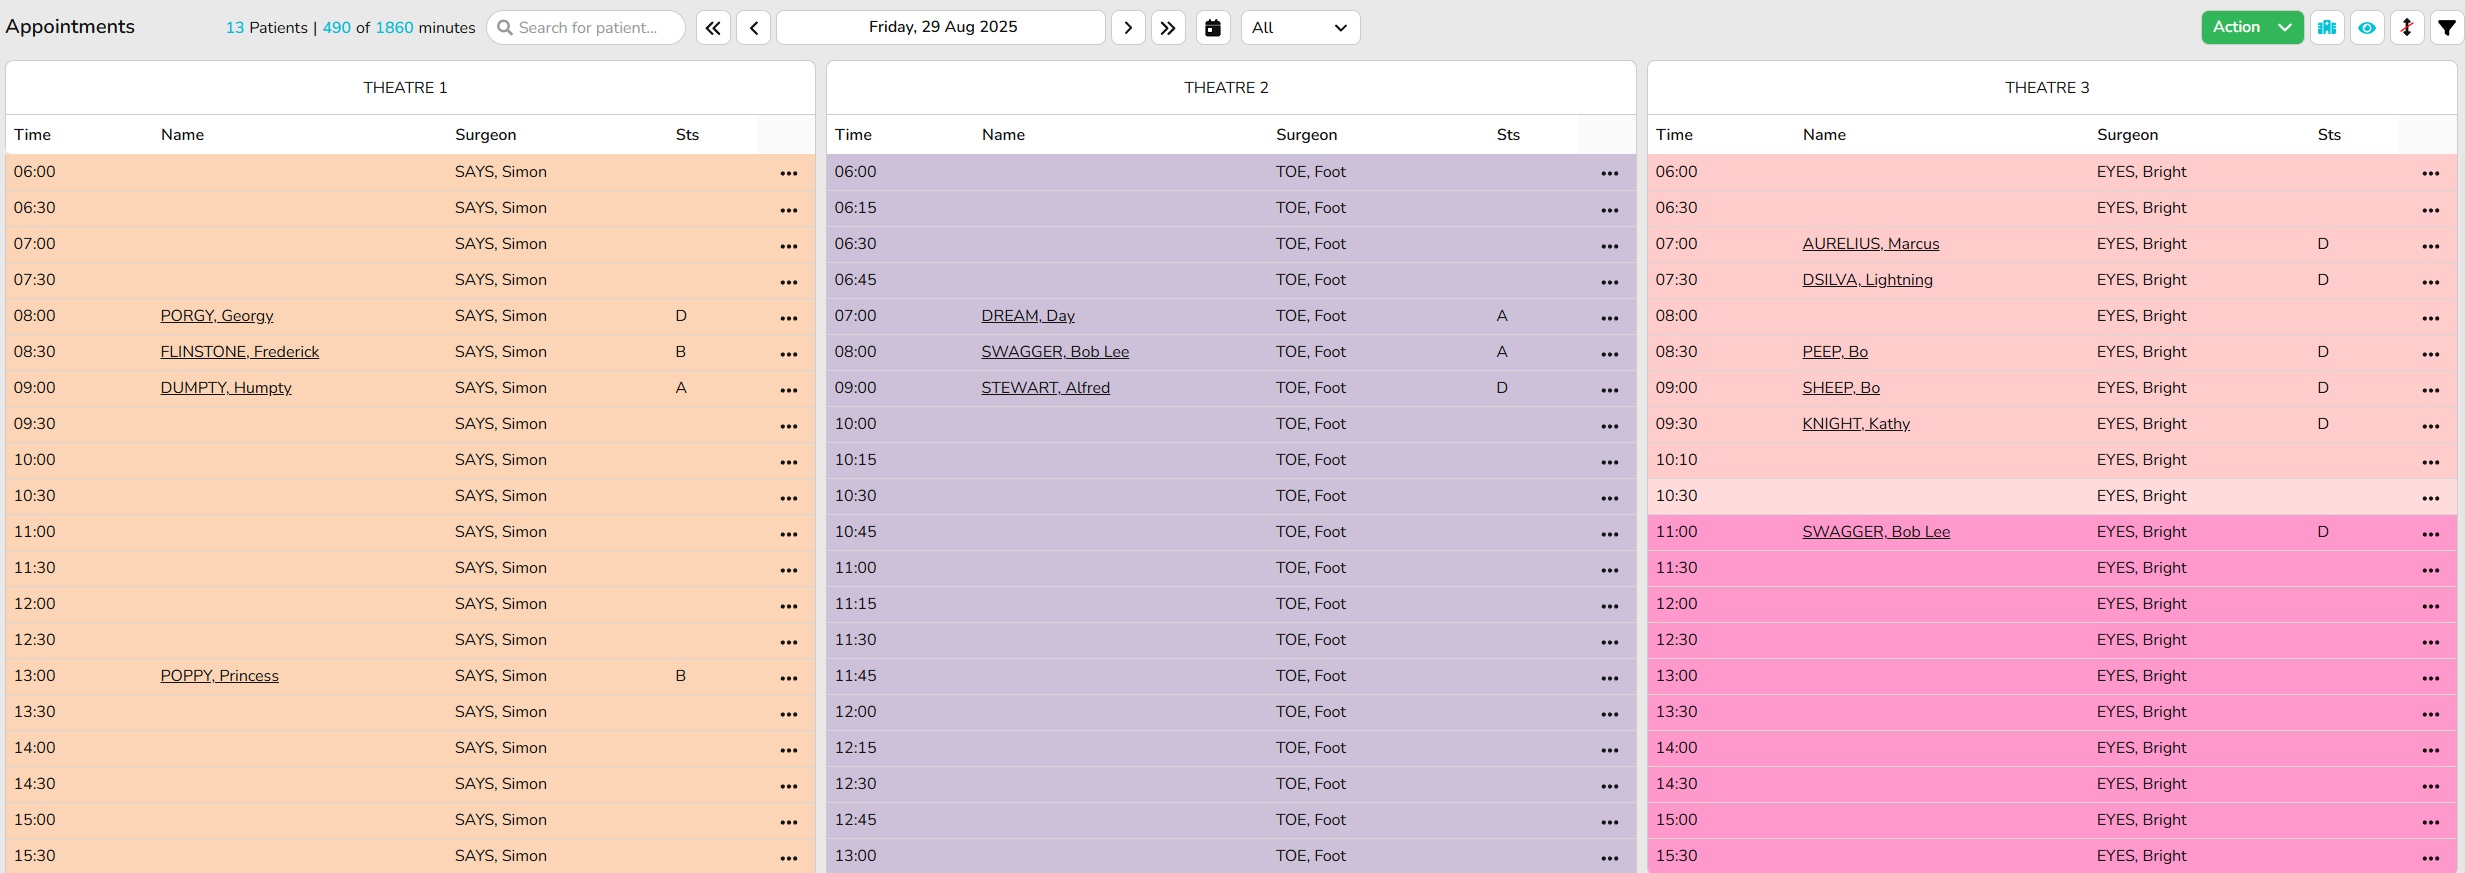
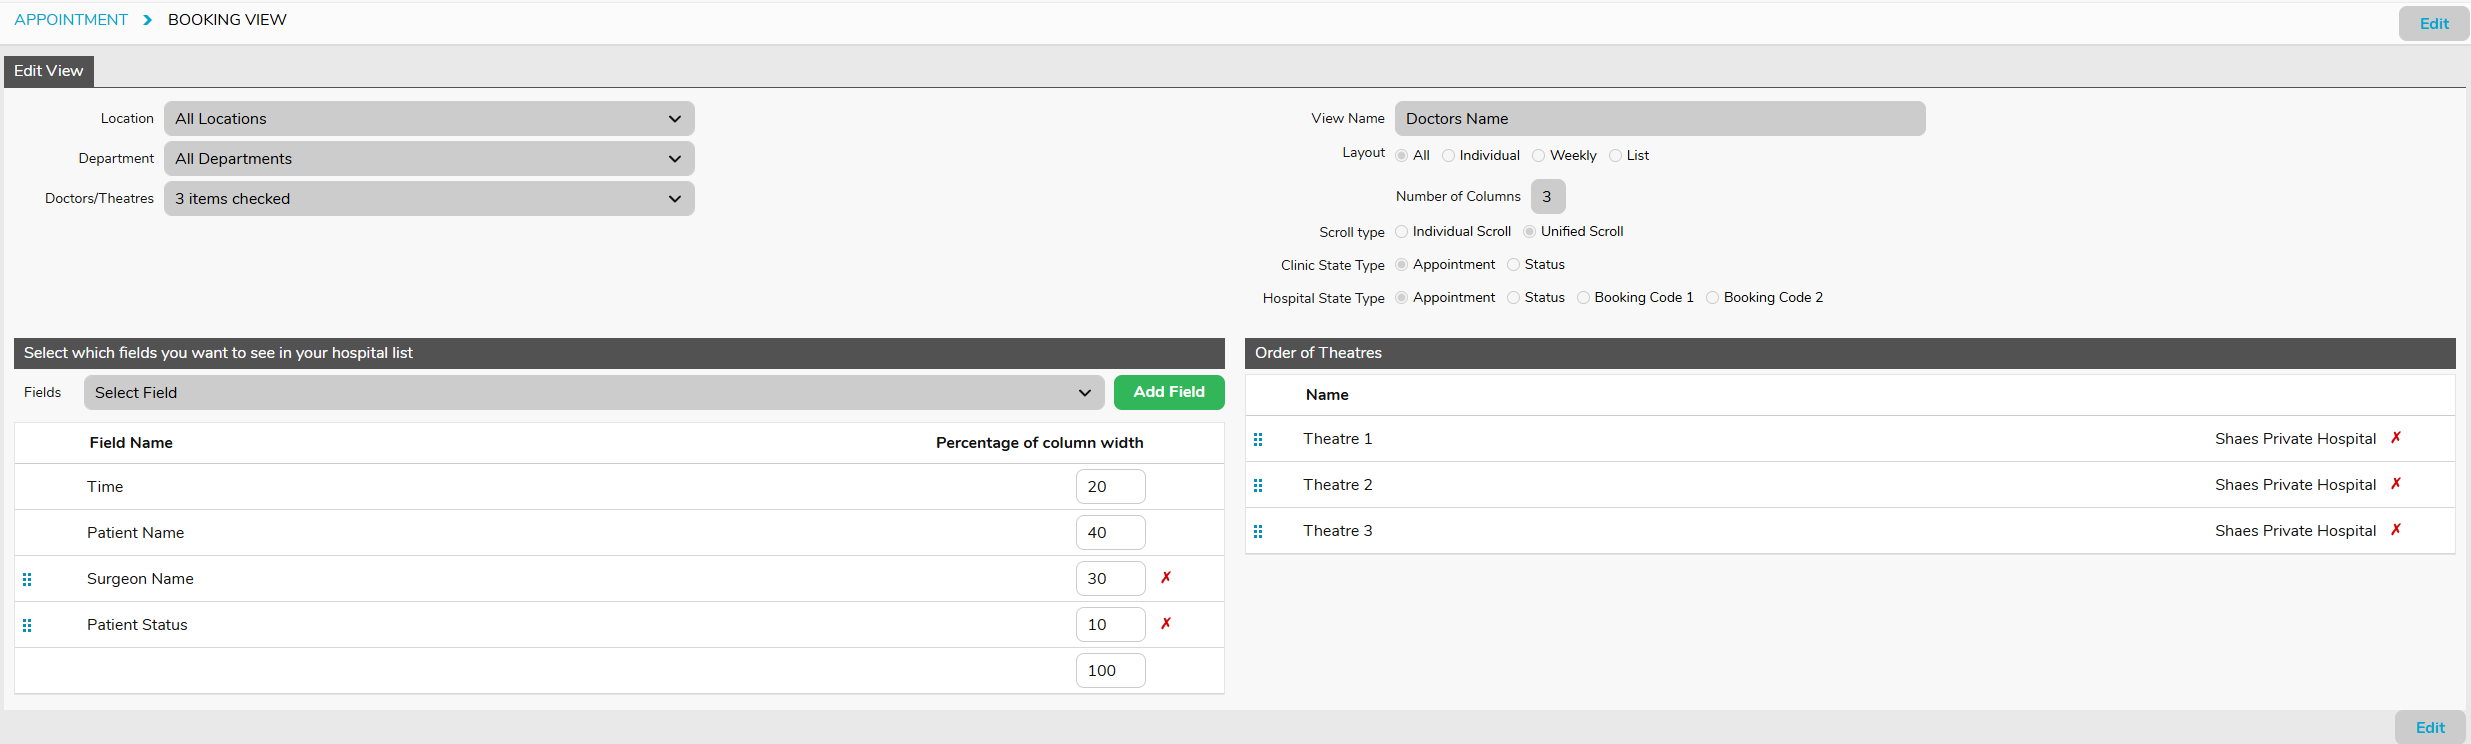
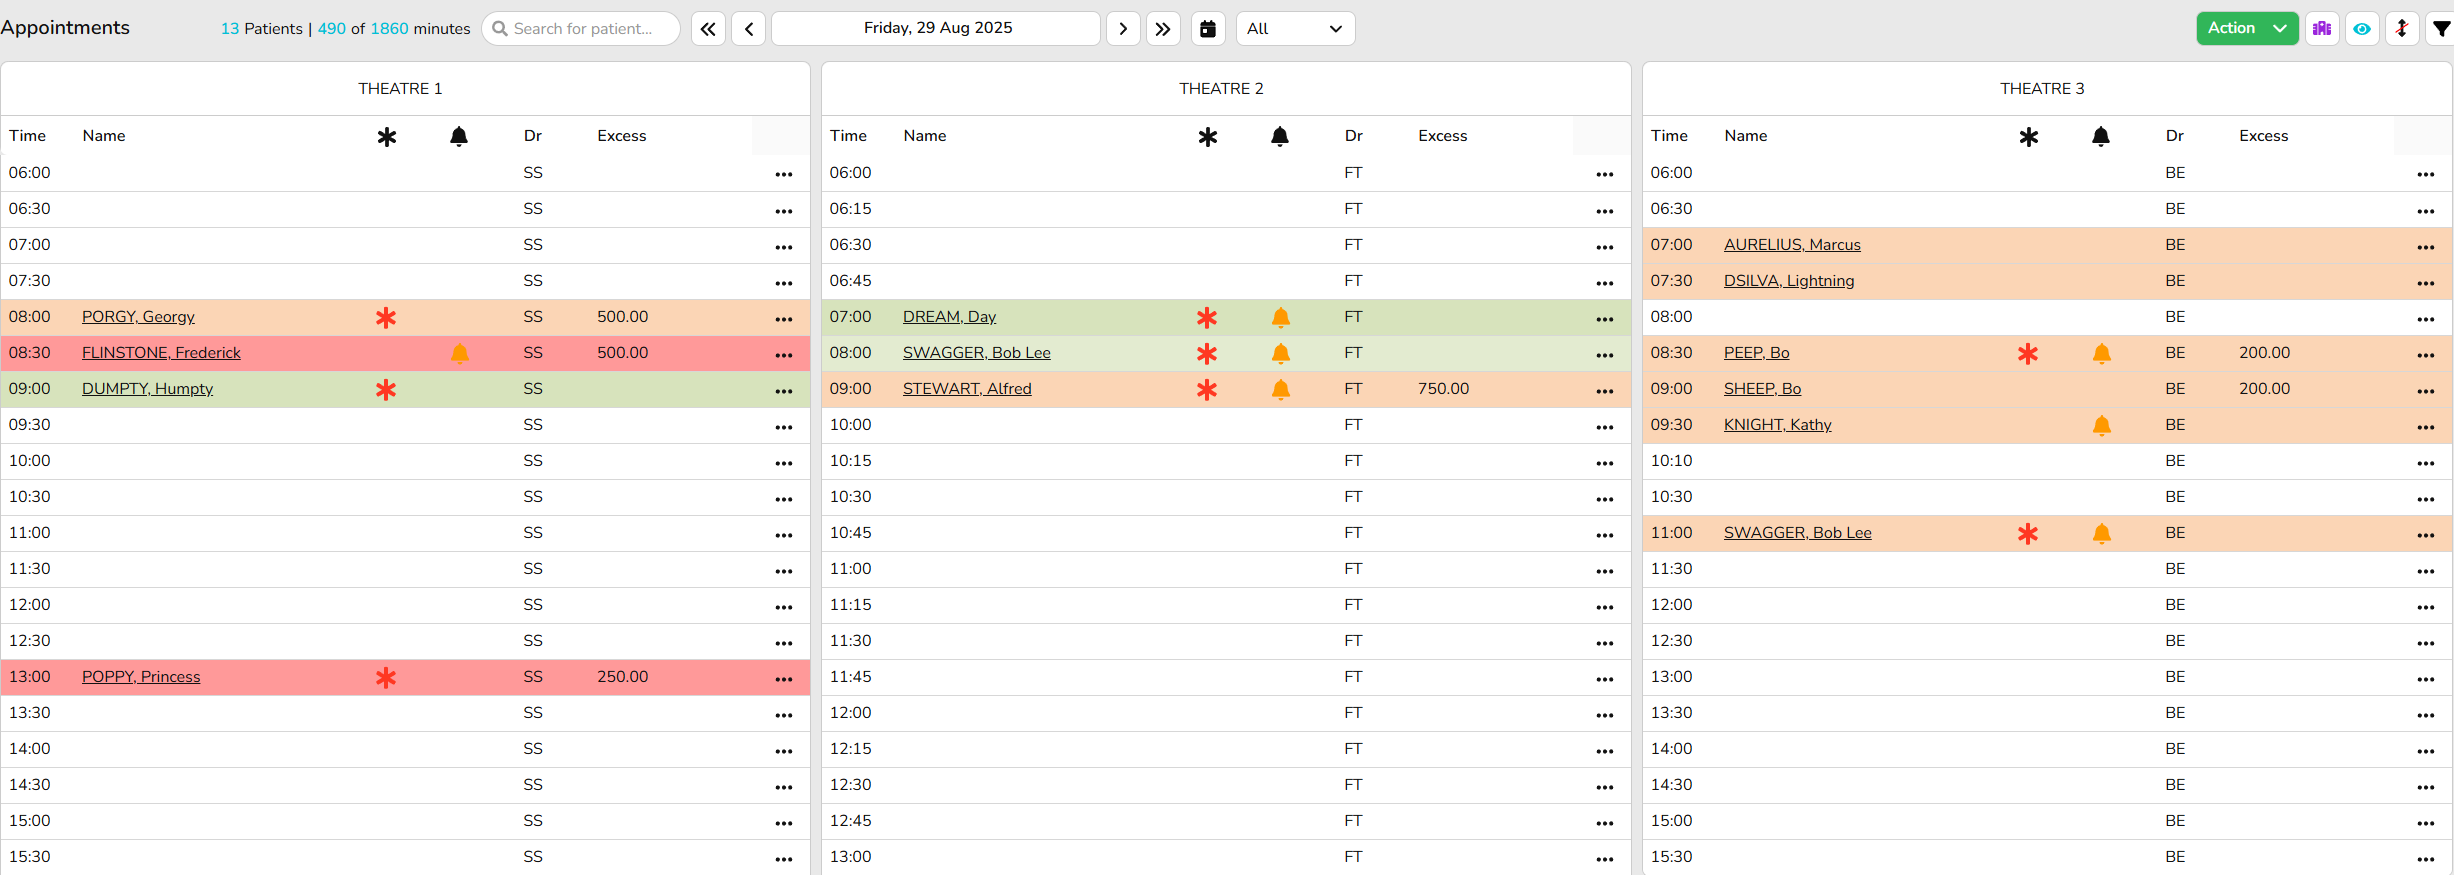
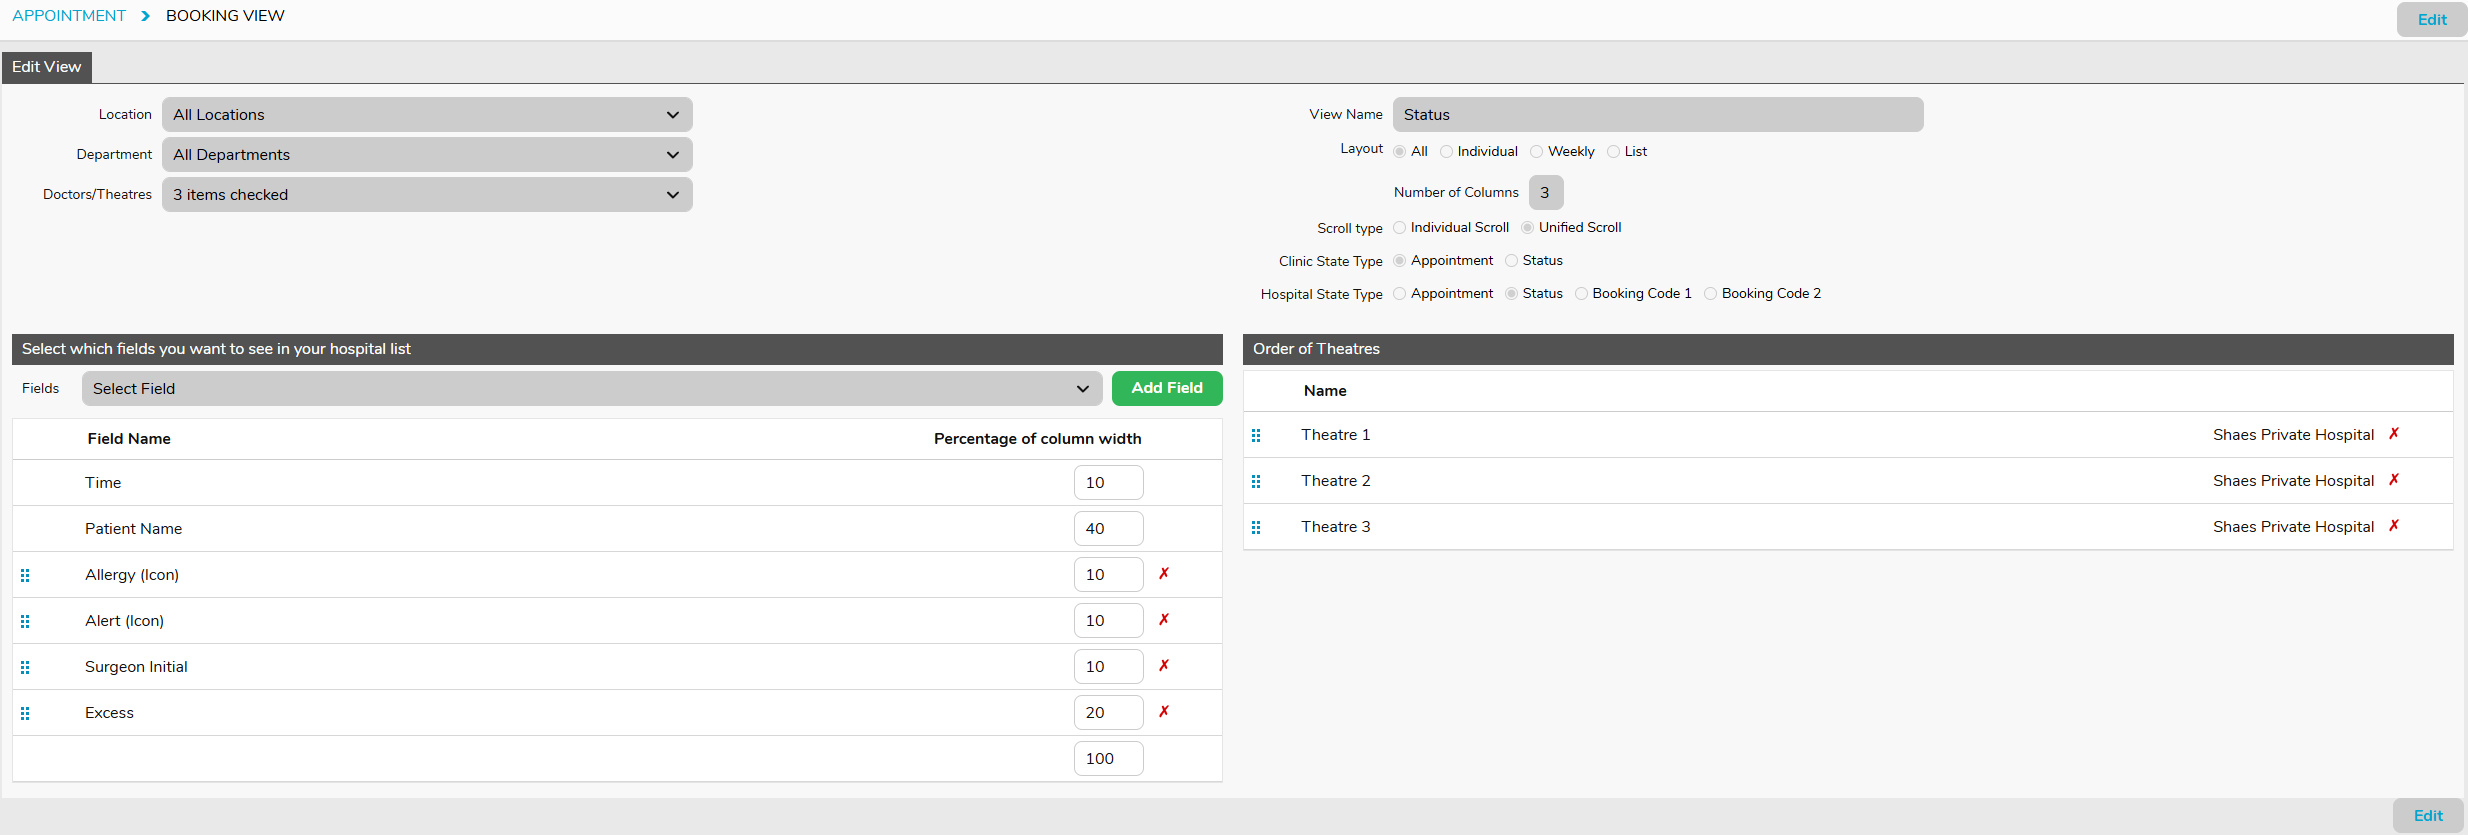
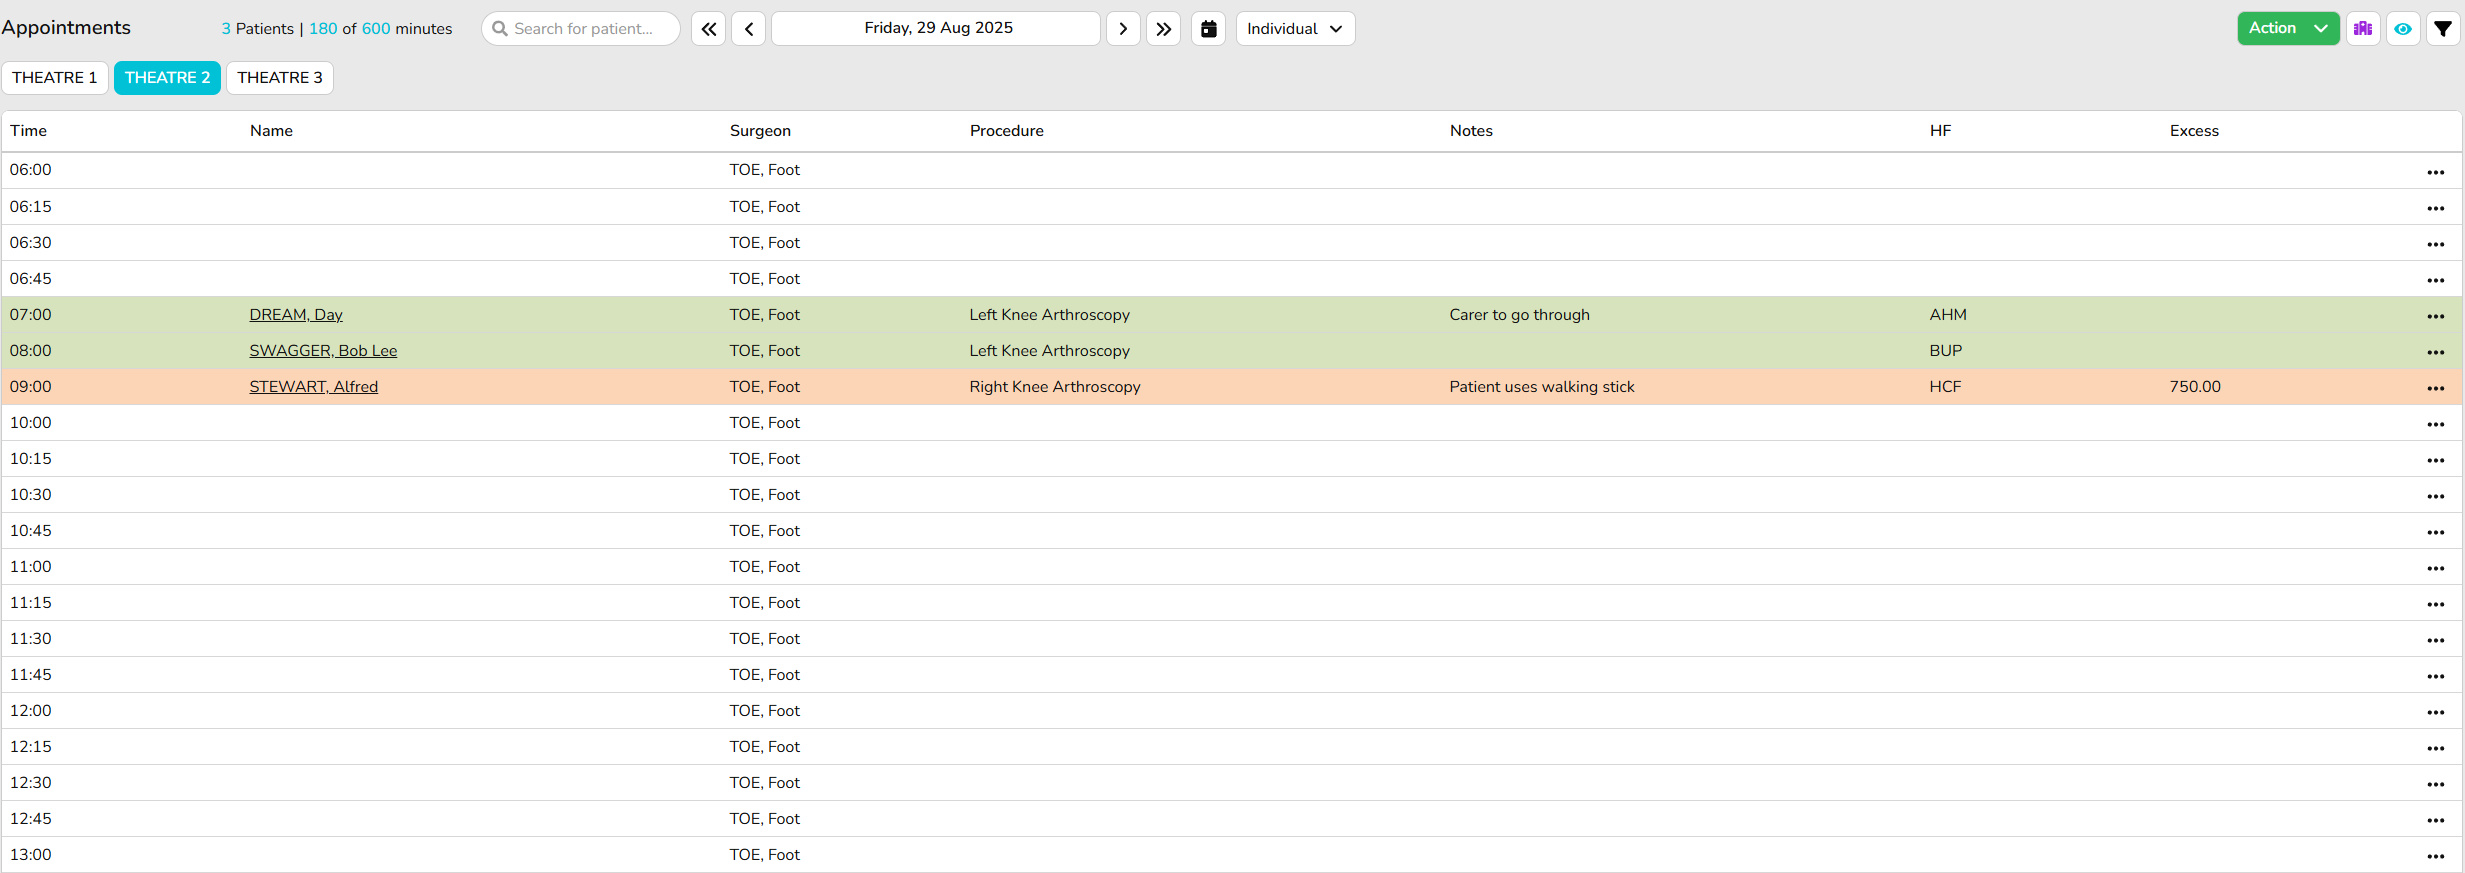
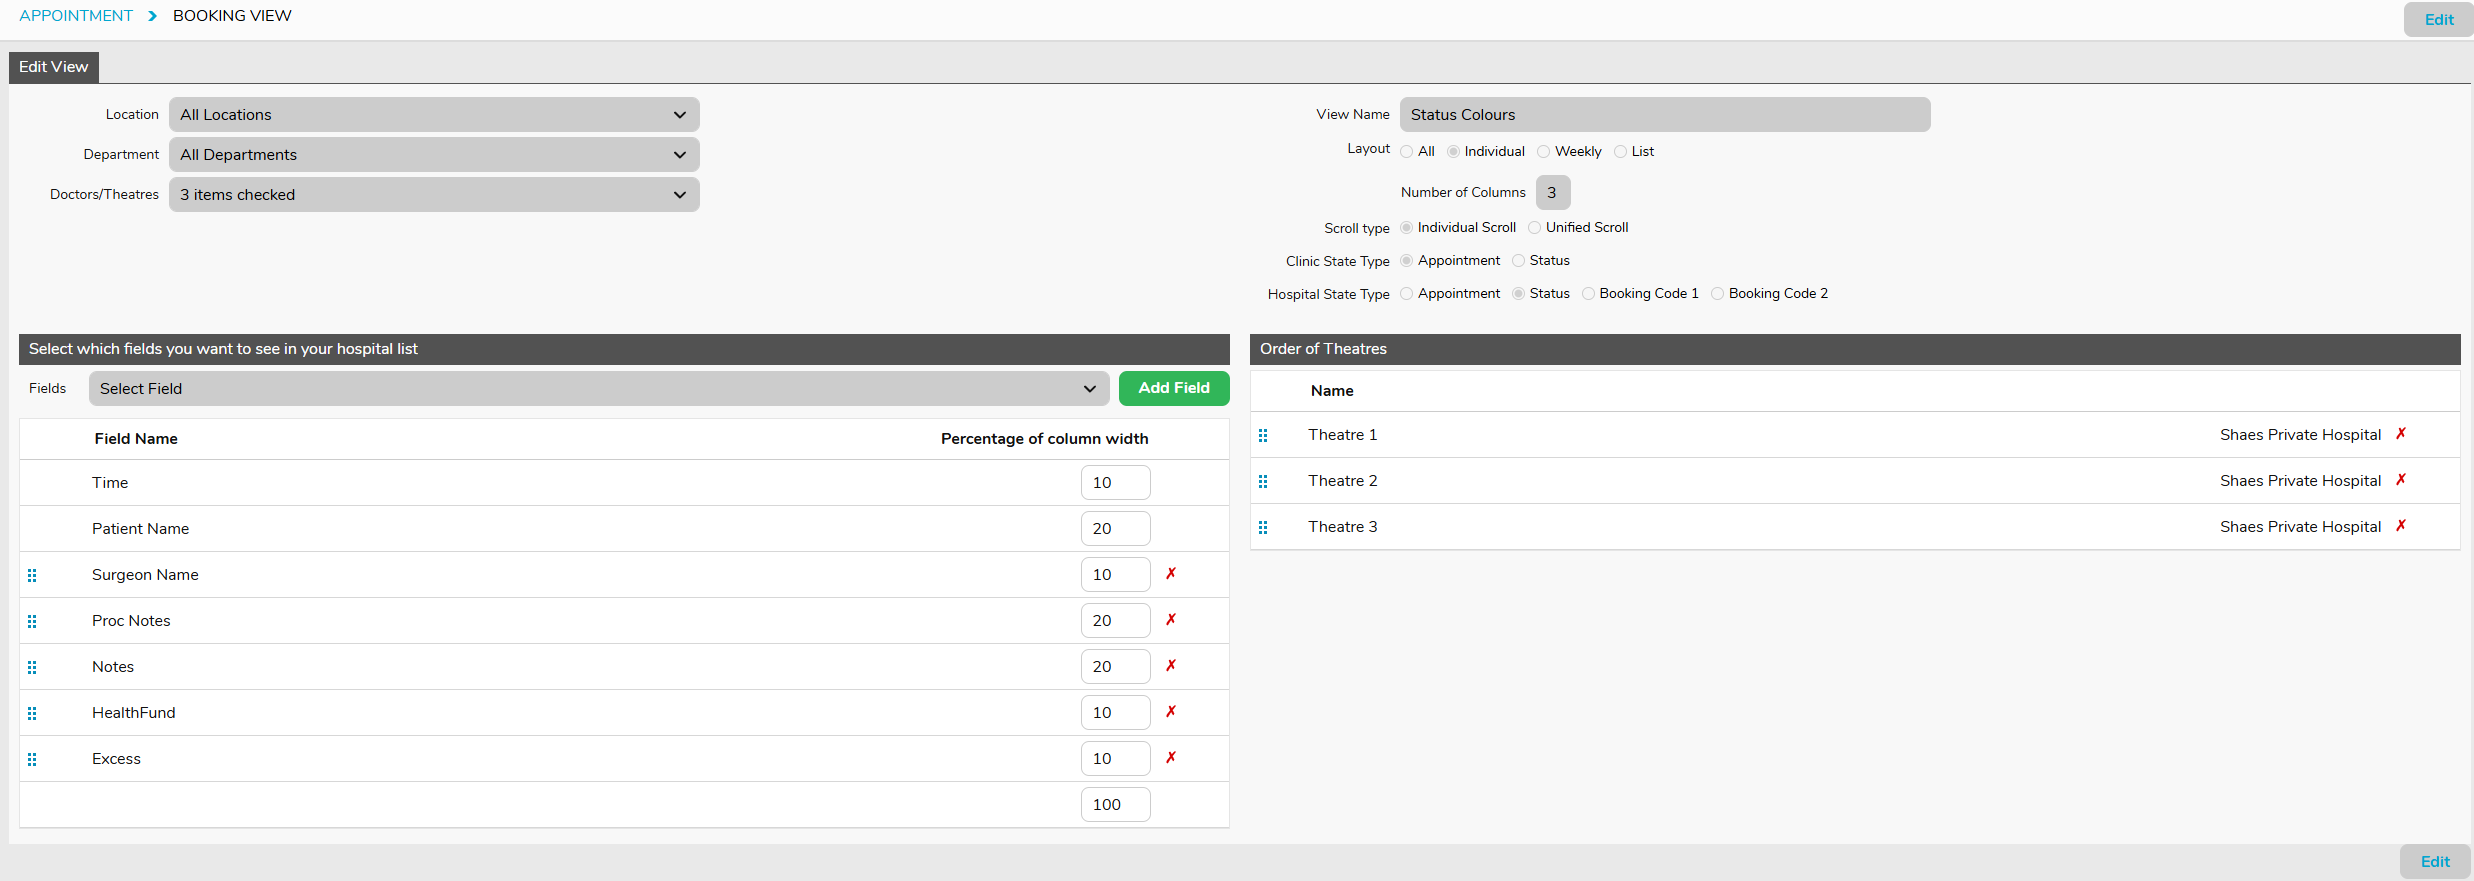
Status View
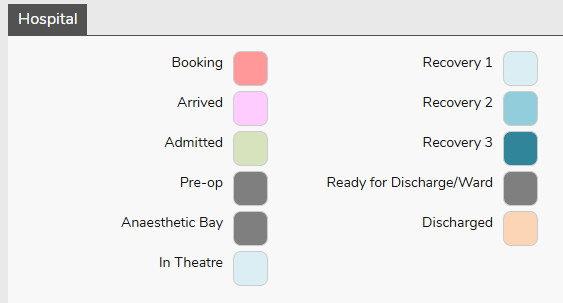
In addition to creating the Status Custom View the user will need to ensure the desired colours are set up in Settings > System Configuration > Hospital.
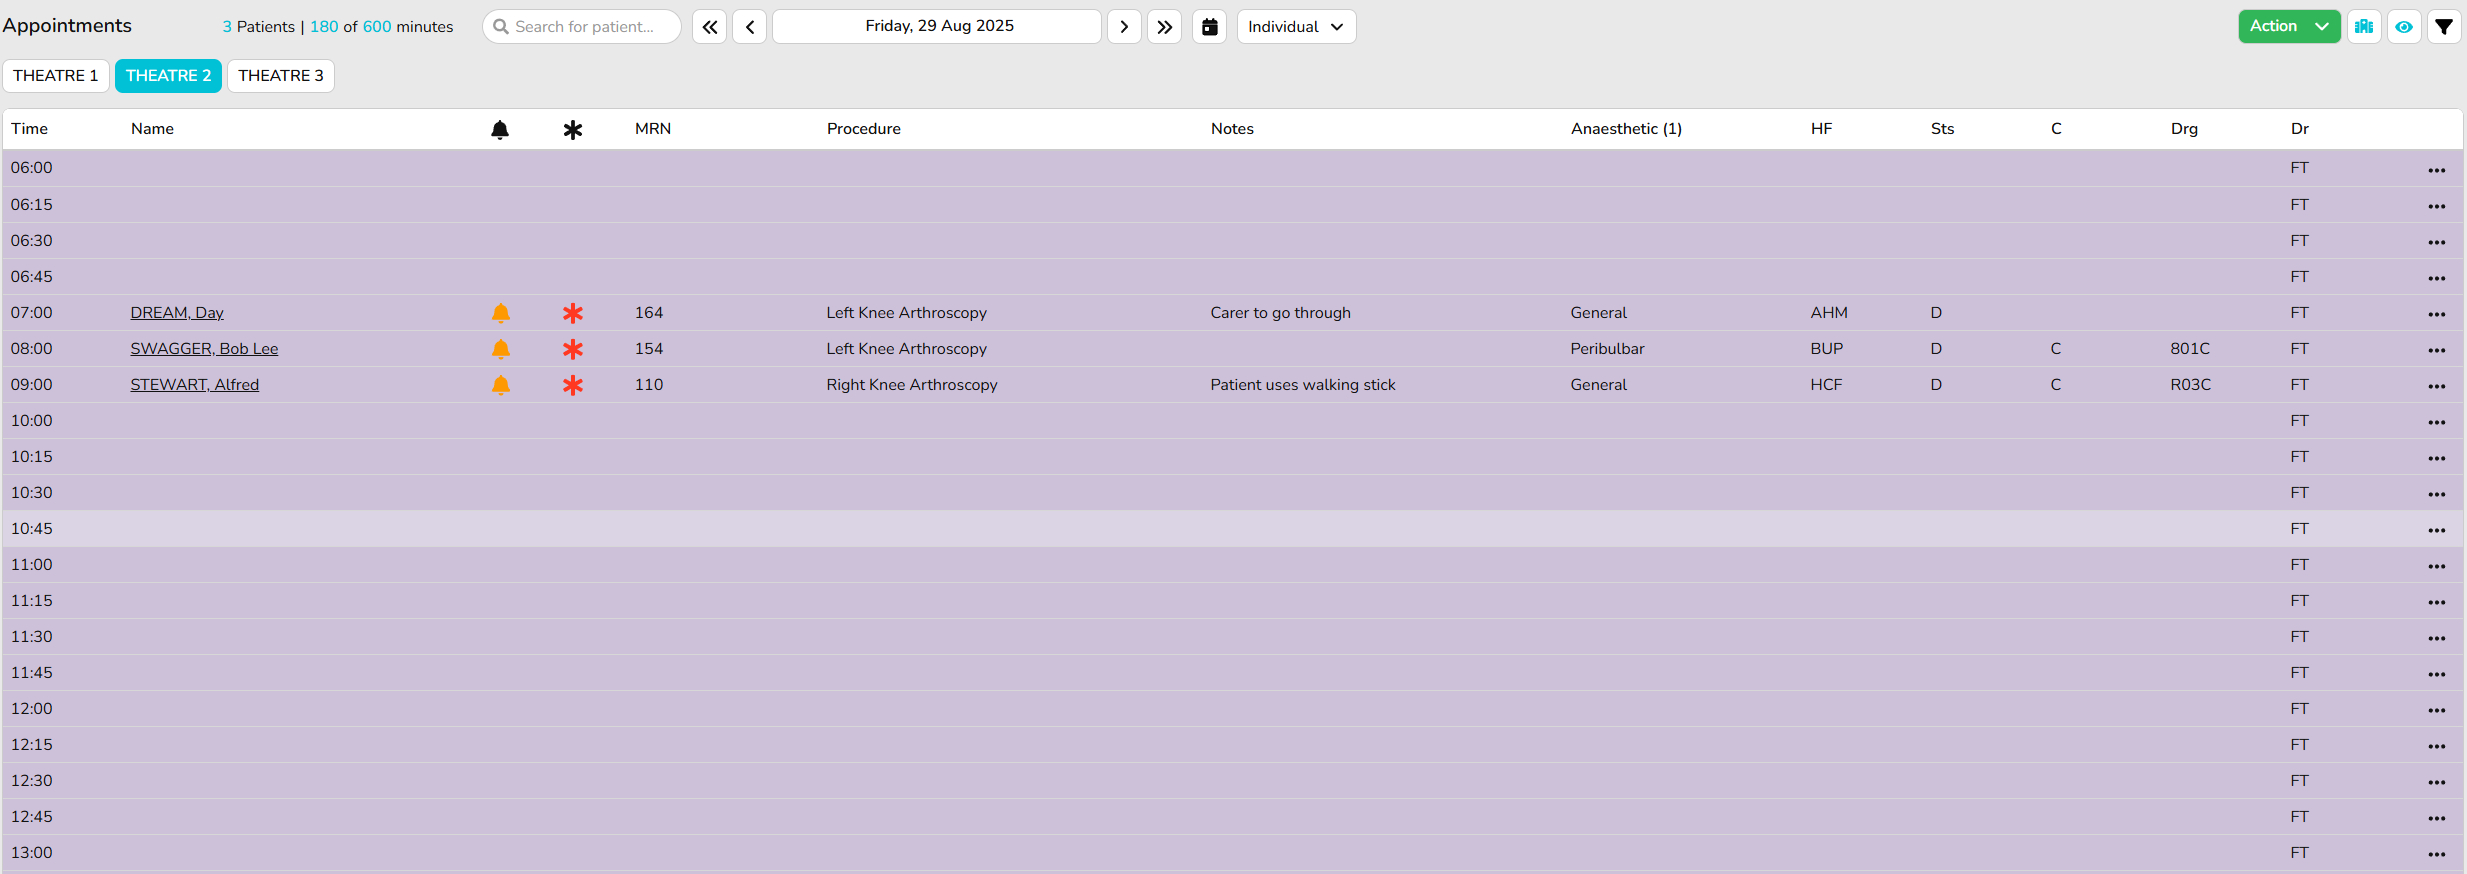
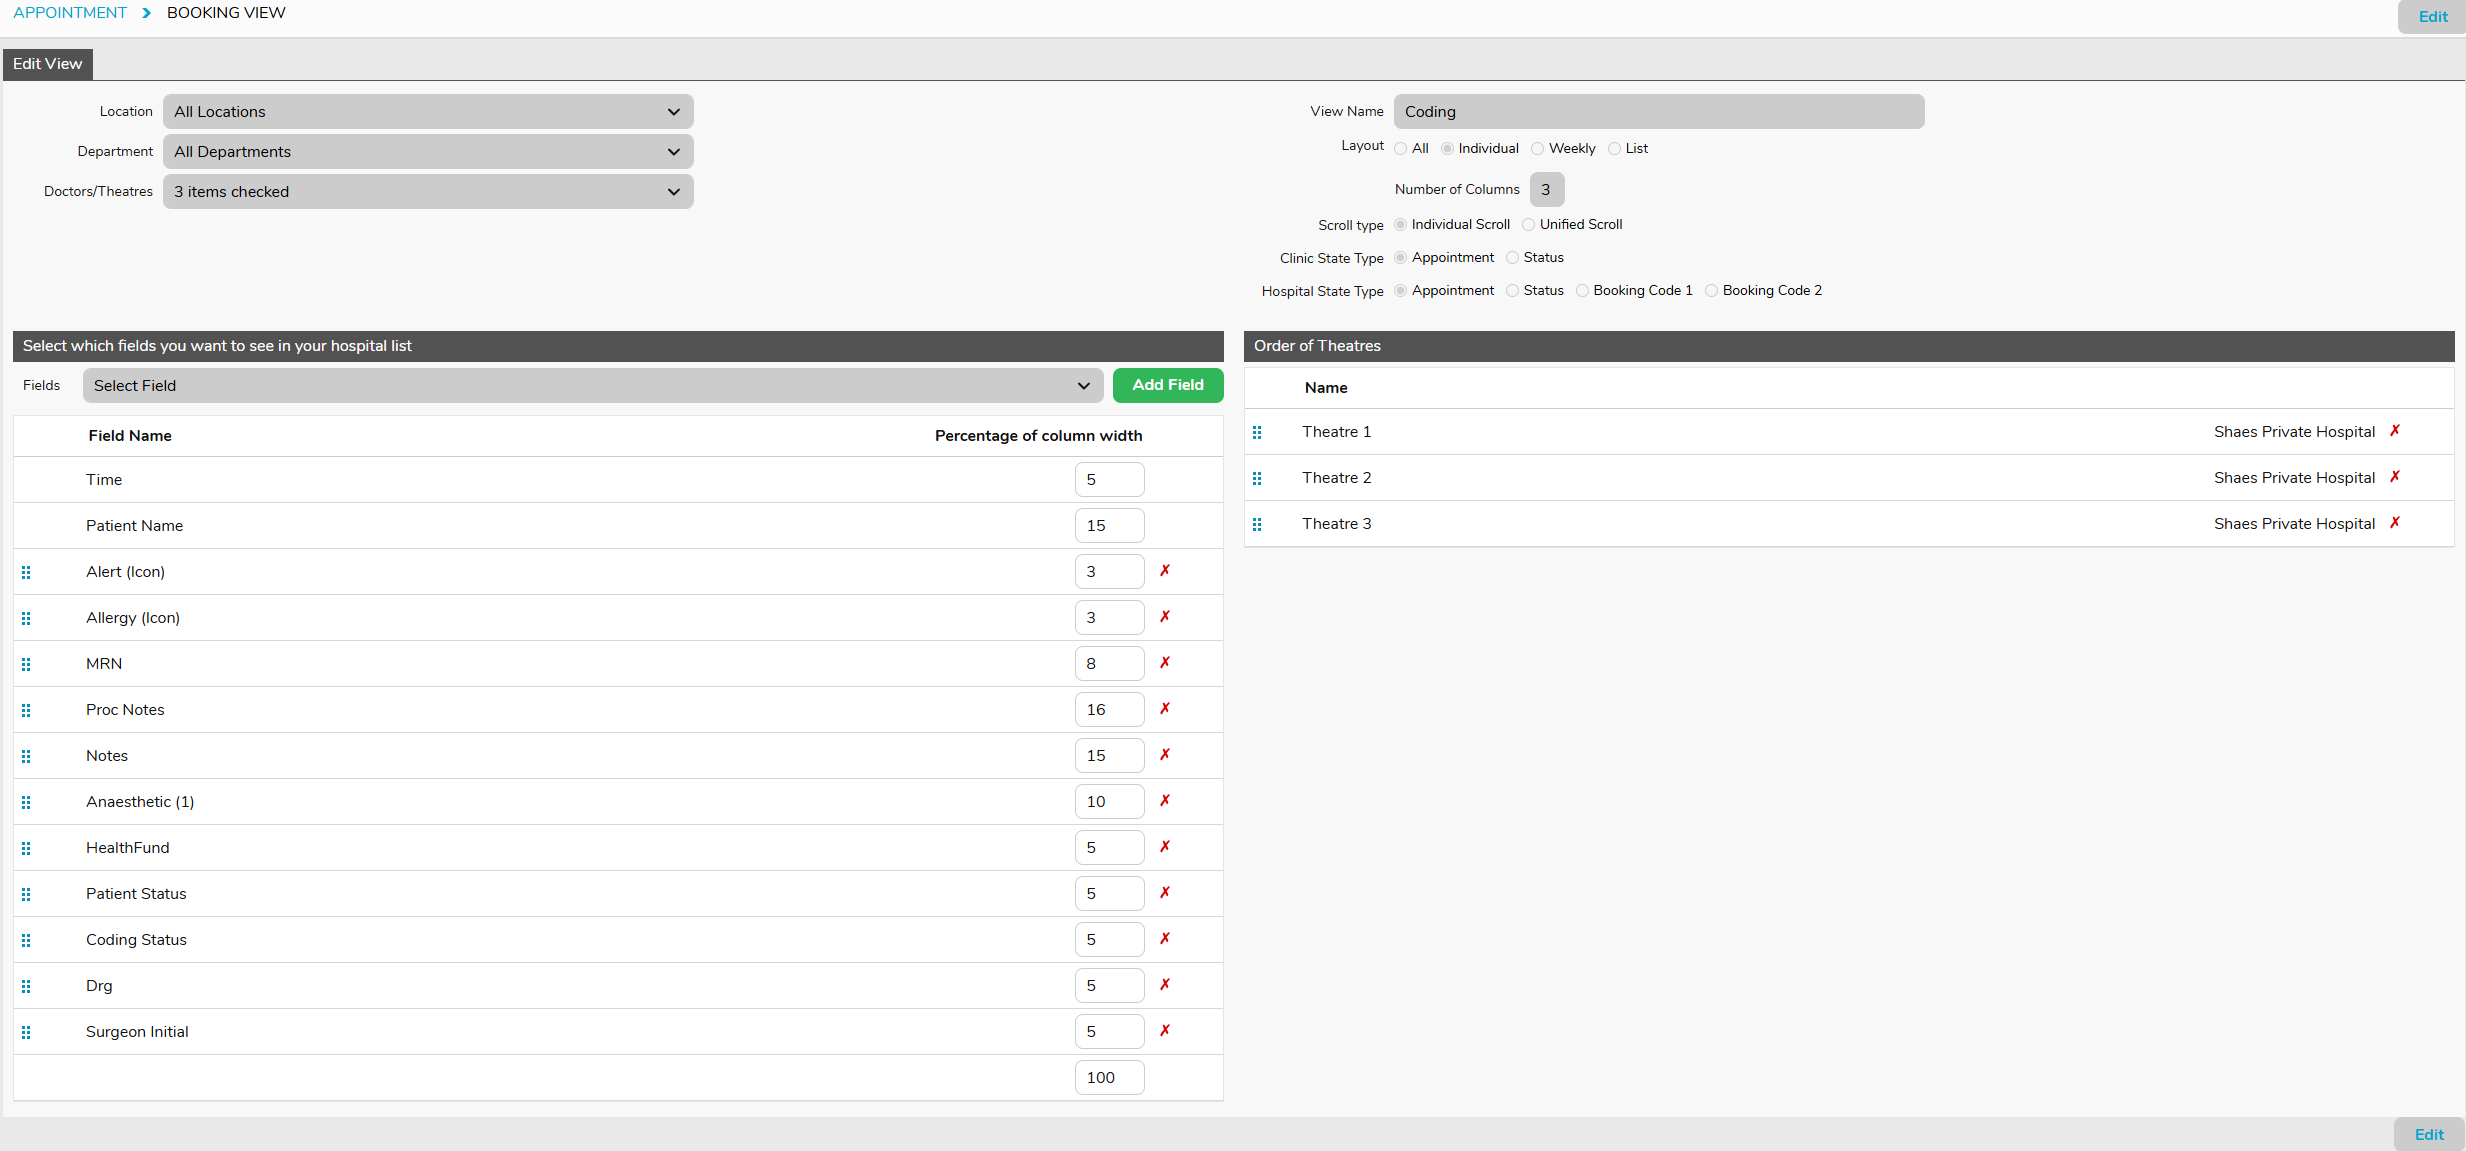
Coding View
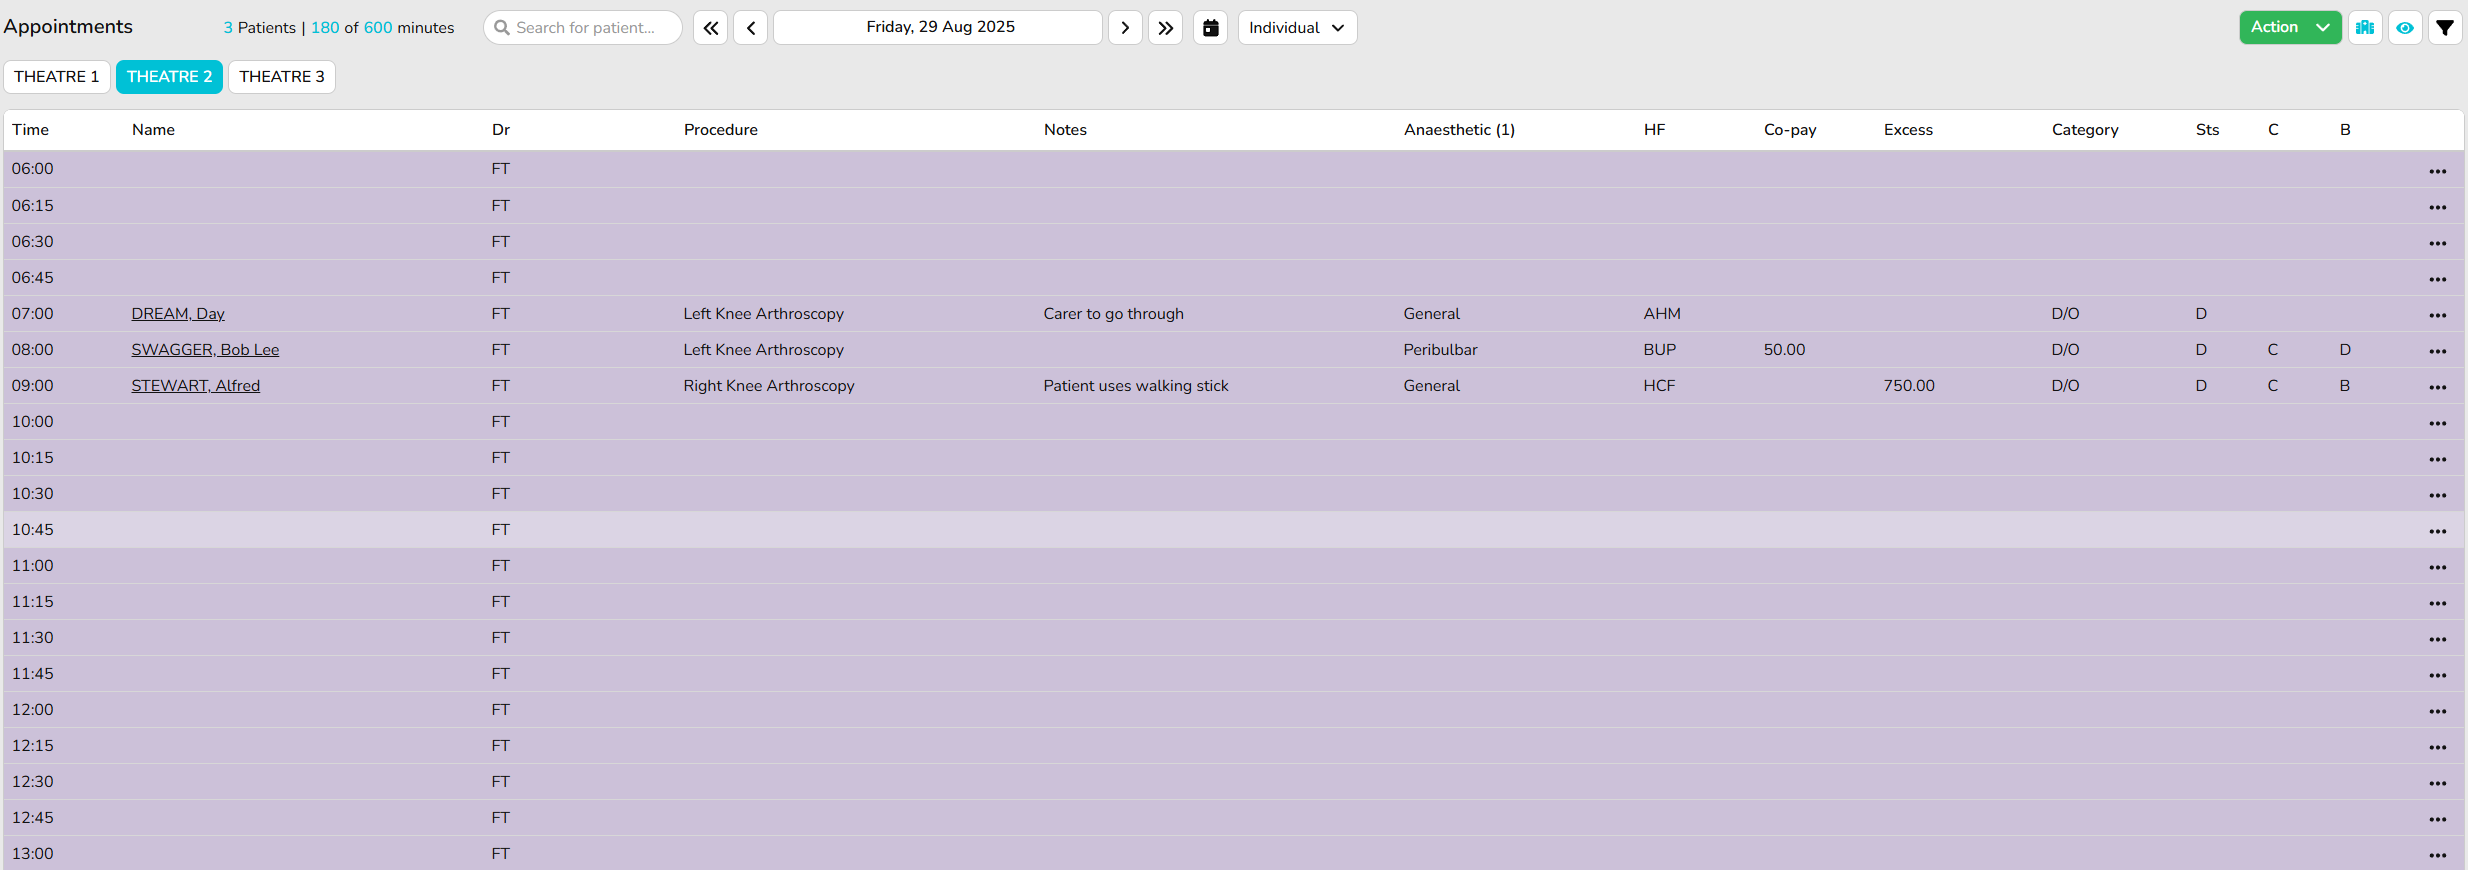
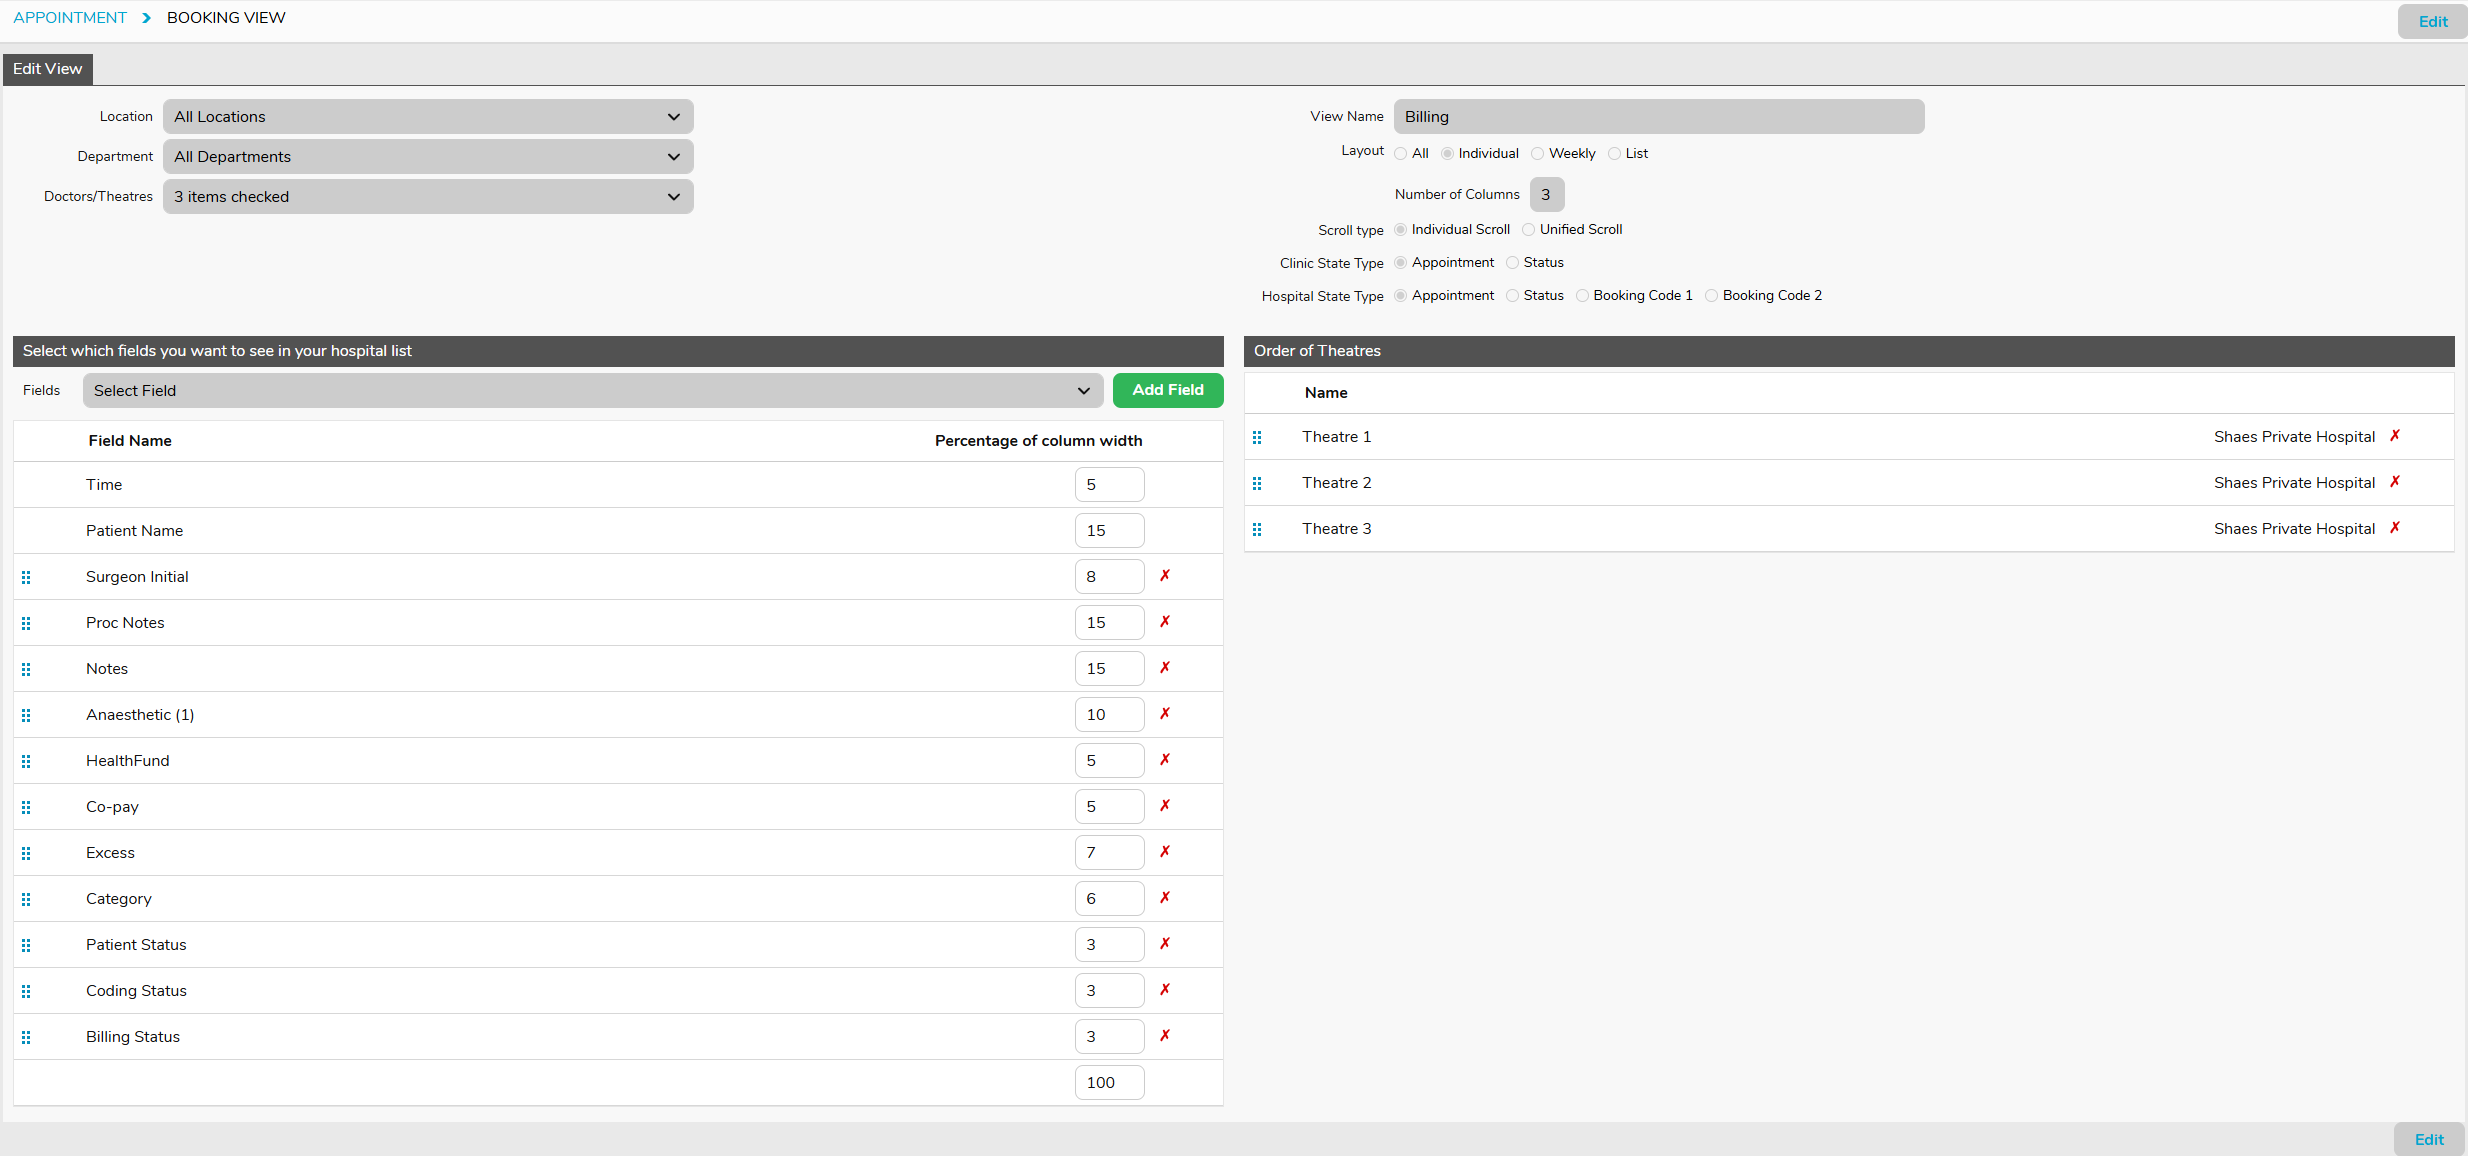
Billing View
Hospital Coding
Once the episode is complete it is required to be Coded. The episode needs to be Admitted for the Coding Screen to be made available. FYDO integrates with TurboGrouper & utilising this program, along with FYDO will result in a seamless coding & grouping process.
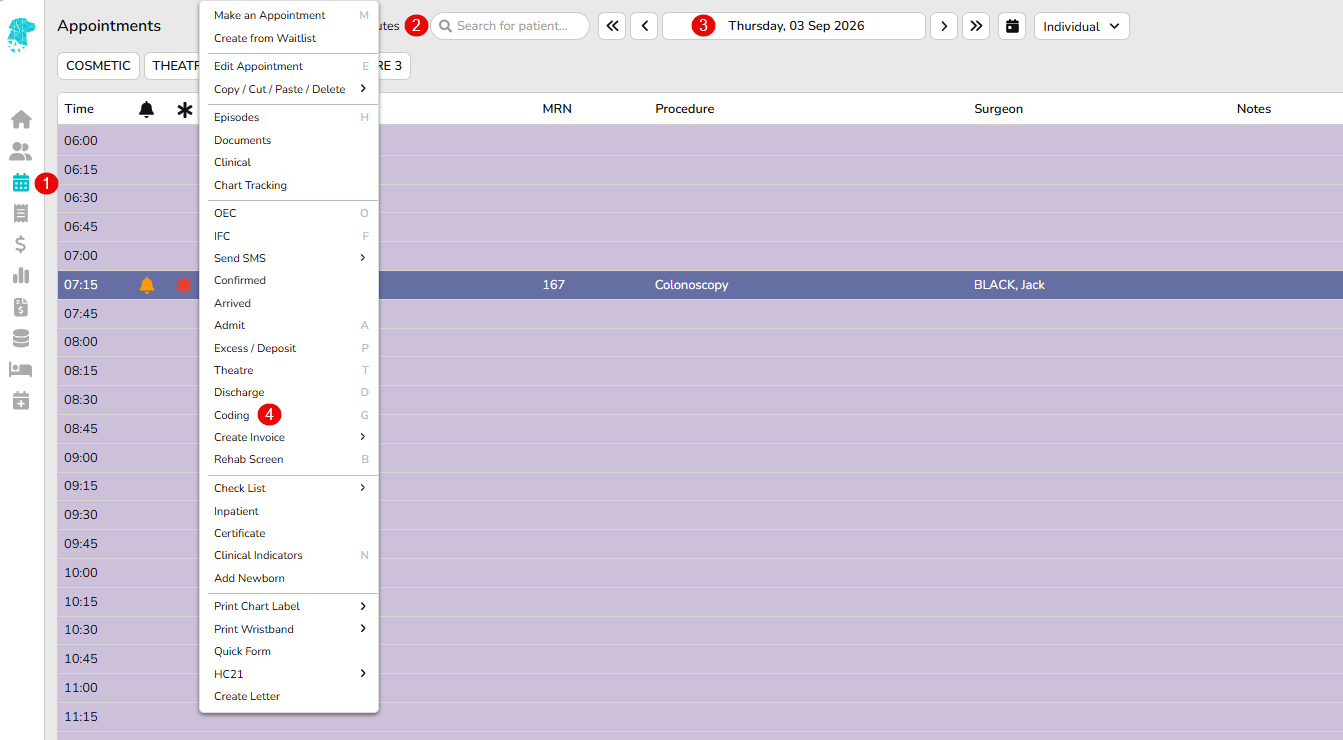
The Coding Screen can be located by navigating to the Appointments Screen
Use the Search feature to find a specific patient or
Use the Calendar to view a specific date
Once the episode has been located, use the Right-Click Menu to select Coding (Or use the Fast Key ‘g’)
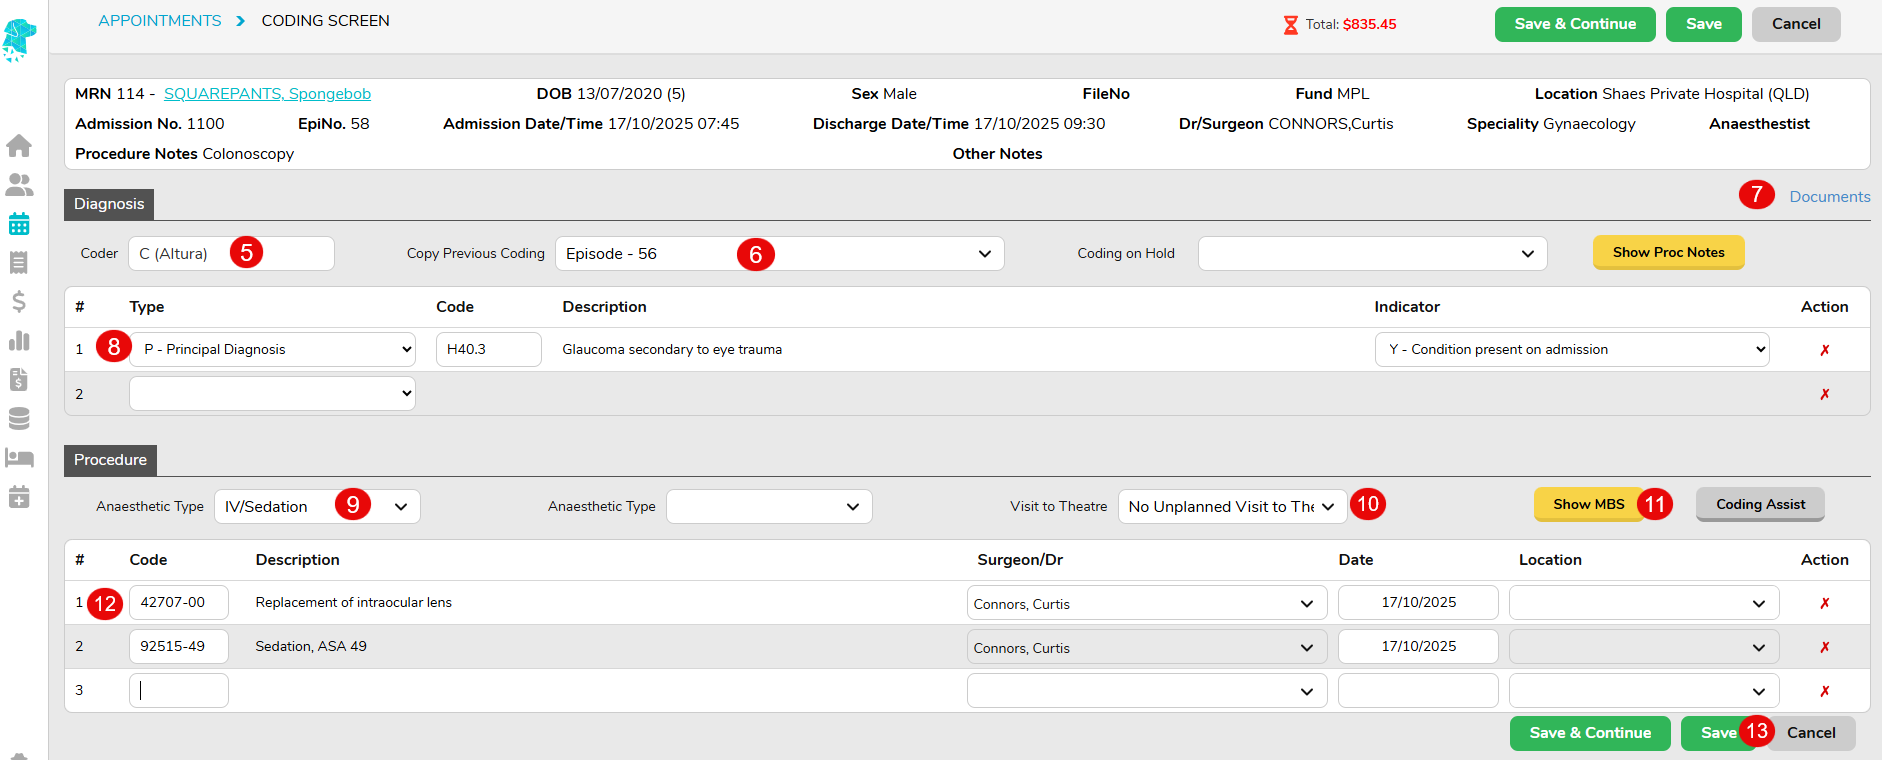
The Coder field will automatically populate with the current user’s name
Copy Previous Coding will populate all fields according to a previous admission (This feature is especially handy when a patient has reoccurring admissions for the same procedure)
Documents will open a new tab, allowing the user to view scanned documents while coding. EMR will also be displayed here if the facility has one linked.
When a Diagnosis Codes is added, a new line will display below to enter the next code (This field searches Codes or Descriptions) The Type & Indicator can be selected for each individual line
Anaesthetic Types are populated from the Edit Appointment Screen and can be edited if necessary (Any changes made here will be reflected in the Edit Appointment Screen)
Visit to Theatre is populated from the Discharge Screen and can be edited if necessary (Any changes made here will be reflected in the Discharge Screen)
Show MBS allows the user to hover over the button to display the MBS items that have been entered into the Theatre Screen (If these items need to be amended the user will need to navigate to the Theatre Screen)
When a Procedure Code is added, a new line will display below to enter the next code (This field searches Codes or Descriptions)
Once all required data has been entered click Save. Or utilise the Save & Continue button thorough the coding process to save the progress as you go along.
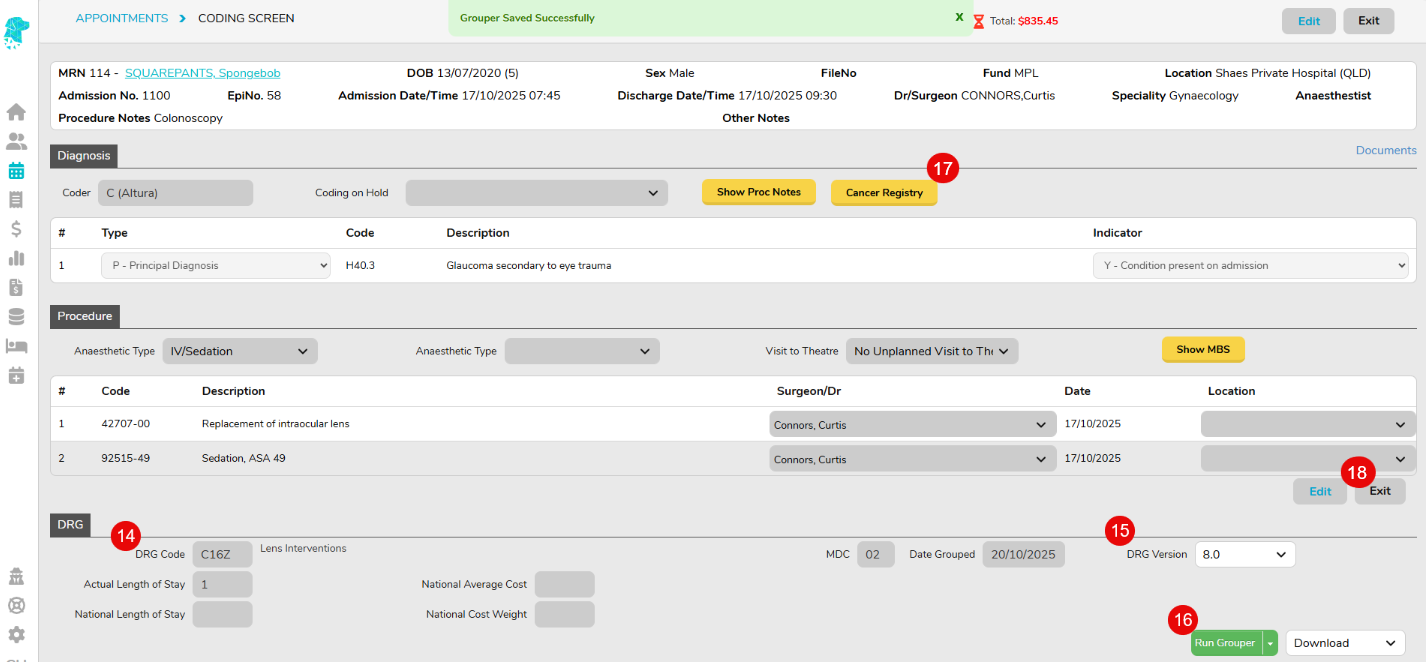
Once the coding has been saved the user will be able to obtain the DRG by running the Grouper (if TurboGrouper is installed)
Ensure the correct DRG Version is selected (A default DRG Version can be set up for each fund in Settings > Health Funds which will then populate in this field)
Click Run Grouper. This will complete the DRG Code field, the MDC field & the Date Grouped field
If required, you can then select Cancer Registry and enter all applicable details.
Once complete click Exit to return to the appointments screen
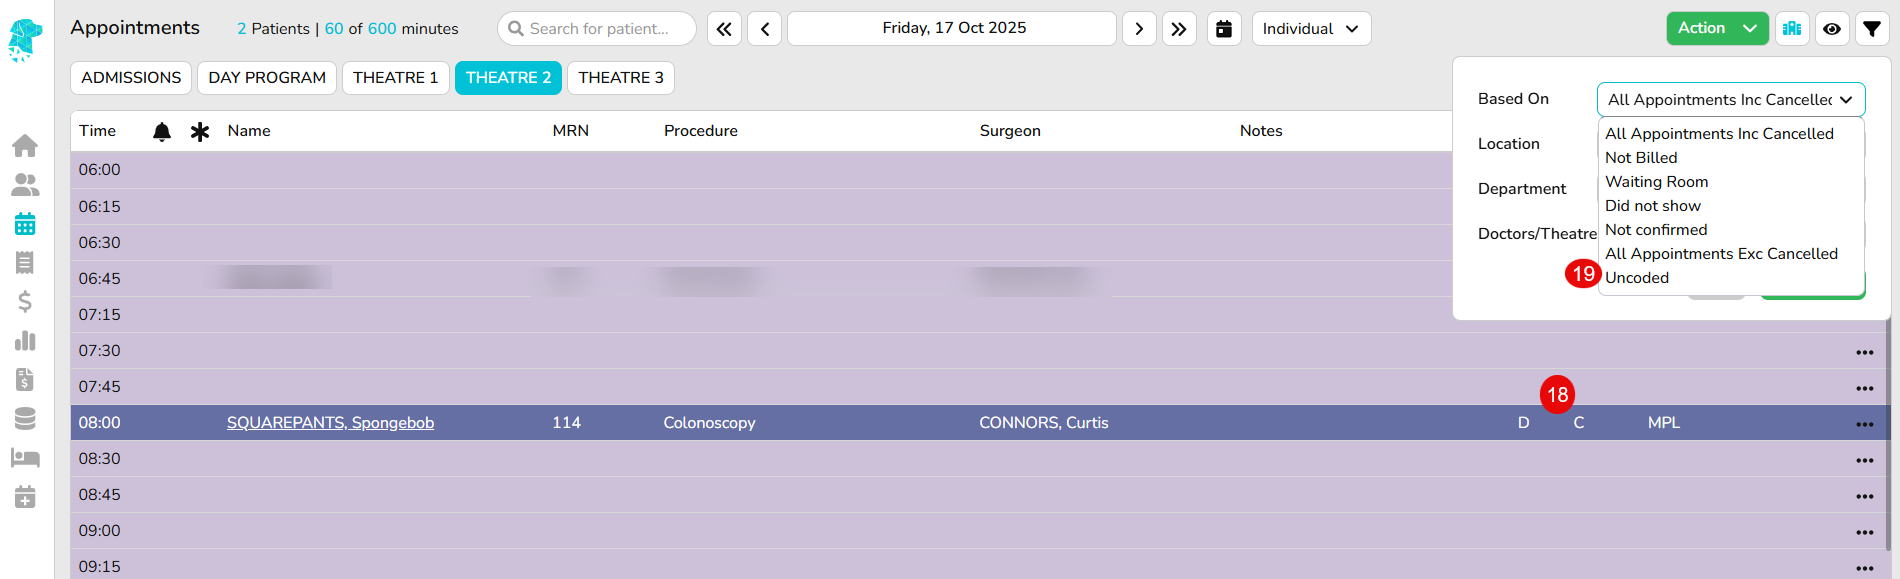
The episode will now display a “C” to identify that it has been coded
Users are also able to use the Filter dropdown to view Uncoded episodes only
How to Find Your Minor ID
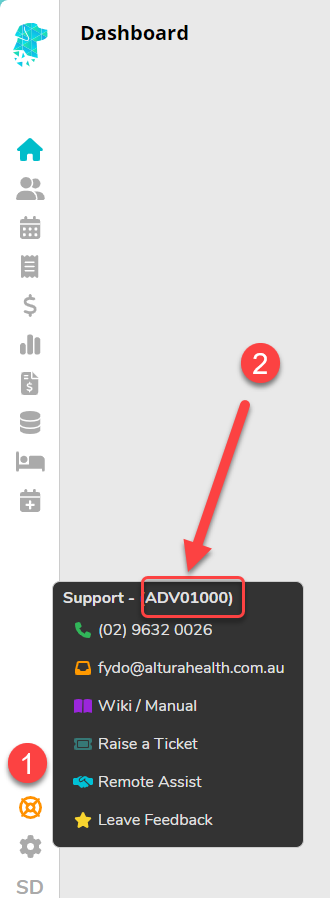
The minor ID, also referred to as the Location ID, will sometimes be required by Medicare. It is the same as your ADV client number. Here’s how to find it in FYDO:
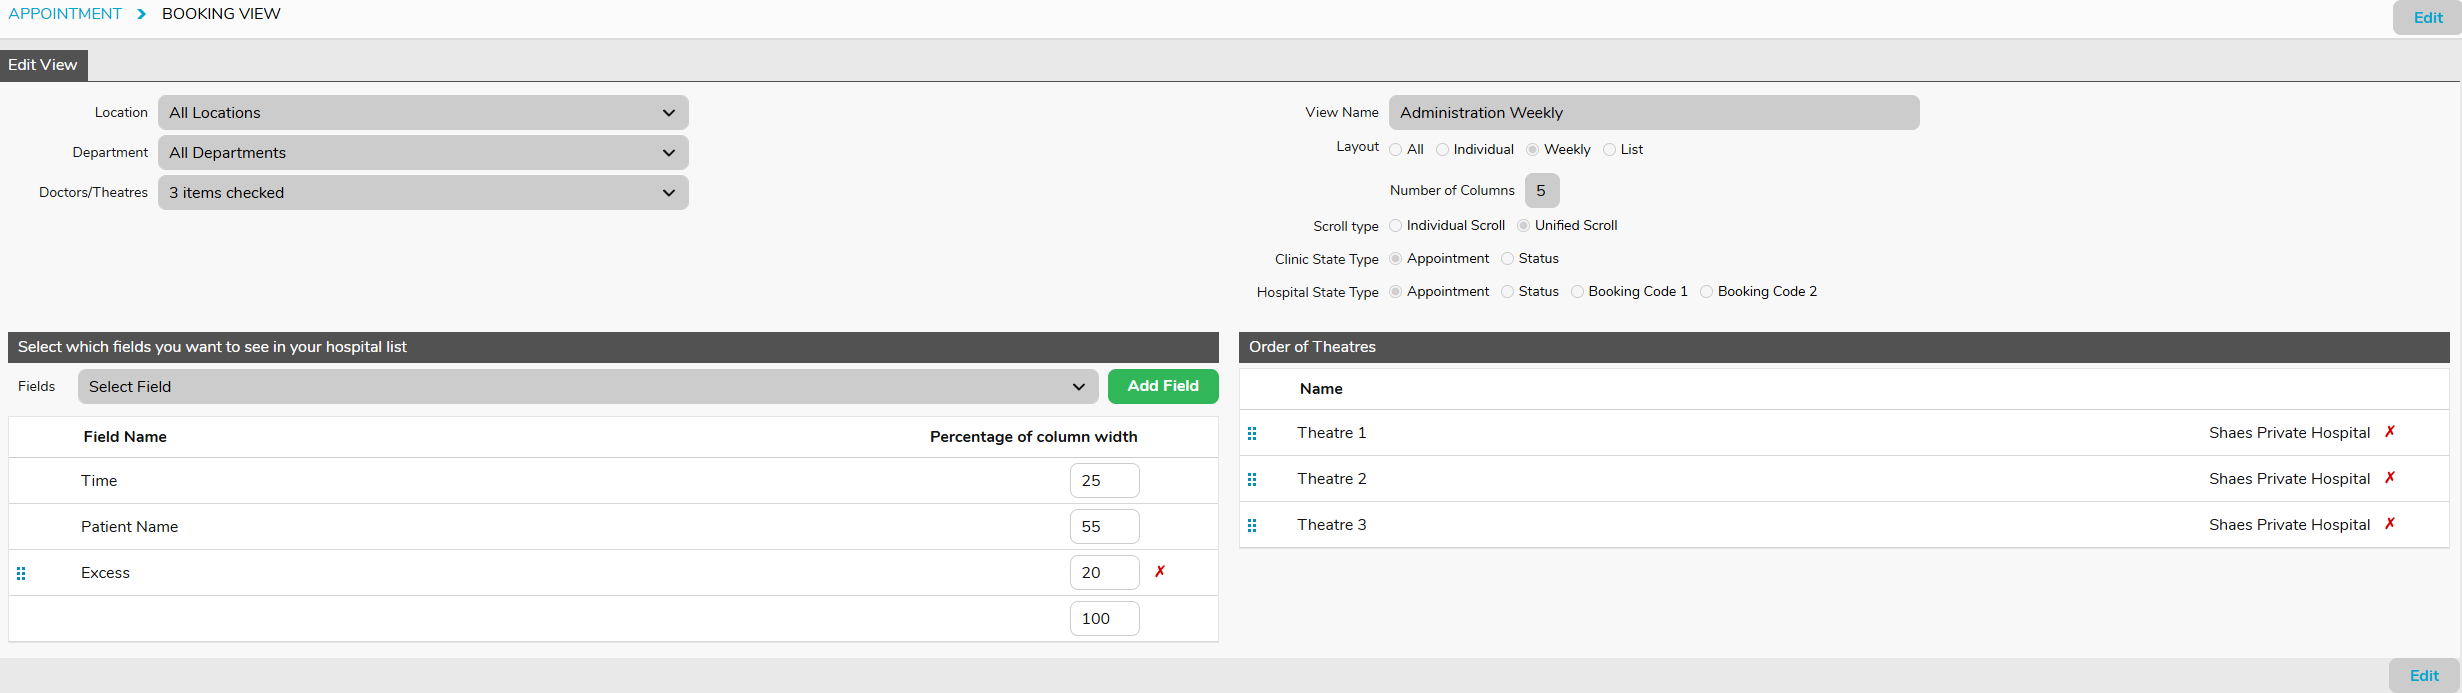
FYDO gives users the ability to customise the Appointments Screen to allow them to view the information that is important to their role. This assists in workflow & efficiency & allows users to view different information depending on the task that they are undertaking. All custom views that are created for each facility are available to all users. Each user is then able to select their favourite view to open as their default. These instructions will provide ideas for different views & the set up required to accomplish them. For further details on how to create custom views please see the page on Creating Custom Views
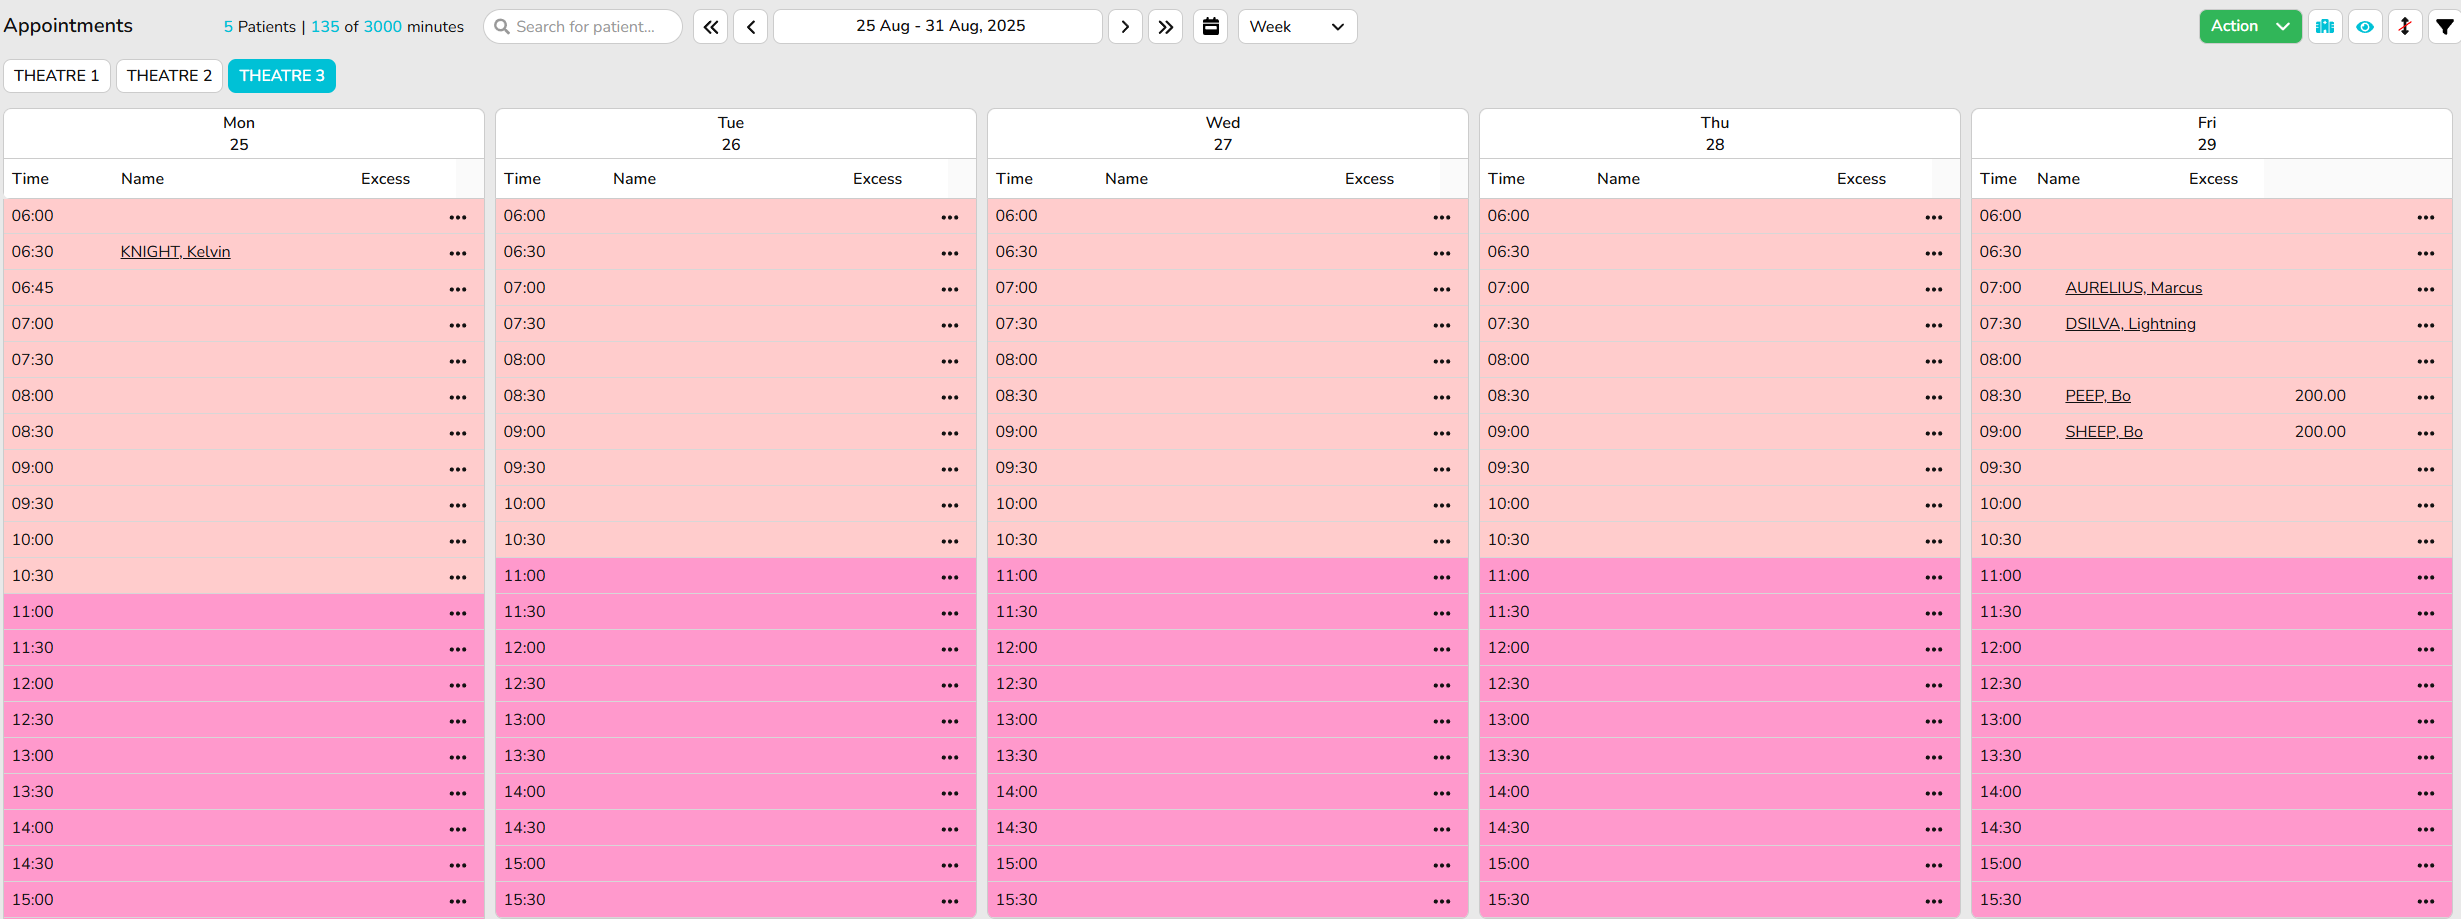
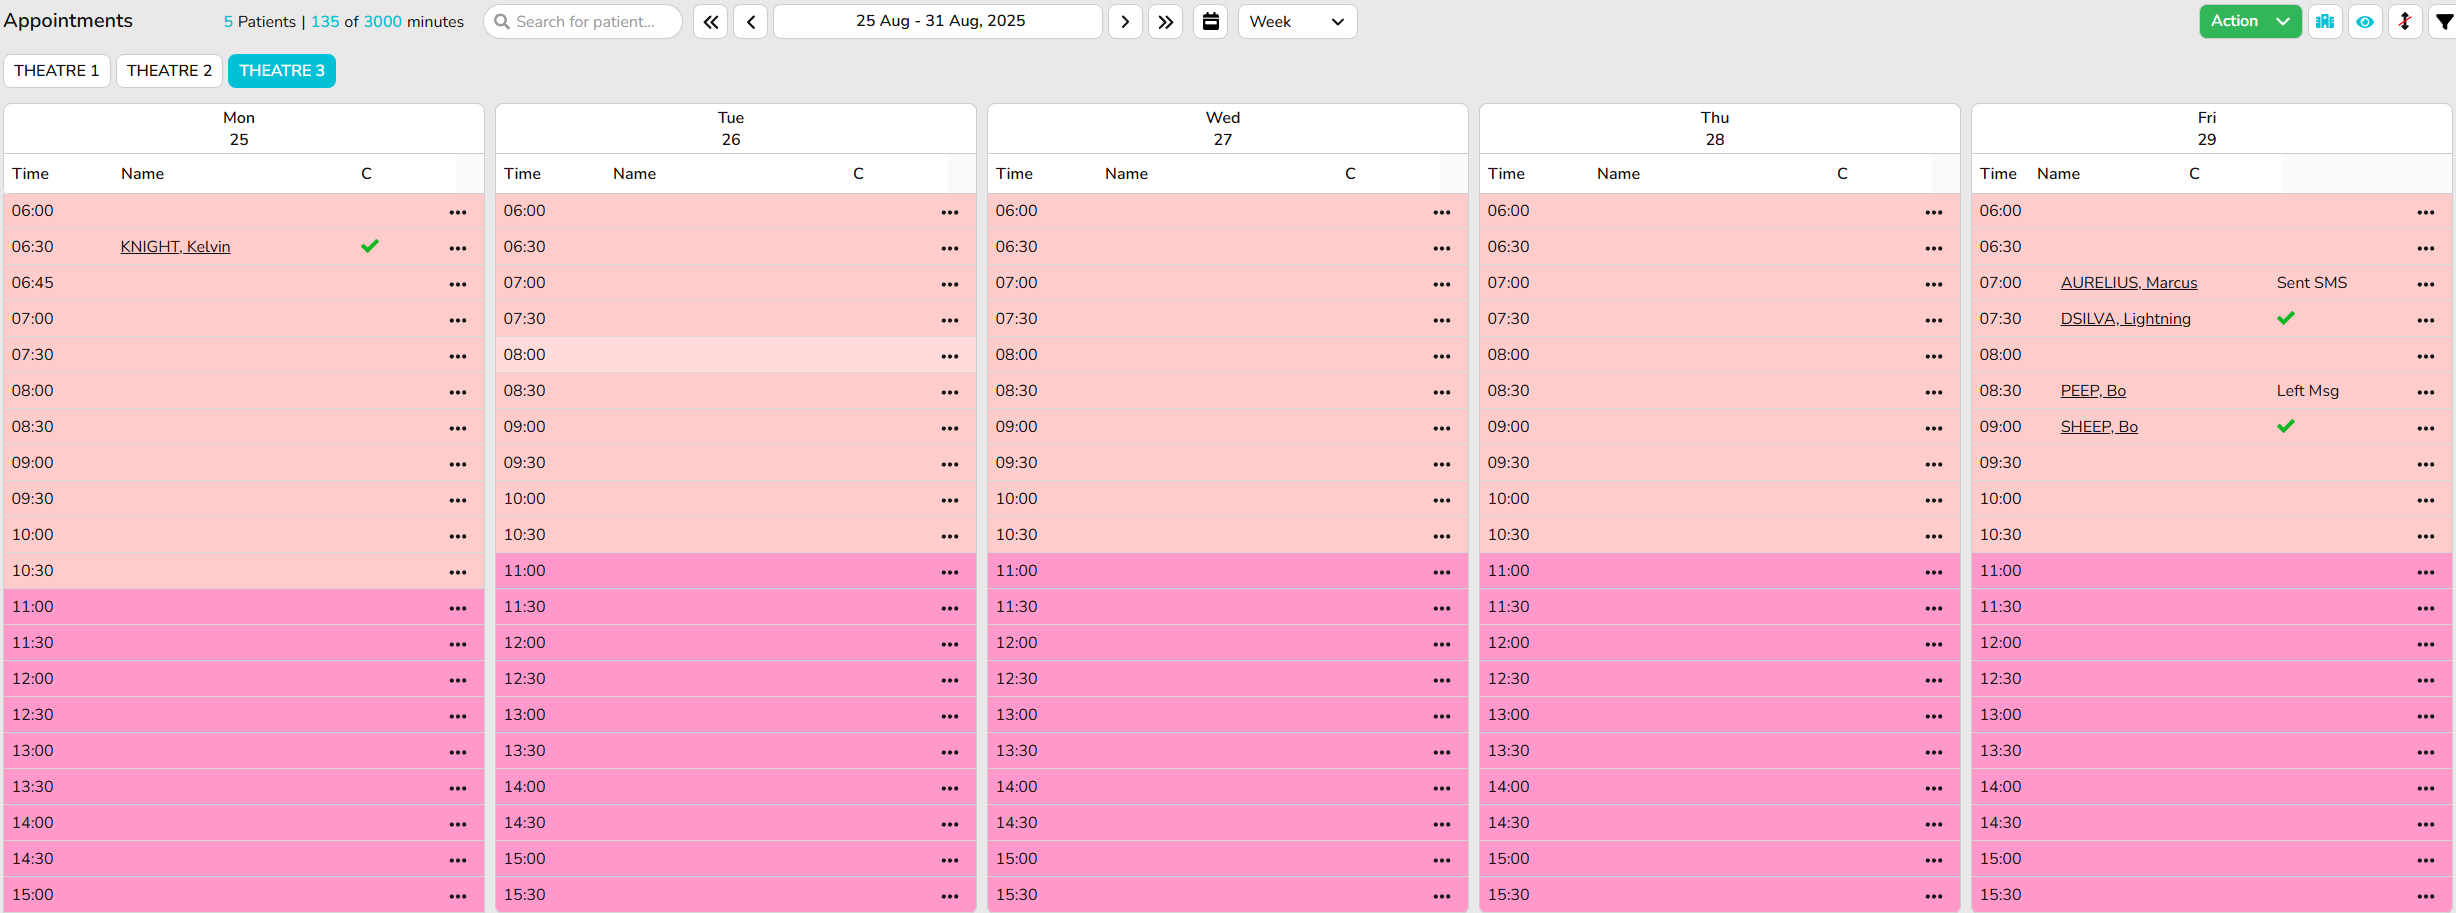
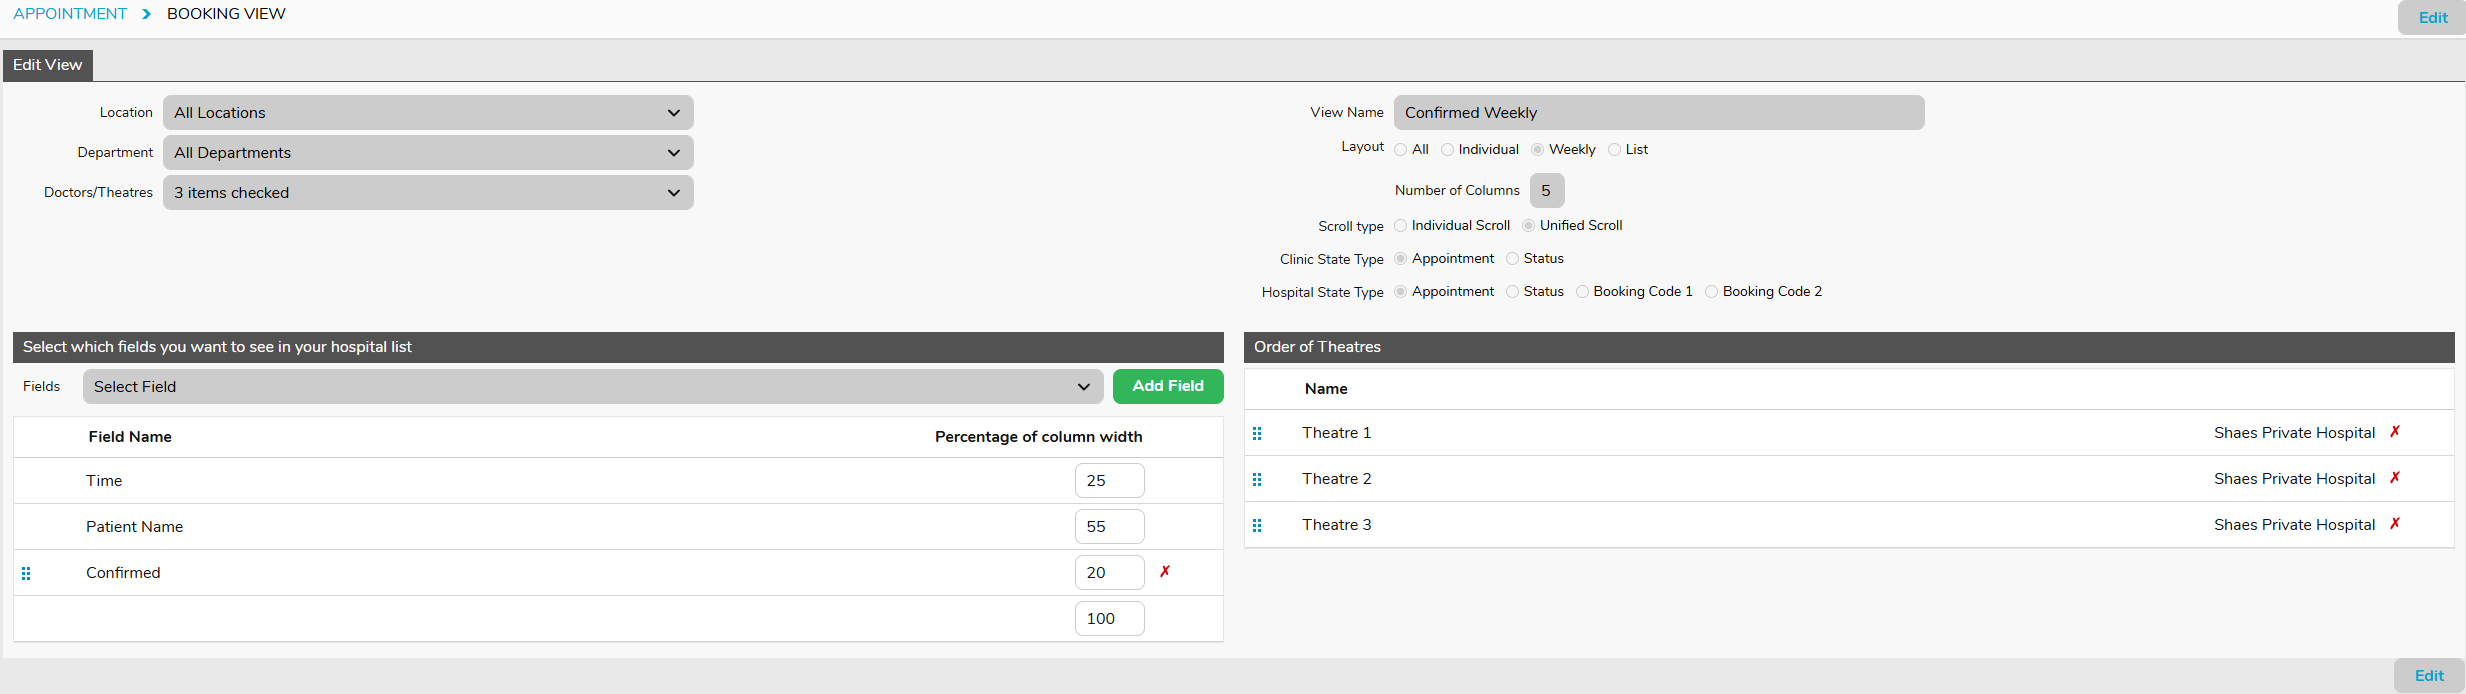
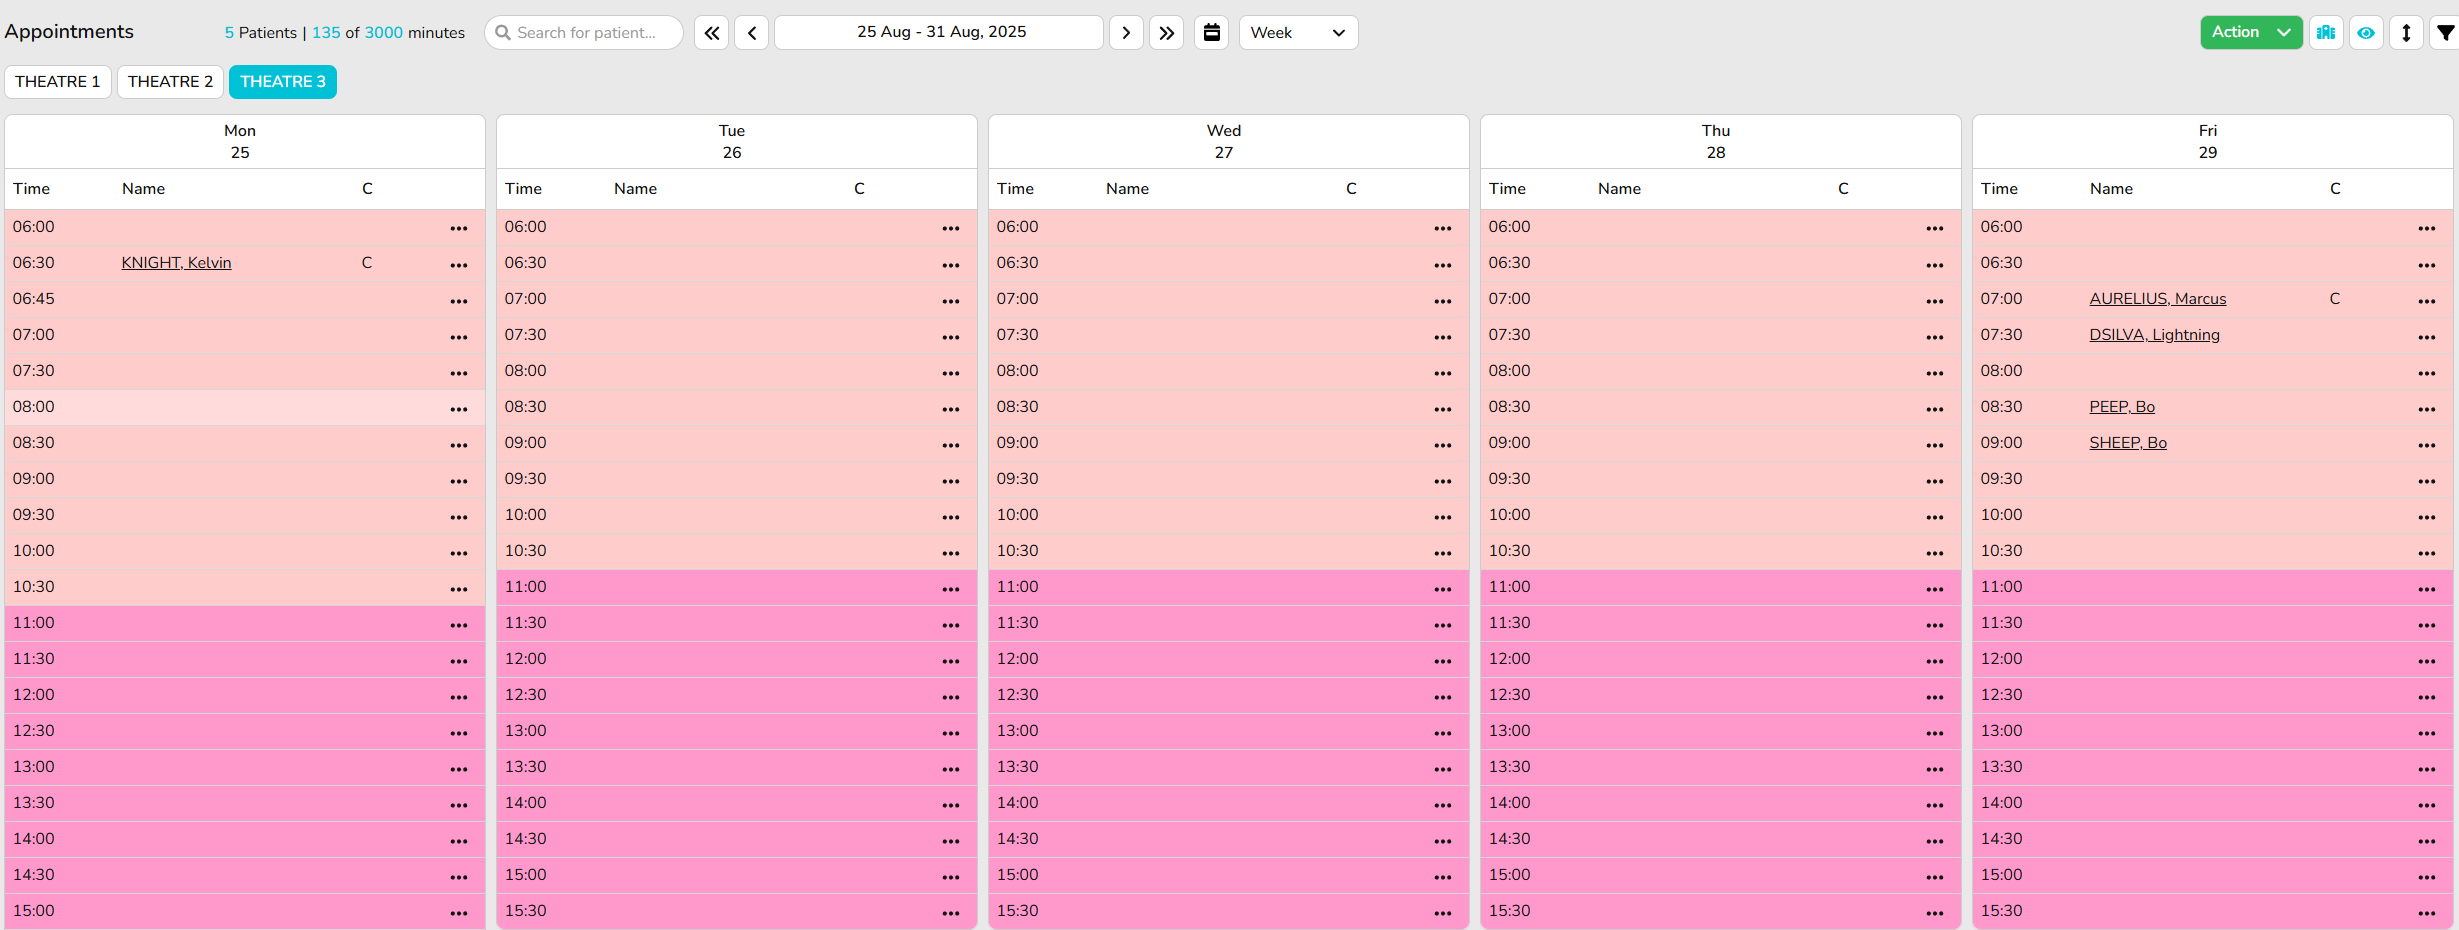
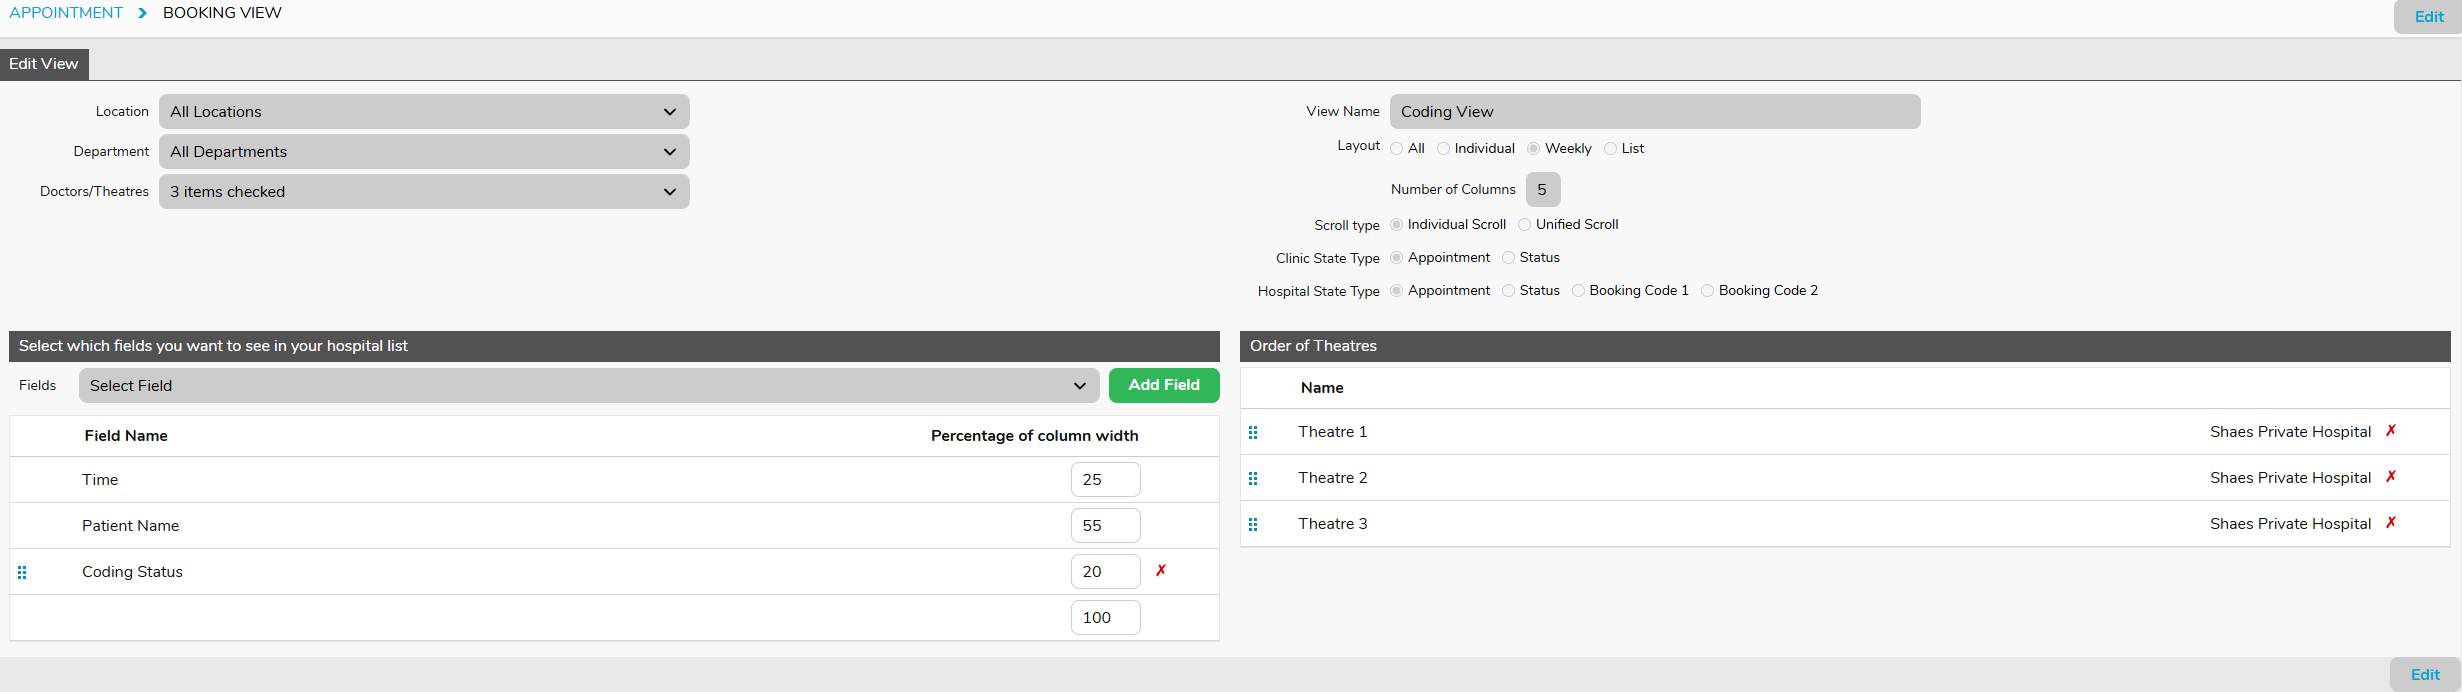
Included below are examples of Weekly View ideas. Please see our other pages on Individual & All View ideas for those view types.
Administration View
Confirmed View
Coding View
List Re-Ordering Feature (Session Priority)
FYDO allows users the ability to re-order lists with a fabulous feature that resembles the SimDay function Session Priority. This feature allows users to easily re-order patients’, move all patients’ appointments up at once (in the case of a cancellation) and set appointment times according to each appointment length. This feature will work from the admission time of the FIRST patient on the list. It will then slot all other patients’ into their corresponding admission times, according to the appointment lengths. The difference with using the List Re-Ordering feature is that it allows users to easily move a patients’ appointment up or down the list & will shuffle the other patients’ admission times to accommodate. Whereas other methods of moving appointments do not impact the admission times of any other patients.
To utilise this function, navigate to the Appointments Screen and locate the list that you wish to change.
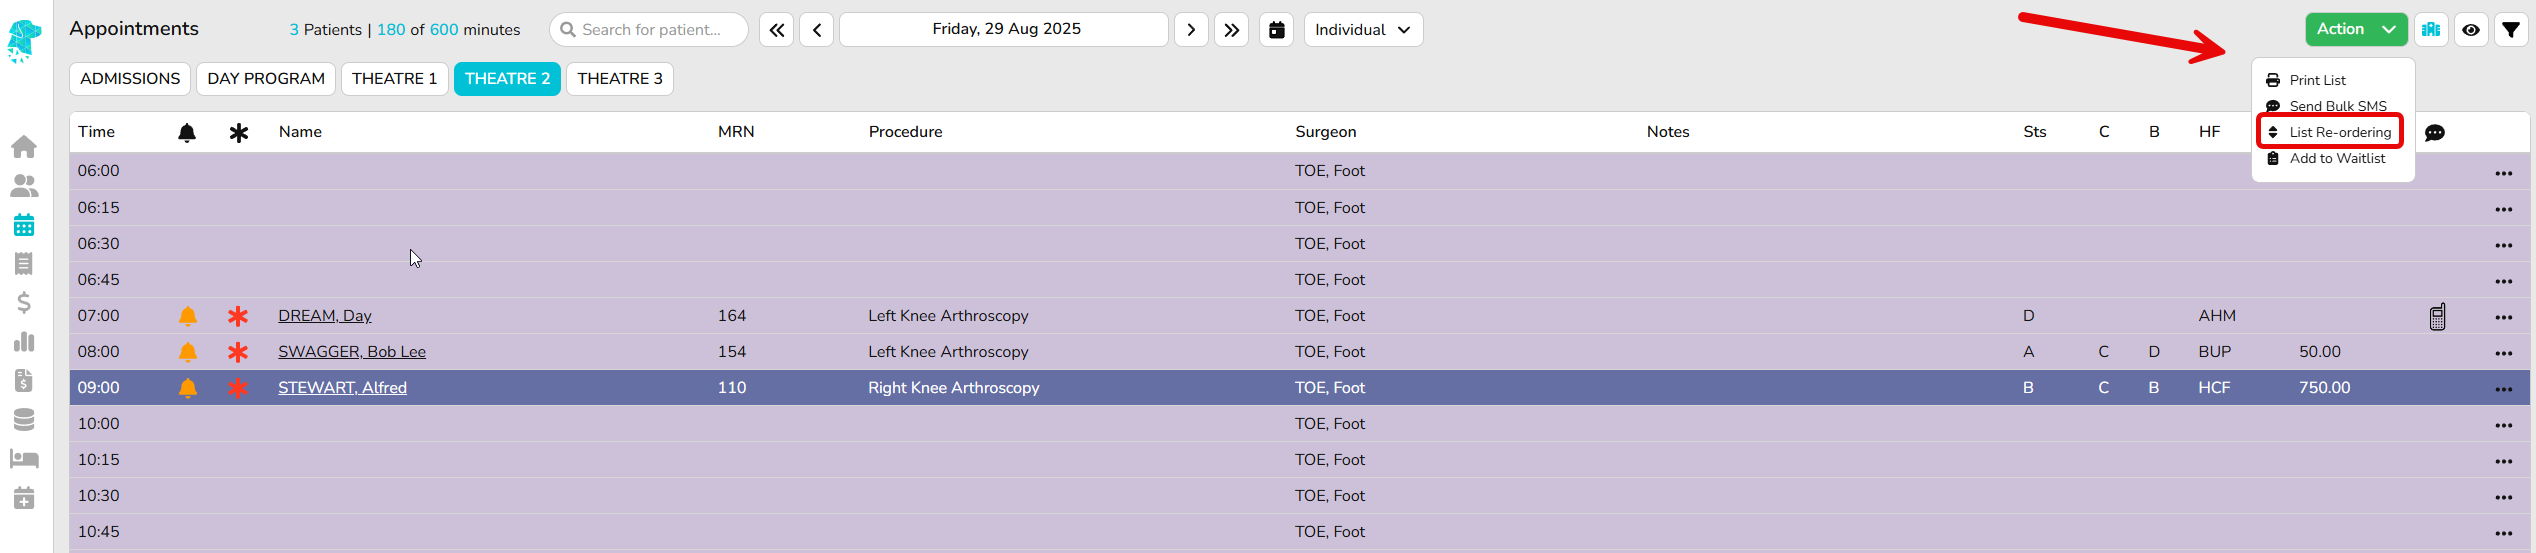
Select an appointment in the required session & use the Select the Action dropdown & click on List Re-Ordering.
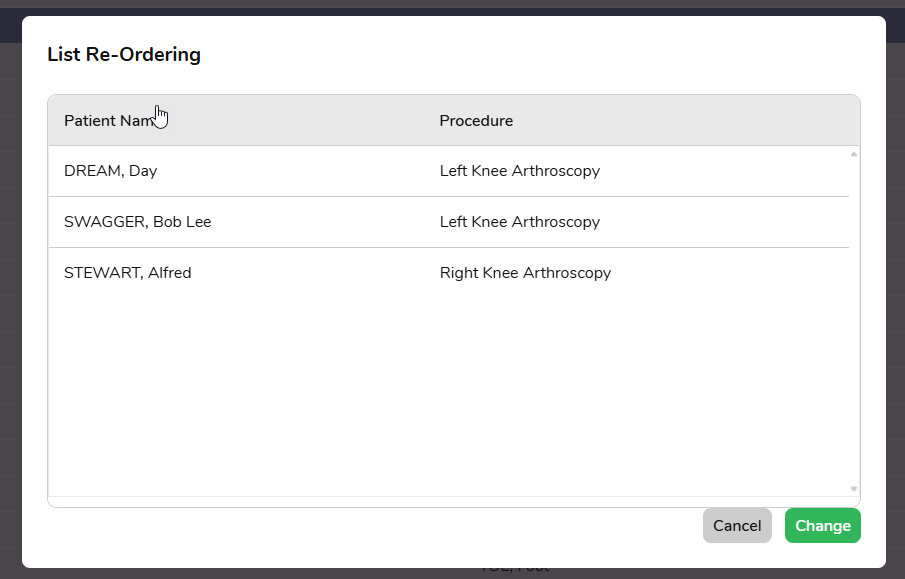
This will display a pop-up box that allows you to drag patients up or down the list.
If you do not wish to change the order of the list, and only wish to move all patients up after a cancellation, then simply open the pop-up box & click Change. This will move all patient’s appointment times up the list.
You will notice in the below video that we used the Procedure to sort the patients & once we clicked Change, FYDO also filled in the gaps that were left from cancelled appointments.
Sending Bulk SMSs
FYDO allows you to contact patients via SMS to assist in efficient workflow. These can be sent one at a time or to a whole list of patients. The system gives the ability to pre-populate the SMS with information regarding the admission/episode e.g., date of admission, time of admission, health fund excess amount etc
Use these instructions if you would like to send a Bulk SMS to a number of patients at once:
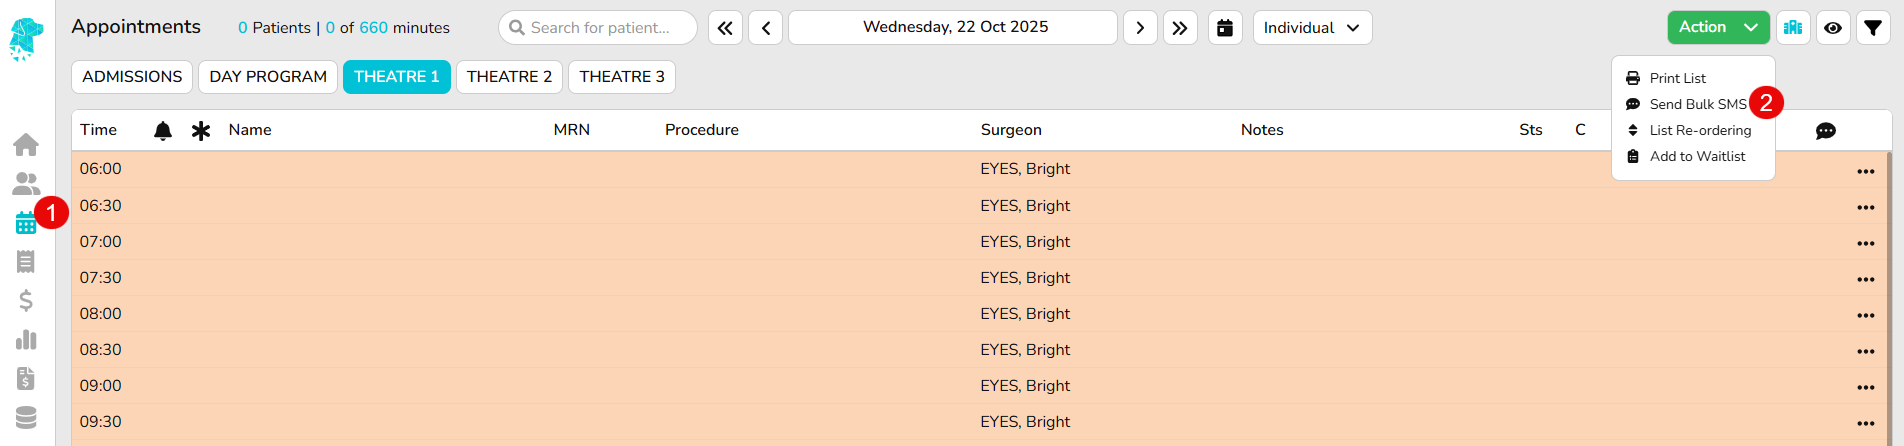
Open the Appointments Screen & navigate to the required date & theatre
Use the Actions dropdown on the right of the screen to select Send Bulk SMS
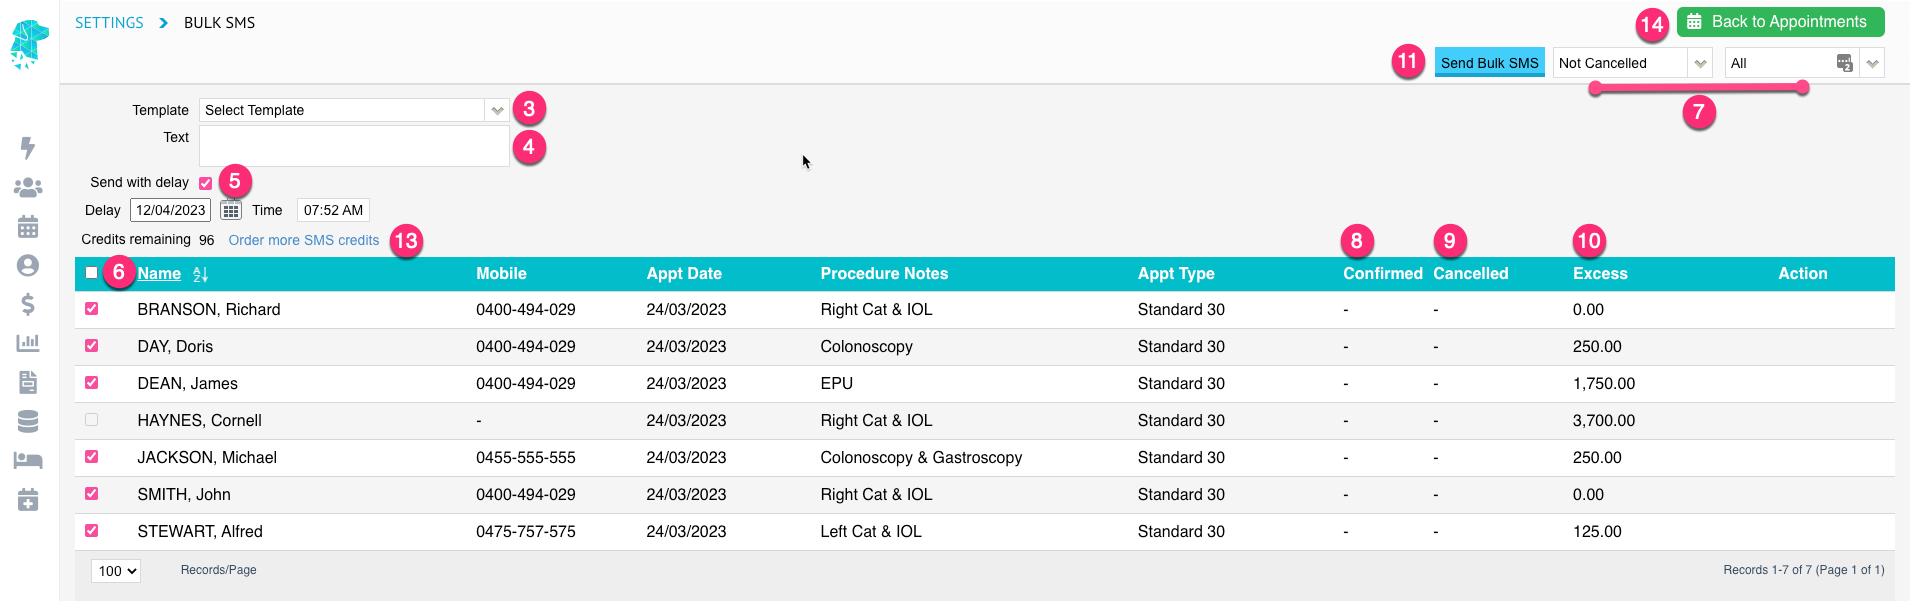
Use the Template dropdown box to select from the preloaded SMS templates in your system (For help with customising these contact Altura Health or visit https://wiki.fydo.cloud/sms-templates/)
Or free type in the Text box to customise the text message
The Send with delay tick box allows the text to be scheduled for a later date & time. If this feature is being utilised enter the Date & Time that the text will be scheduled to send. However, there is no need to use this feature if the text is intended to be sent in real time
All patients with a valid mobile phone number will be selected by default. Use the tick box at the top of the column to easily select or de-select all patients’ at once. Or use the tick box for each patient to individually select or de-select
Use the drop-down boxes in the top right to assist in filtering to the desired patient demographics
Confirmed gives information regarding previous SMSs sent. To assist in determining if they still require an SMS
Cancelled gives information regarding the patients’ cancelled status. However, the screen opens to show Not Cancelled patients’ only. This column is only relevant if the filter has been set to include the cancelled patients’, using the drop-down boxes in #13
The Excess column displays the amount that has been entered into the Excess field of the patients episode
Once all relevant information has been completed, & all desired patients’ have been selected, click Send Bulk SMS
You will be asked to confirm that you wish to send the SMS, click Yes
The Credits Remaining on the account are displayed on the screen & once the credits get low use the Order more SMS credits option on this screen to be re-directed to the Order SMS Credits screen where you can follow the prompts
Back to Appointments button returns the user to the appointments screen
Once the patient has been sent an SMS there will be a visual cue on the Appointments screen. The icon will change depending on the status of the SMS sent. The icons represent the following:
· This icon will display once the SMS has been sent but not yet delivered to the recipient
· This icon will display once the SMS has been delivered
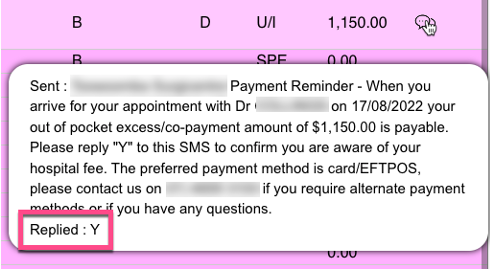
· This icon will display once the recipient has replied
Hover over each of these icons, in the appointments screen, to display the information that the SMS contained. Once a reply has been received it will also be displayed below the message.