MYNT Billing – Guide for Hospitals
This guide has been prepared for FYDO Hospitals that are also MYNT Billing clients.
Invoicing
The MYNT Billing team will invoice your private health fund patients two to three times per week. Please note that this excludes uninsured, third party, Workcover and overseas patients (unless requested).
In order for the MYNT Billing Team to generate invoices, the following steps must be completed by staff at your facility:
- Ensure the Episode Status is Discharged
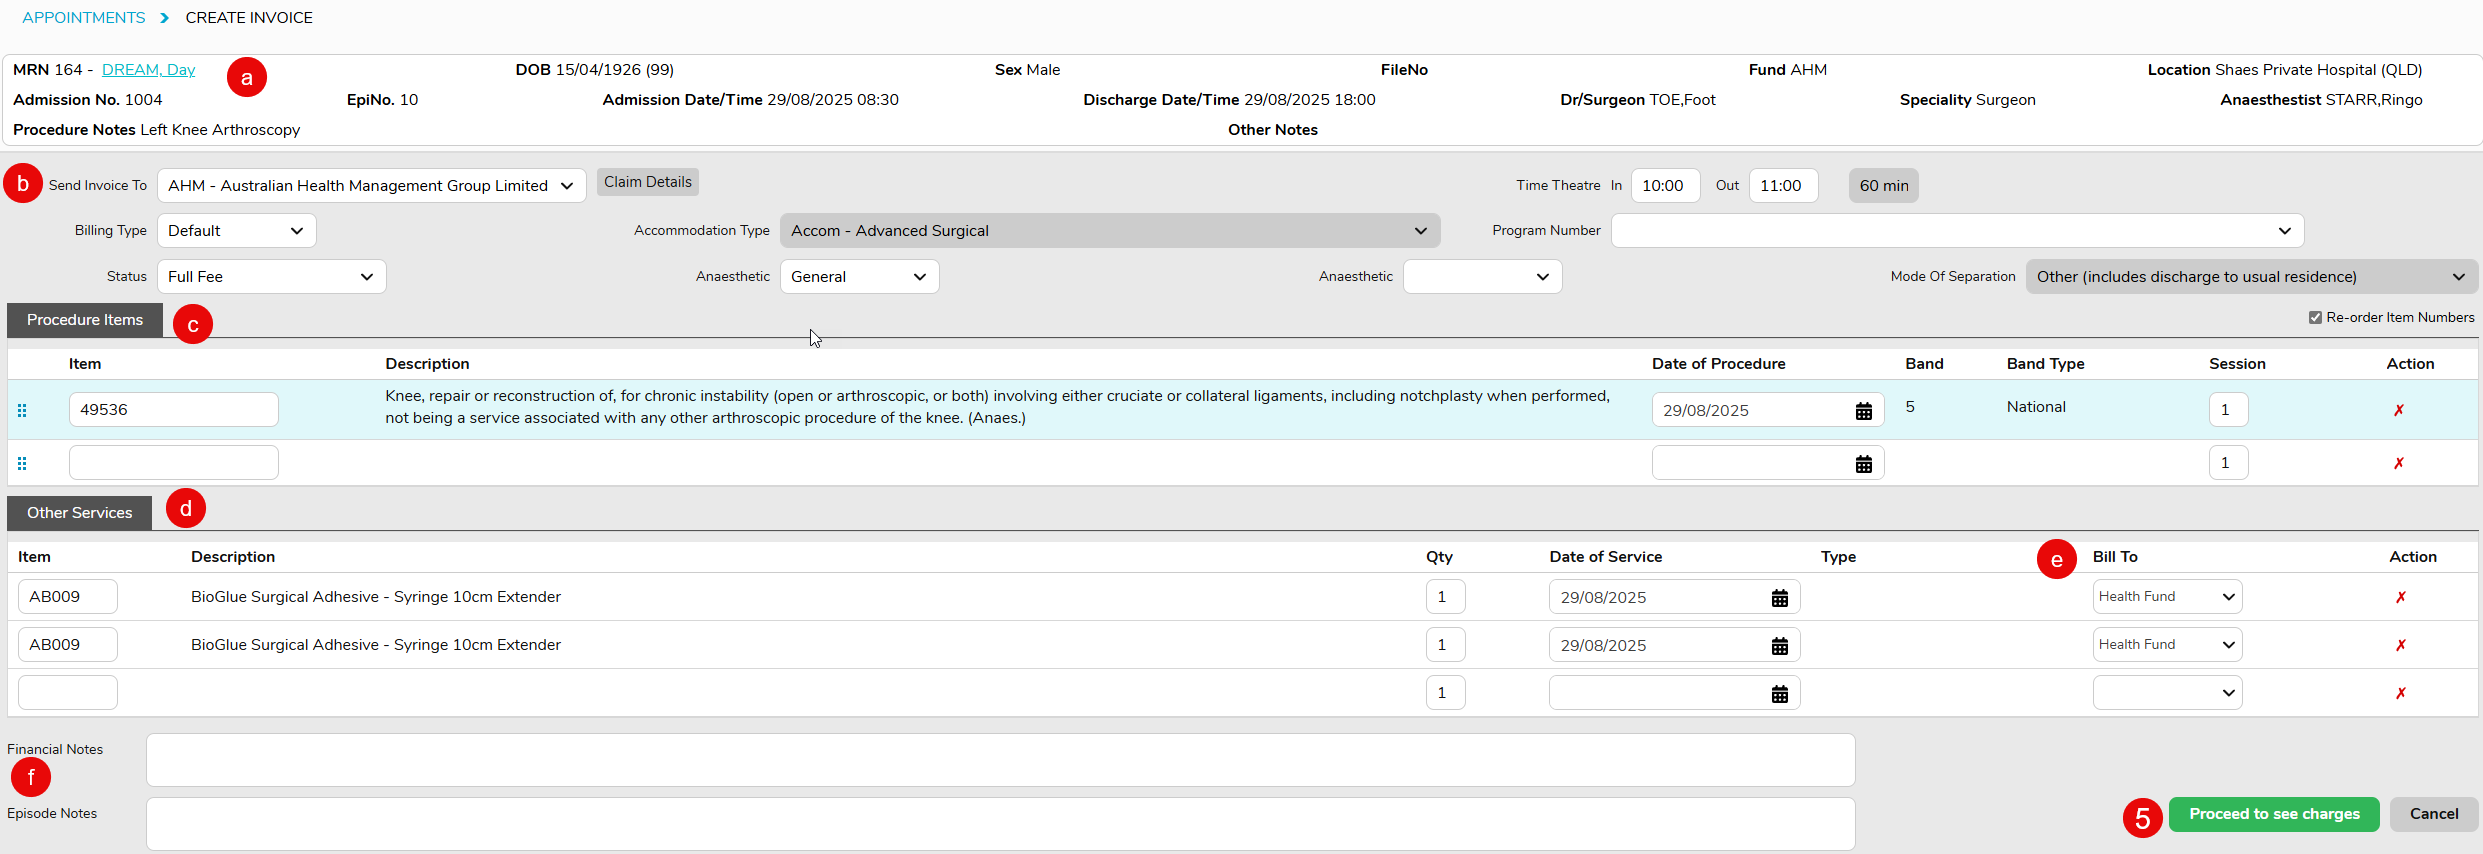
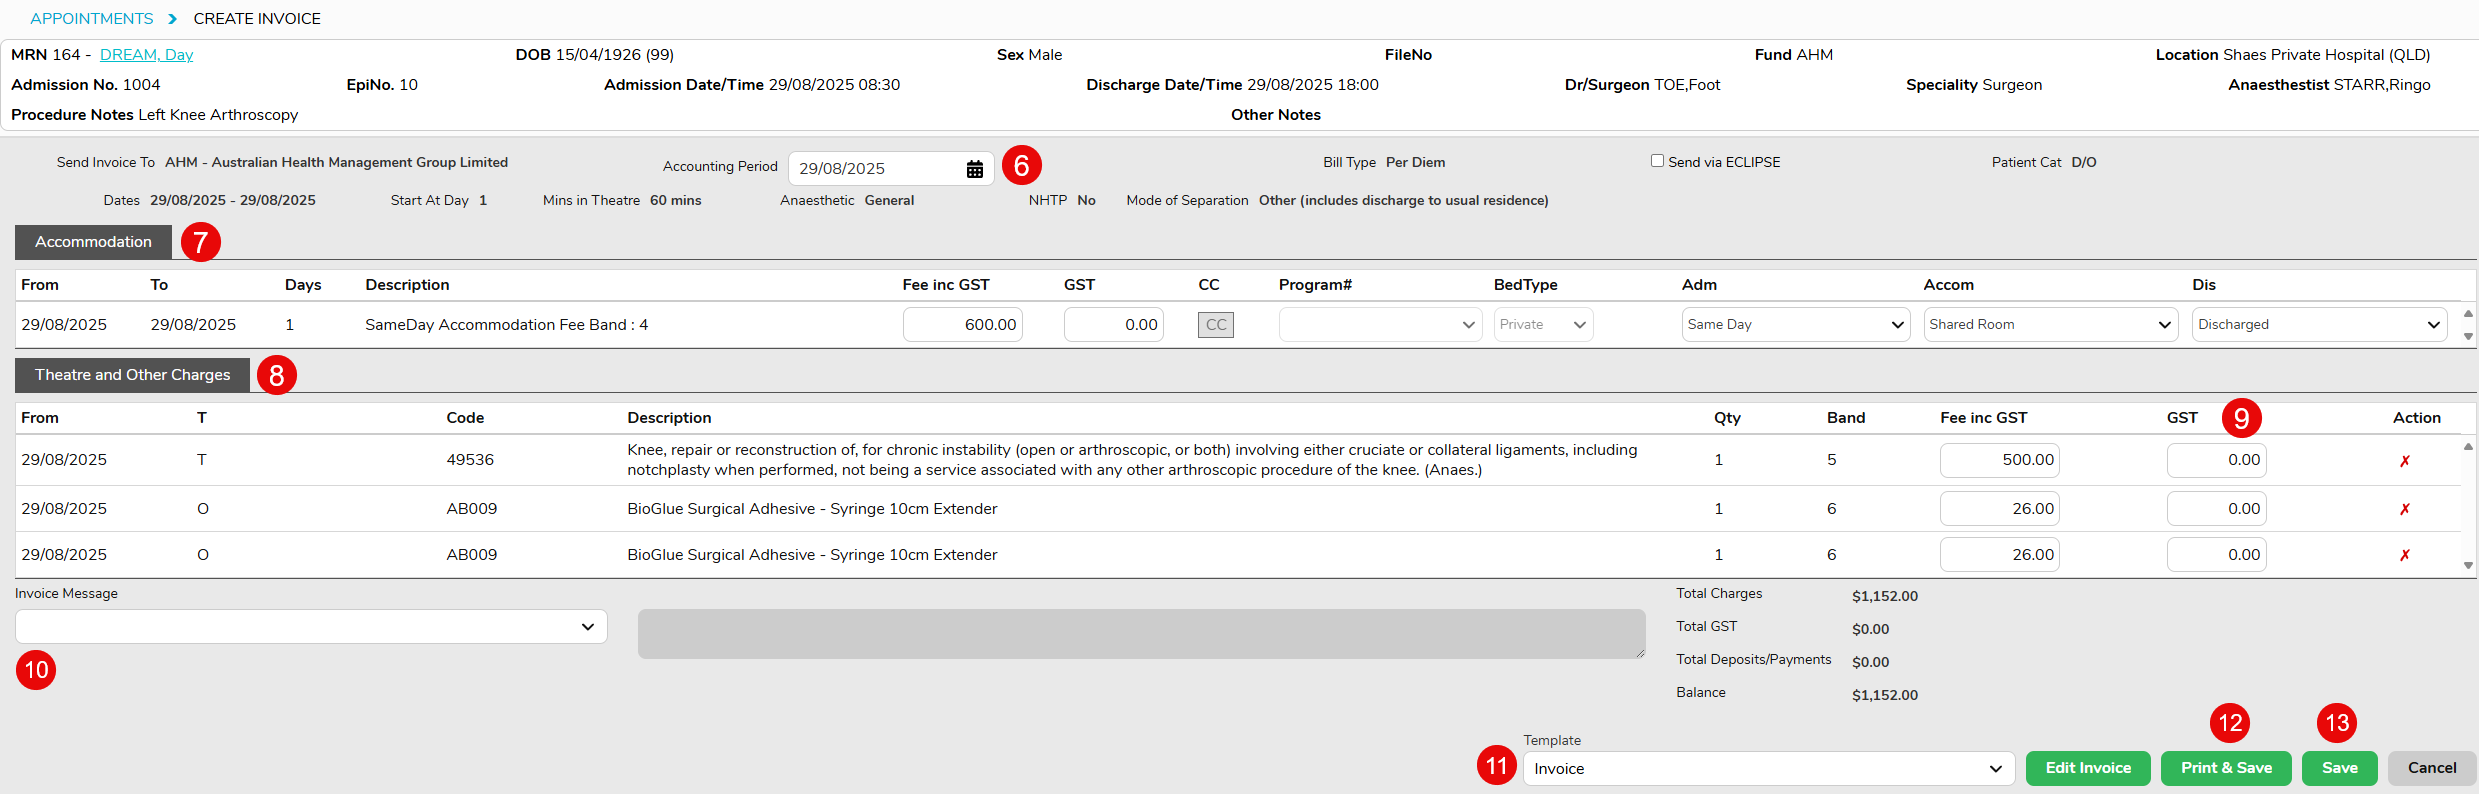
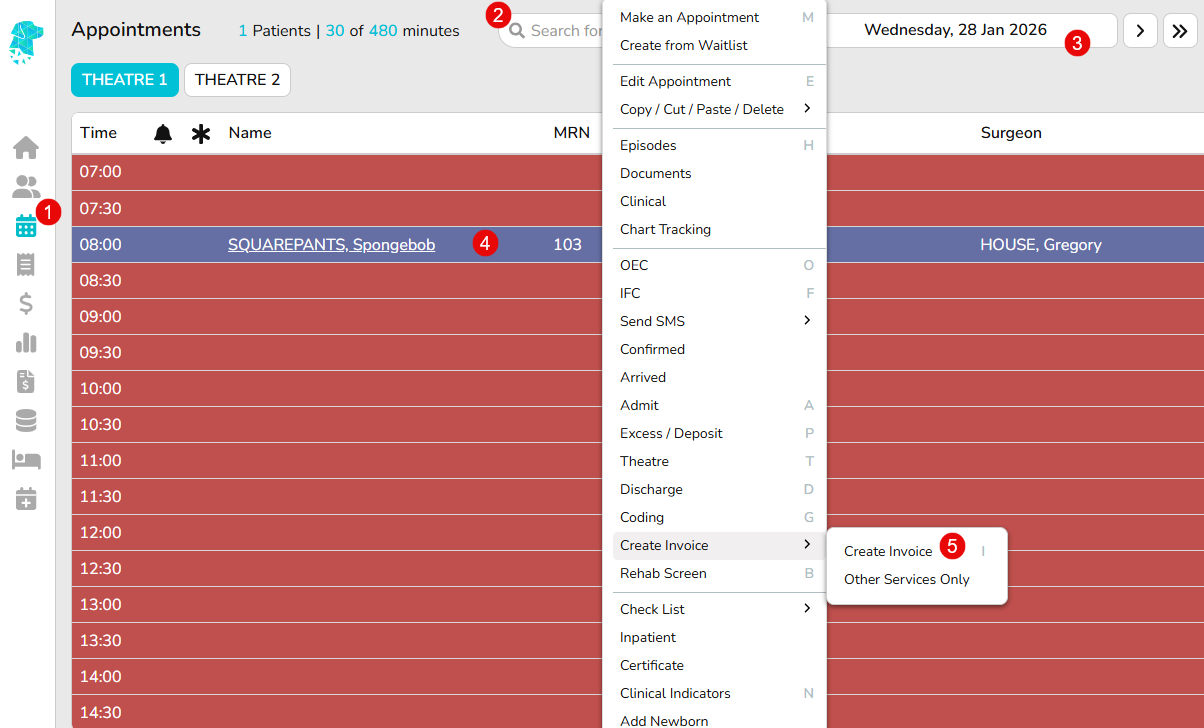
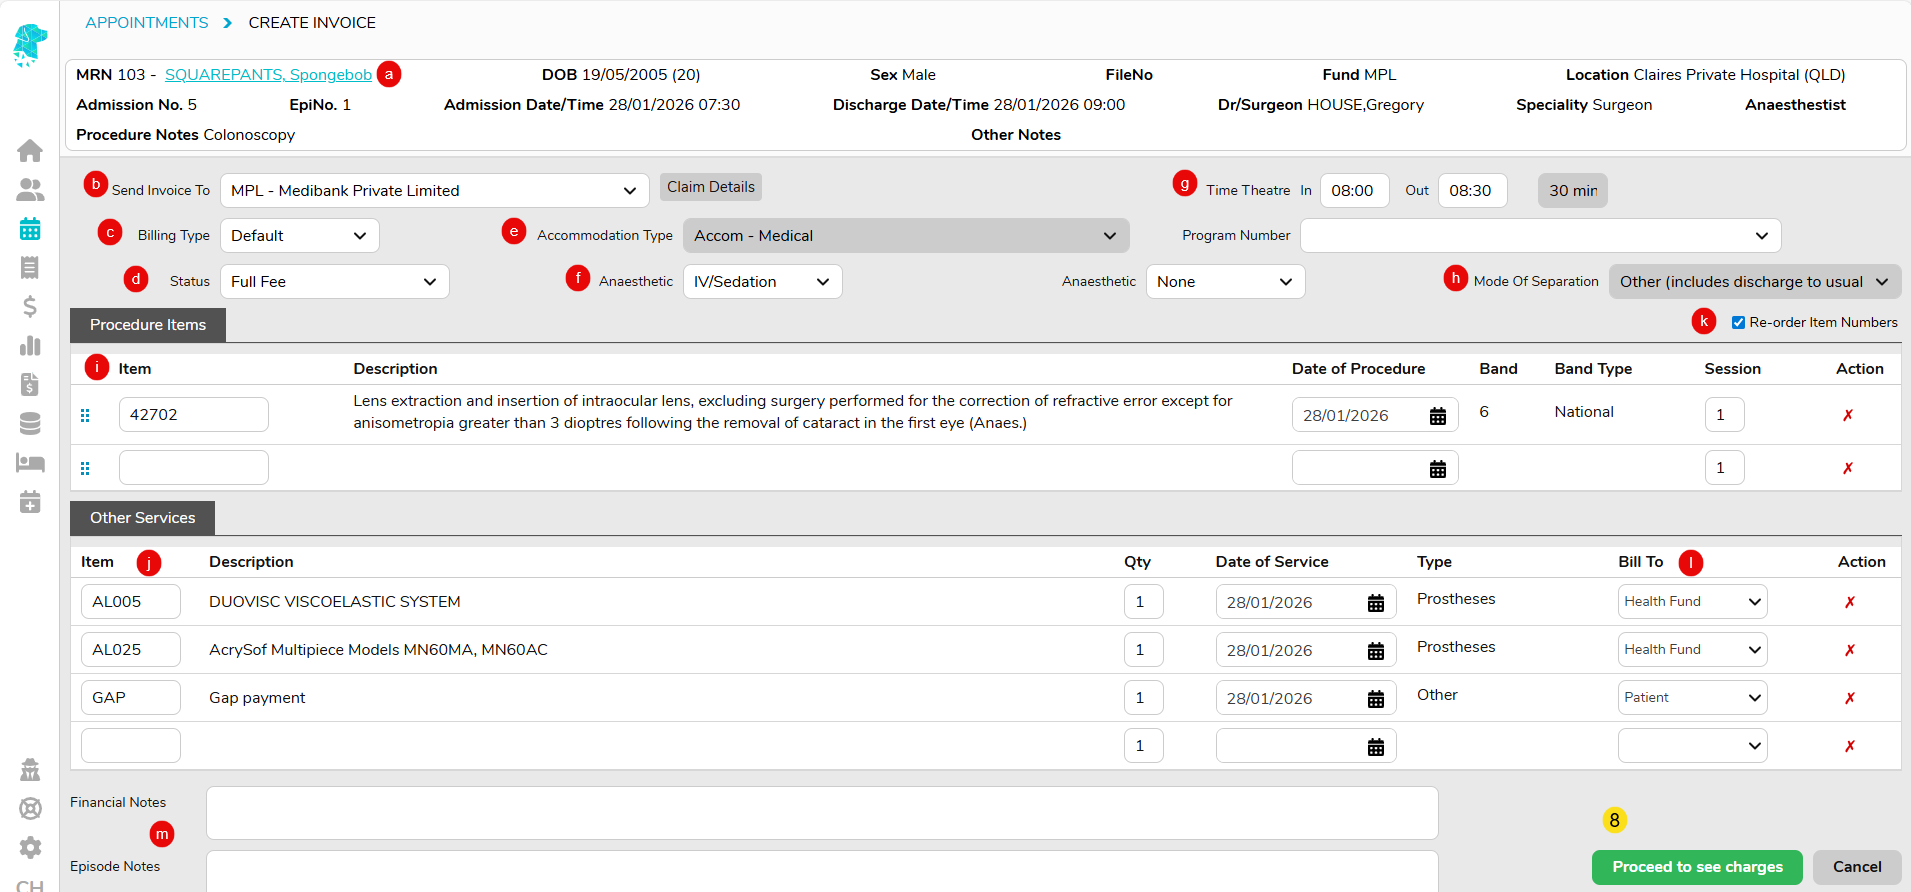
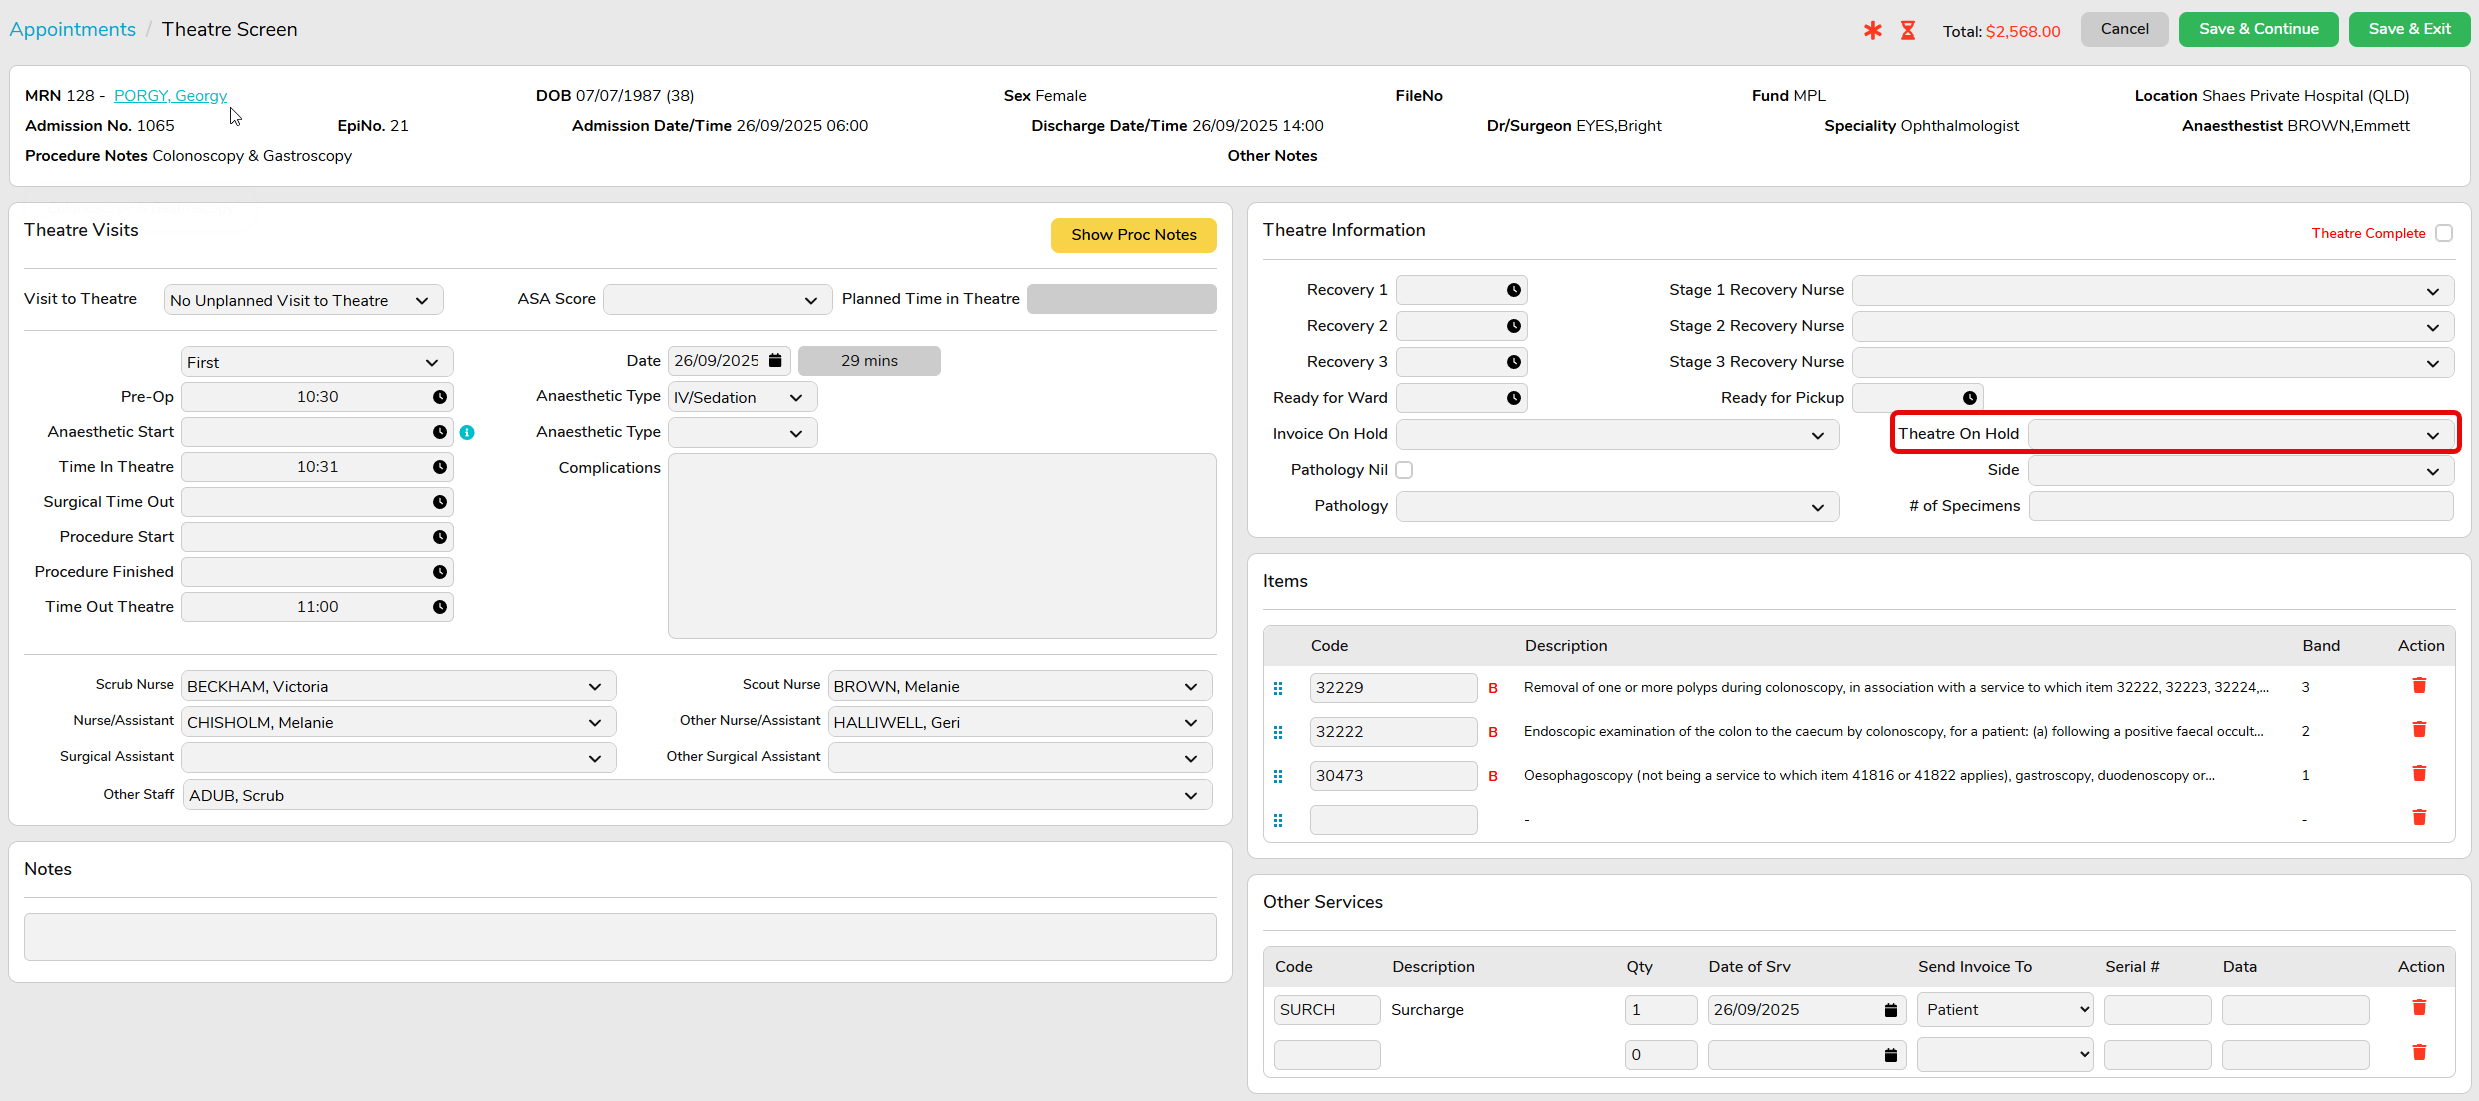
- Complete Theatre Screen information accurately, including the following information at a minimum;
- Anaesthetic Type
- Time In Theatre and Time Out Theatre
- Item numbers/Code
- Other Services, if required, such as prostheses, disposables, surcharges
- Theatre Complete tick box checked

It is imperative that facility staff ensure the accuracy of this information, as the MYNT Billing team does not have access to medical records to verify.
- Ensure Episode is Coded and Grouped, by completing the Diagnosis, Procedure and DRG sections in the Coding Screen – see Hospital Coding – FYDO Wiki
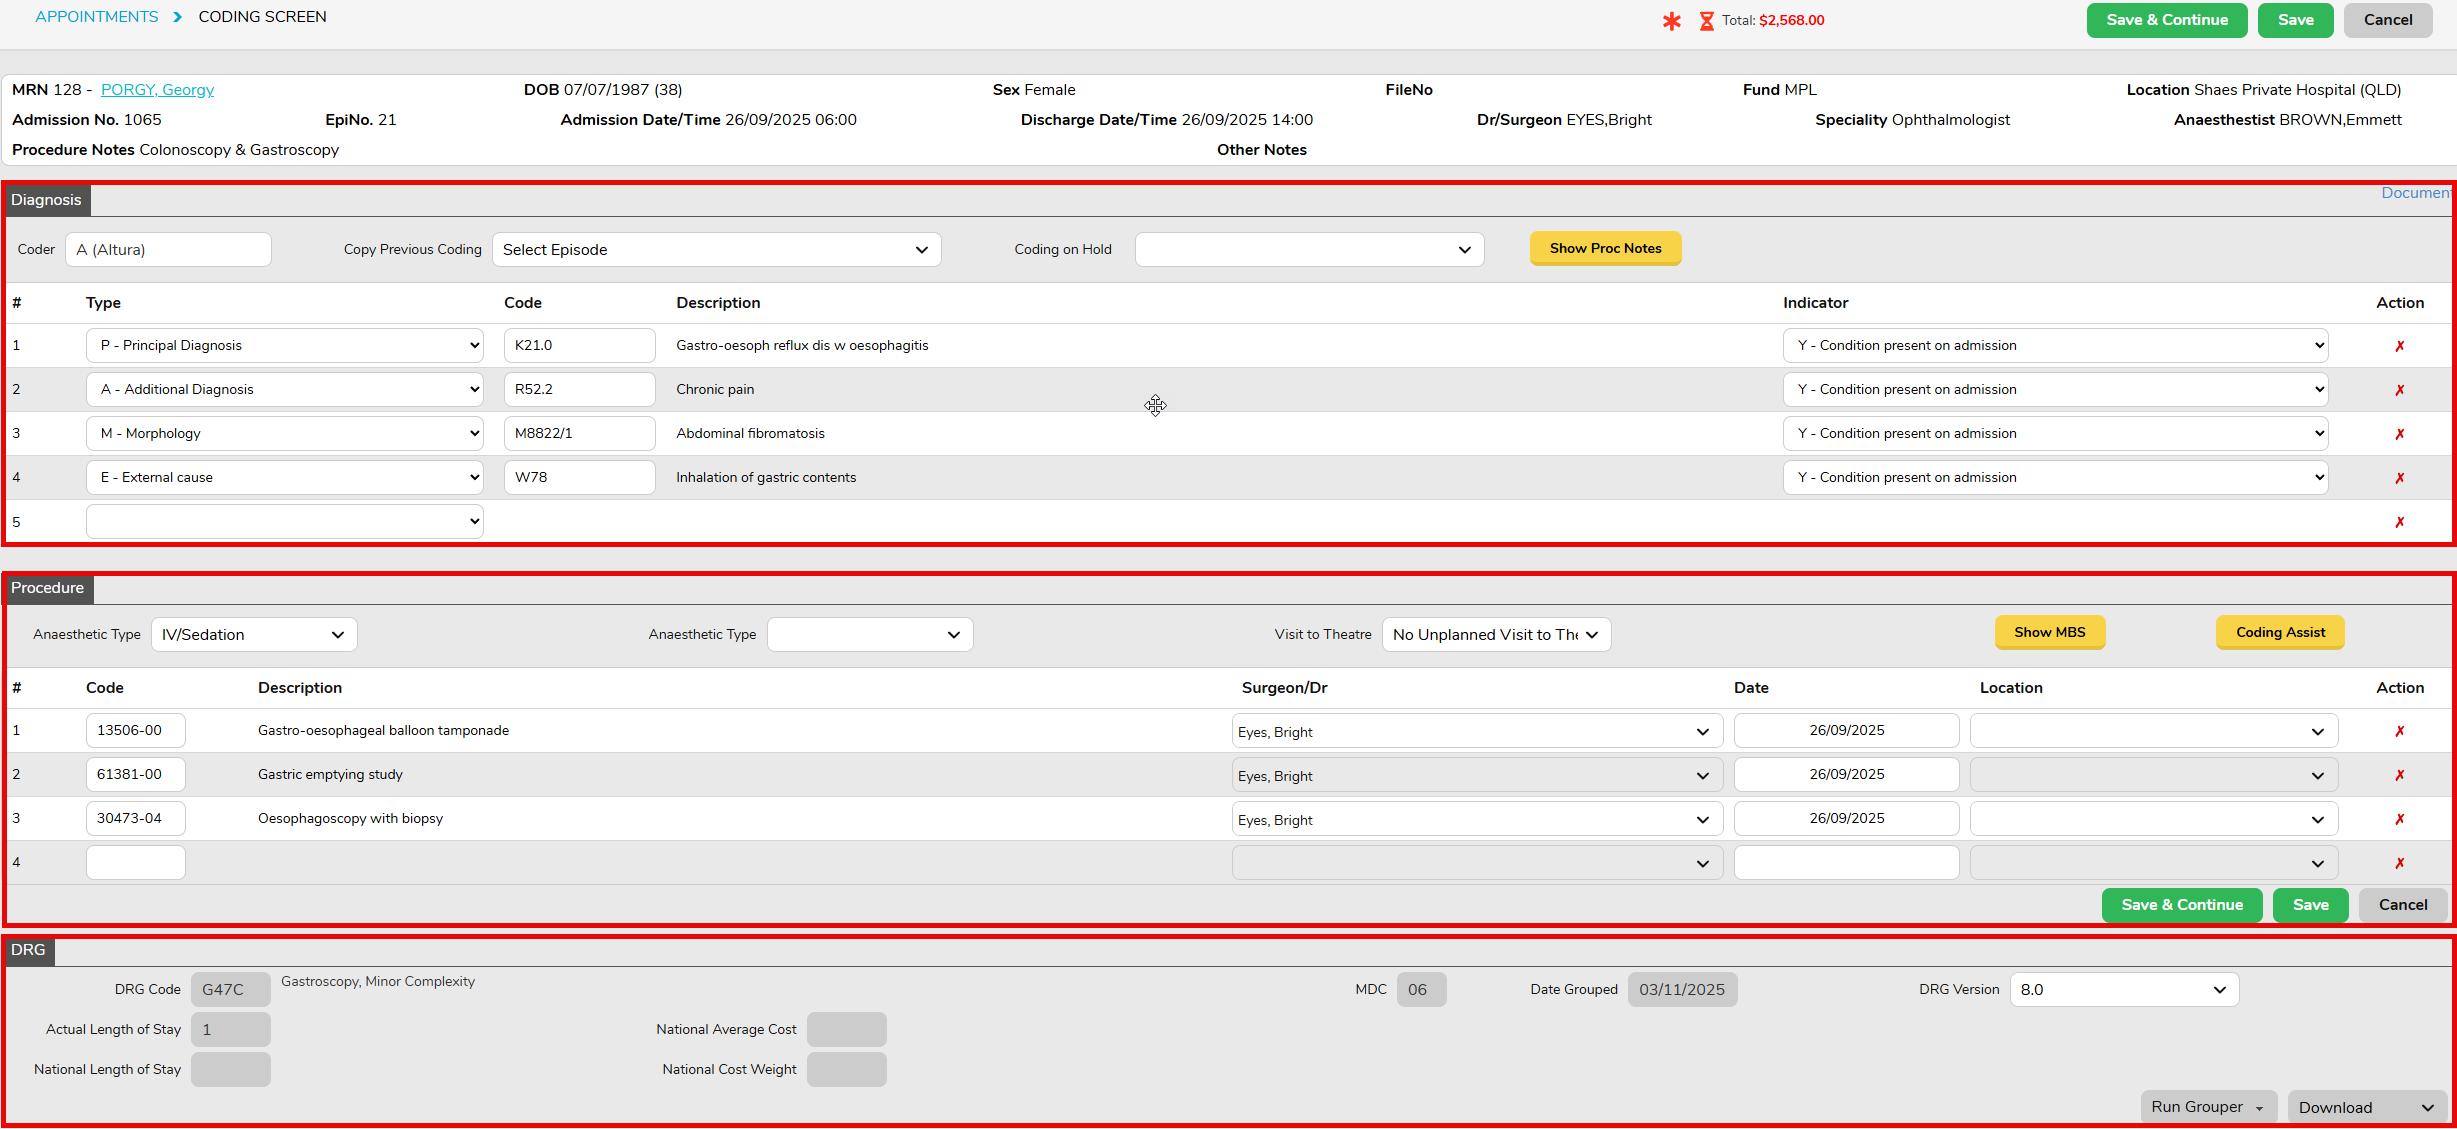
For many disciplines, coding may be impacted by pathology results, or awaiting doctor verification of items performed. If coding is on hold, please designate a Theatre on Hold reason (e.g. Pending Pathology, Awaiting Item Numbers, etc) in the Theatre Screen. (Additional reasons can be added in Settings > Theatre Hold Reasons.)
The MYNT Billing team will run a Billing Status Report for your site, once per week, to identify any episodes that cannot be invoiced and outline the reasons for this (e.g. waiting on coding).
Rejected Claims
The MYNT Billing team will review rejections daily, and strive to address any rejections within two business days. If we are awaiting information or action from your facility in relation to a rejection, notes will be recorded in the Financial Notes tab for the episode.

Debtors
The MYNT Billing team will be responsible for following up with debtors. A weekly Debtors Report will be sent to the site to outline reasons for any claims outstanding greater than 45 days (e.g. issues with the claim or slower payments – for example some smaller funds, as well as paper-based claims, can take longer to be paid).