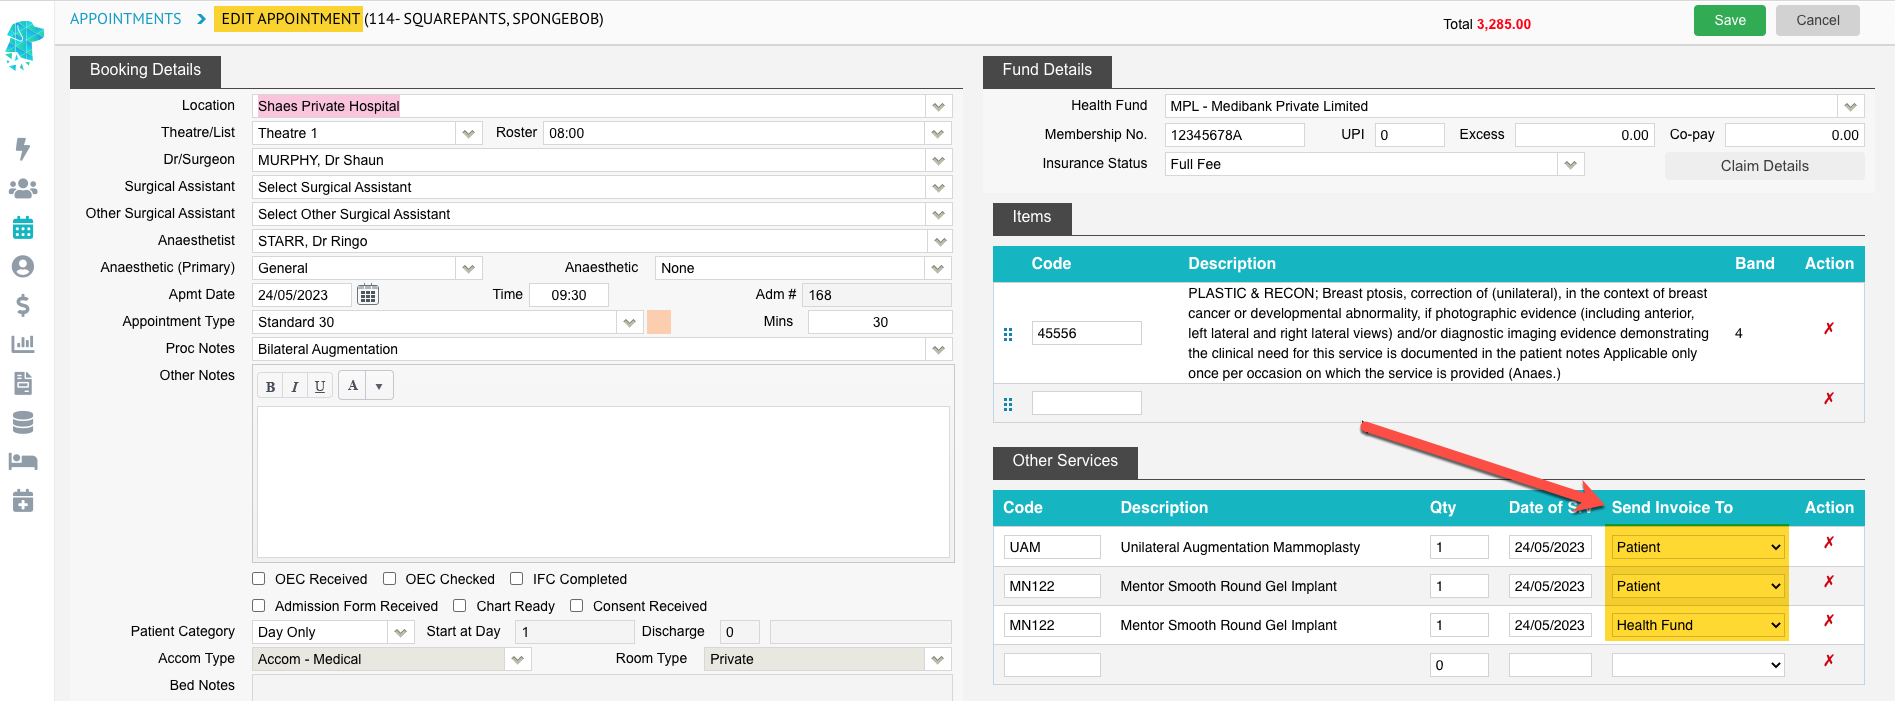
Hospital Health Fund Fees – Overnight Accommodation Fees
When new contracts are negotiated with health funds, amended fees need to be loaded into FYDO to facilitate a seamless IFC & Billing process.
The Overnight Accommodation Fees tab allows the entry of any contracted fees.
For more information on adding Same Day Fees, please see our page
Hospital Health Fund Fees – Same Day Fees Set Up
- Fees can be entered in Settings > Hospital > Fees Setup
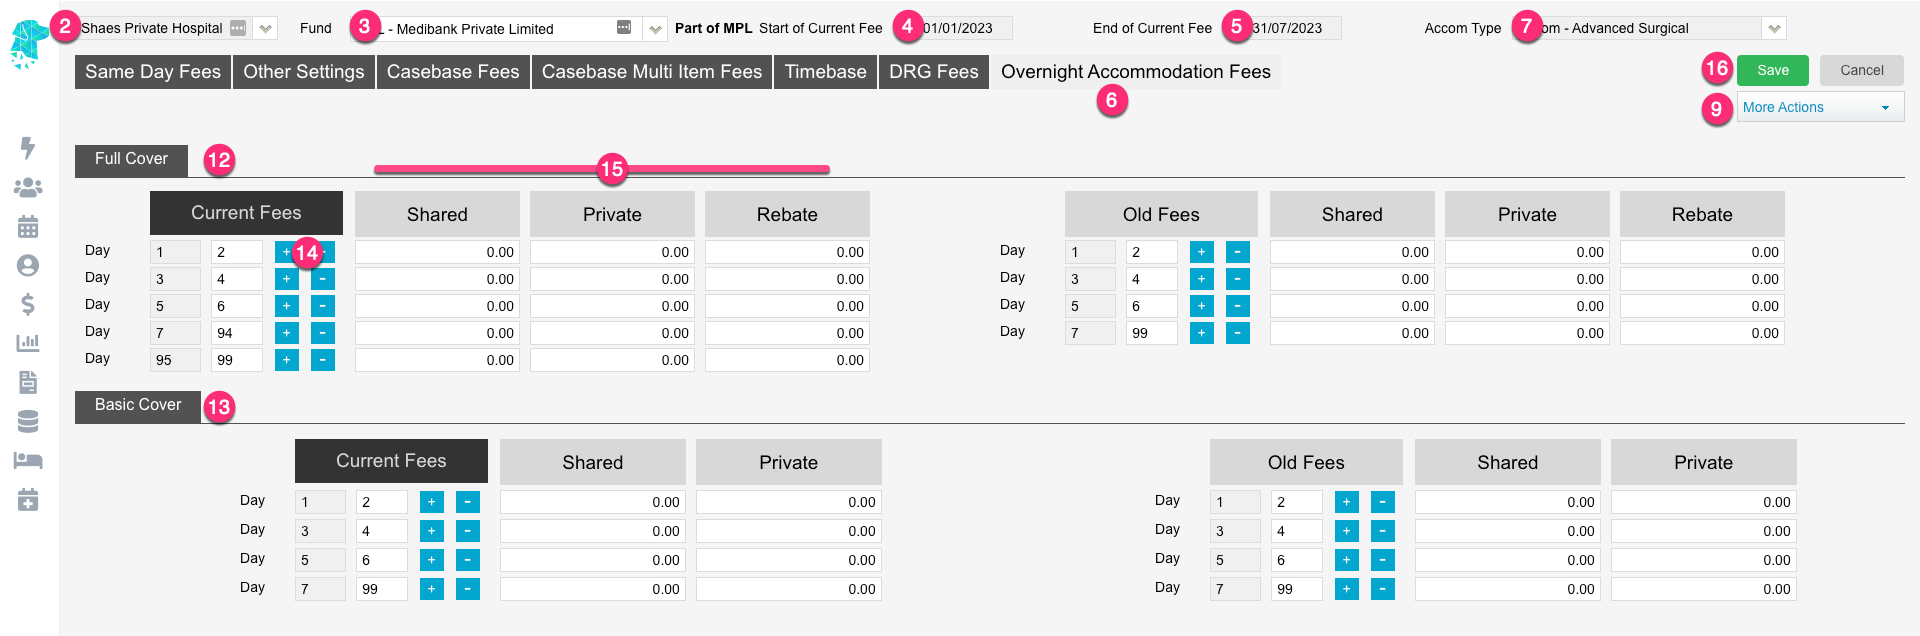
- For multi-location databases, ensure the correct Location is selected
- Use the Fund drop down to select the required health fund
- The Start of Current Fee date indicates the date that the Current Fees will be utilised from. Any episode from before the start date will utilise the Old Fees (See Same Day Fee Instructions to amend these dates)
- The End of Current Fee date indicates the date that the Current Fees will expire. Users will still be able to create IFC’s for admissions after the End of Current Fee date. However, the system will prohibit billing for episodes that fall after this date. (This date isn’t mandatory. However, it is a good way to ensure accounts aren’t accidentally billed at old prices)
- Select the Overnight Accommodation Fees tab
- Select the required Accommodation Type from the drop down. (Accommodation Categories can be added or amended in Settings > Accommodation Categories)
- Click Edit
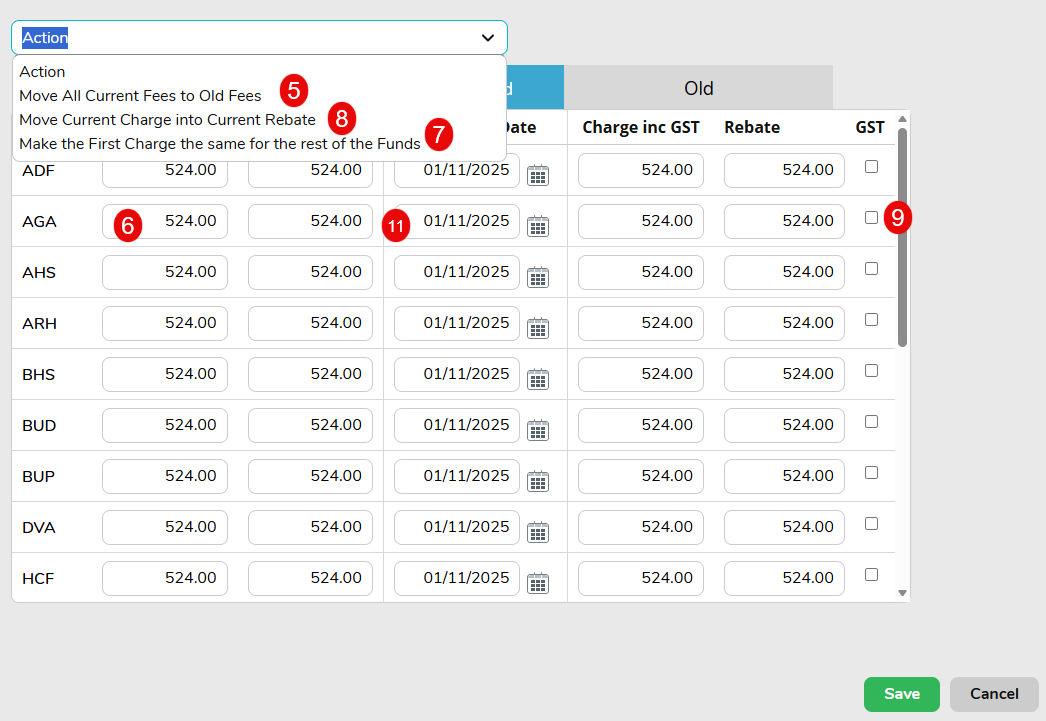
- If adding amended fees, use the More Actions dropdown to select Click to move all Current Fees to Old Fees
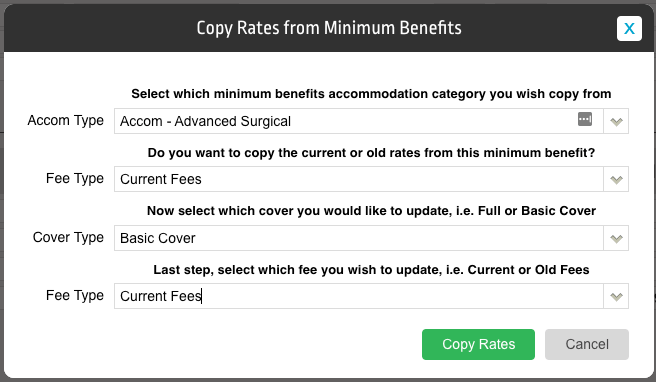
- If the fees are required to mirror the Minimum Benefits fees (Entered in Settings > Minimum Benefits), use the More Actions drop down & select Copy Rates from Minimum Benefits
- A pop up will appear to give all required options regarding copying the Minimum Benefits Rates into the Health Fund Contract rates
- Full Cover Fees can be added to the first section of the screen
- Basic Cover Fees can be added to the second section of the screen
- When entering fees, use the
 to adjust the Day that the fees apply to. This will automatically adjust the following line to continue on.
 - Add the relevant fees into the Shared, Private & Rebate columns
- Click Save
- The user is then able to select the next Accom Type that they require & follow the same process again
For further information on how to set up fees please visit our pages:
Other Settings
Casebase Fees
Casebase Multi Fees
Hospital Health Fund Fees – DRG Fees