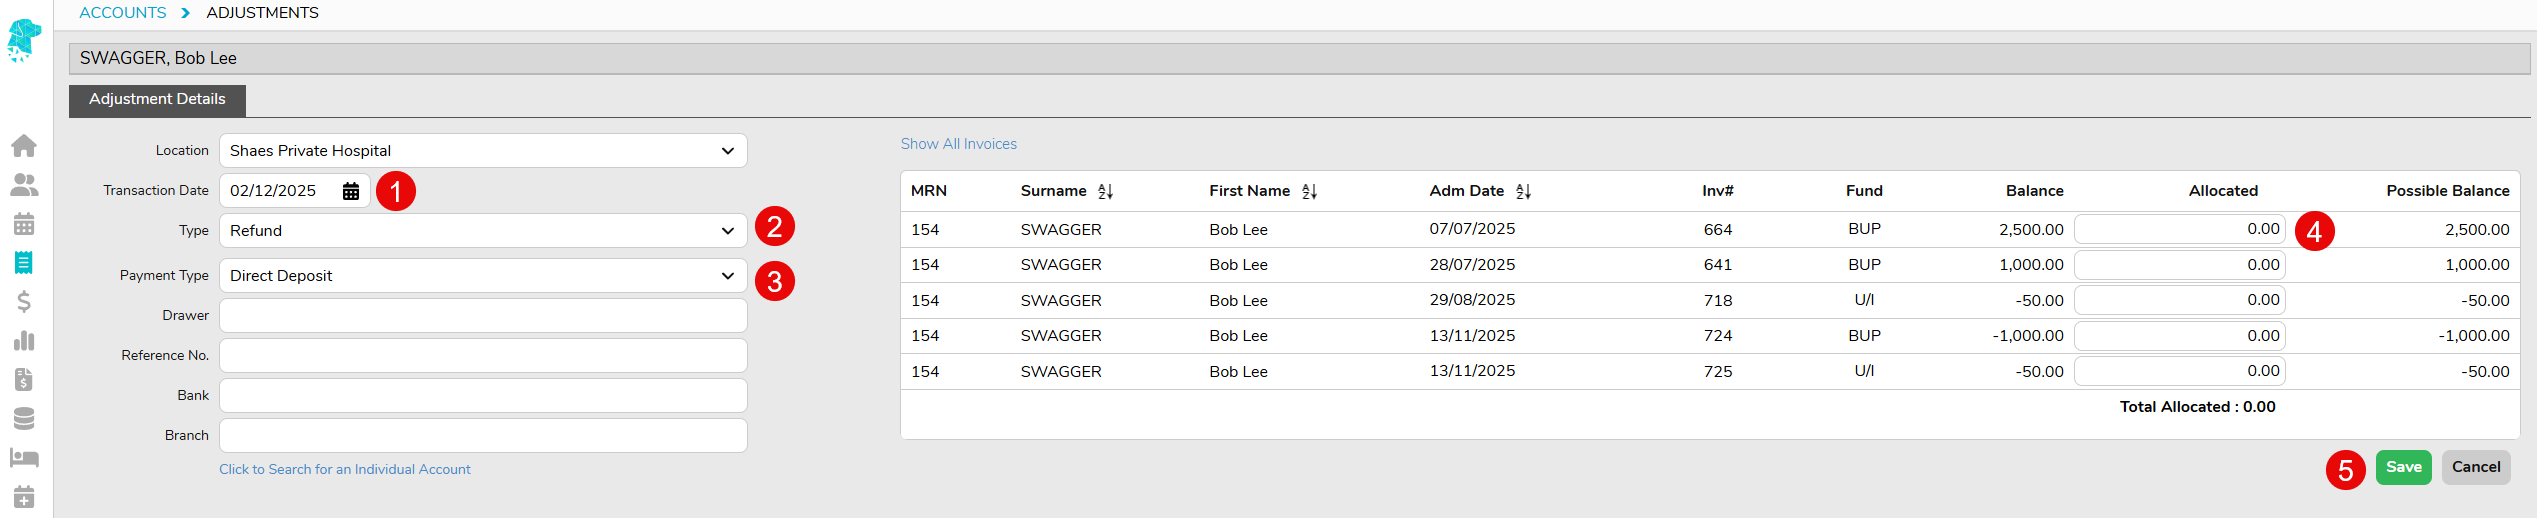
Appointment Screen Improvements
FYDO is continuously working behind the scenes to enhance functionality and streamline workflows. Below, you’ll find an overview of the new look Appointment Screen scheduled for implementation at the end of September.
This sleek new look has been designed to support efficient workflows and allow staff to easily access the features that are important to them. All actions previously in the sidebar have been relocated to allow for a wider view to display more information that is important to you.
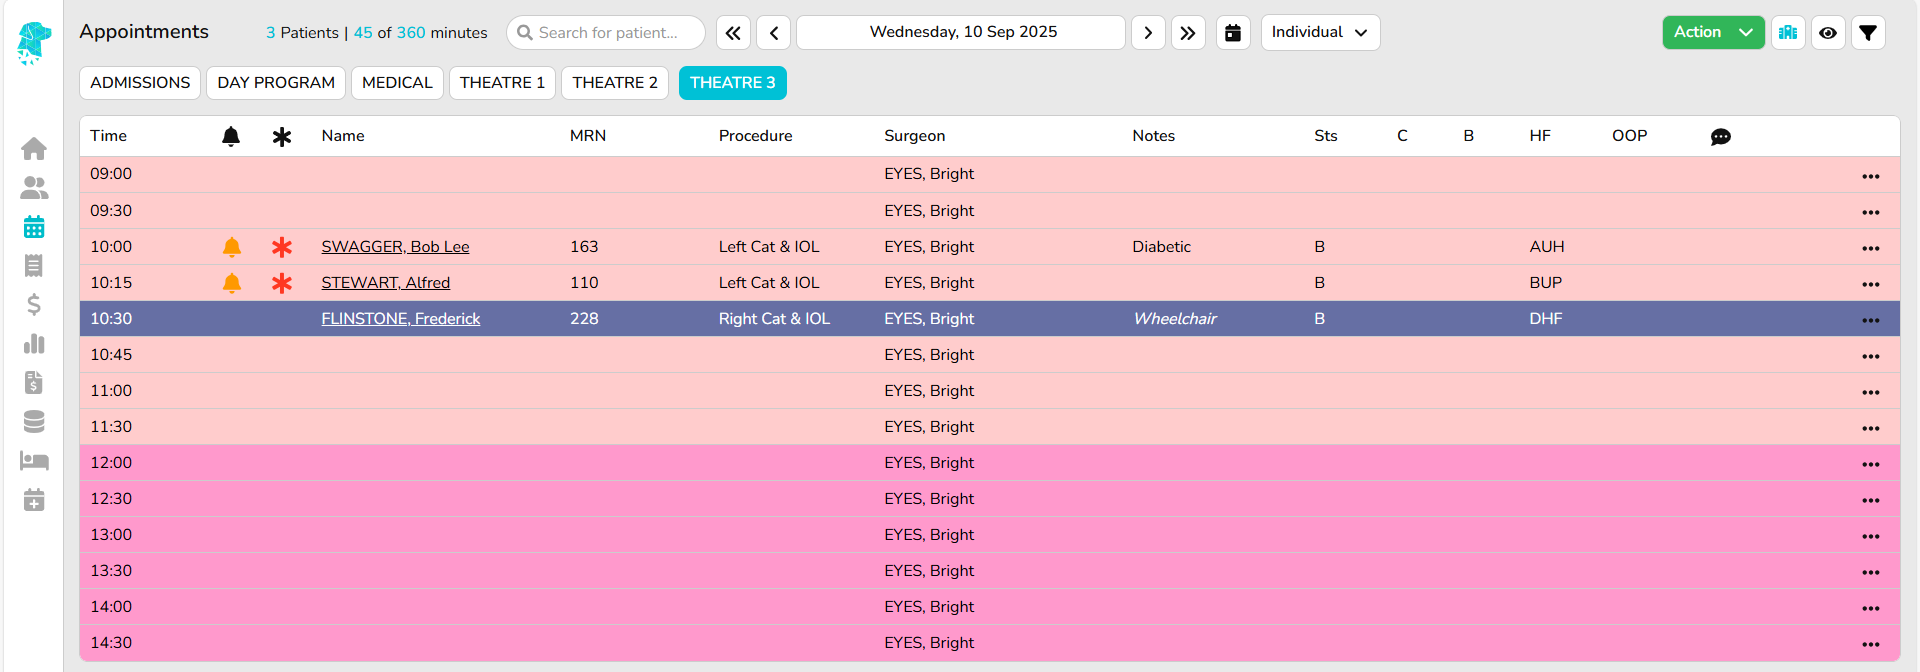
To choose your preferred view – All, Individual, Week, List, or Waitlist – use the dropdown menu located on the right-hand side of the date.

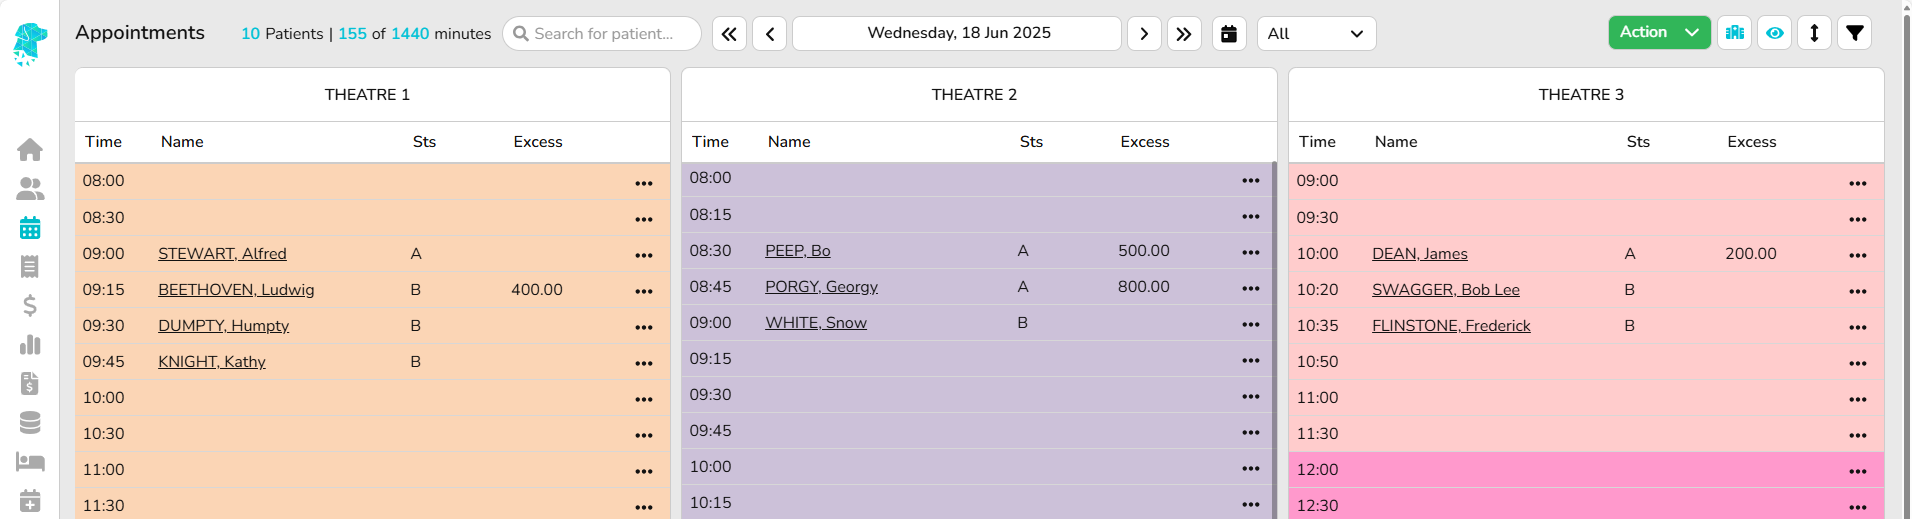
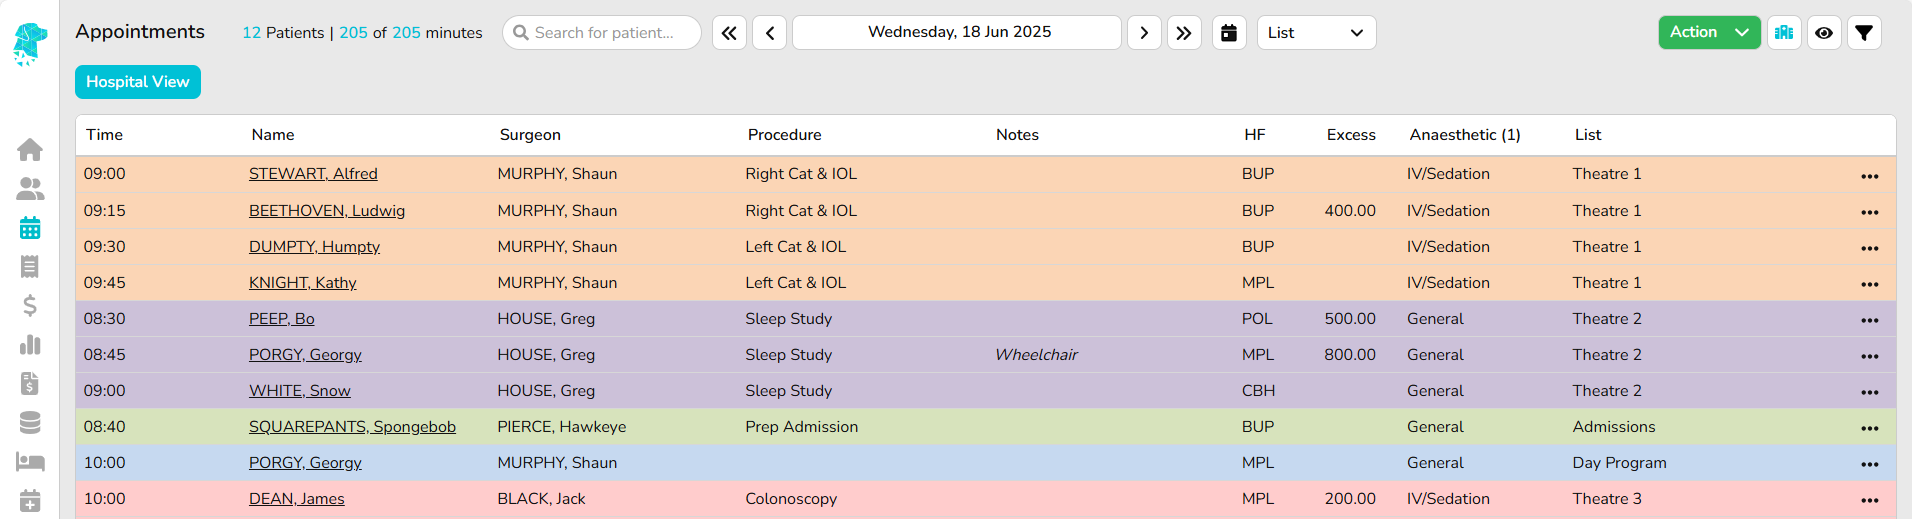
To view the calendar, click on the displayed date (e.g., Wednesday, 10 Sep 2025). The calendar will open, allowing you to easily select your desired date.
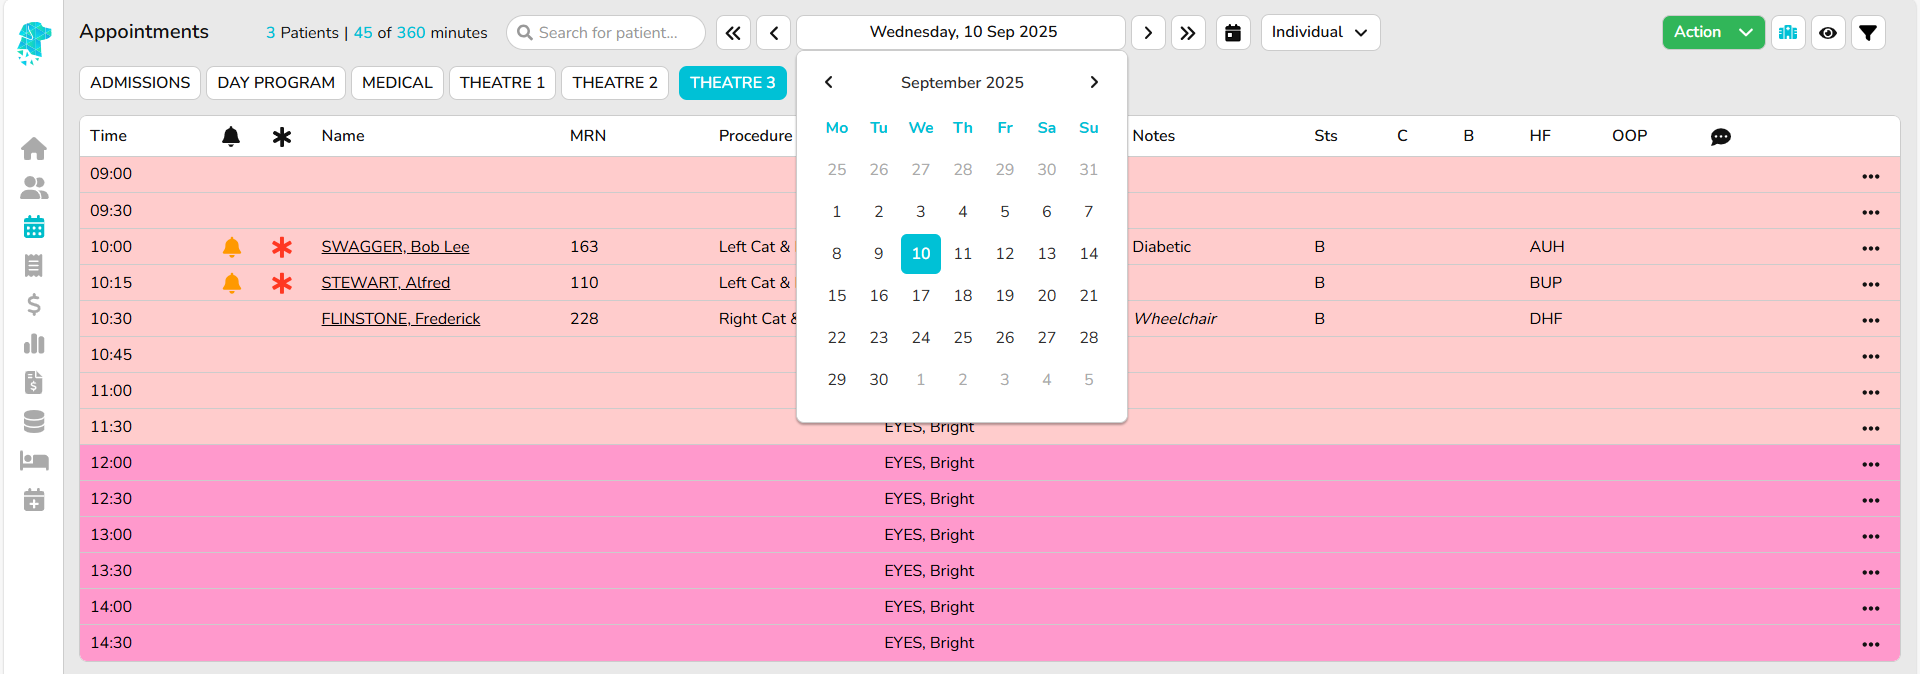
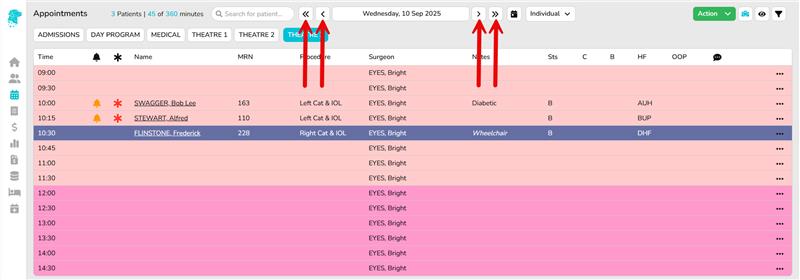
You can also use the arrows on either side of the displayed date to navigate forward or backward by one day or one week, making it easy to reach nearby dates.
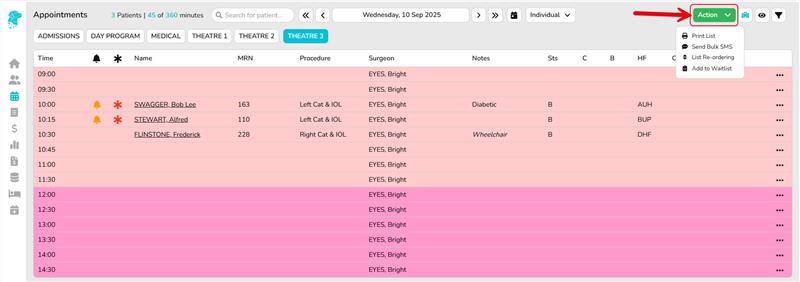
To manage your daily tasks – such as Printing Lists, Sending Bulk SMS Messages, List Re-ordering, or Adding Patients to the Waitlist, simply use the green dropdown menu labeled Action.
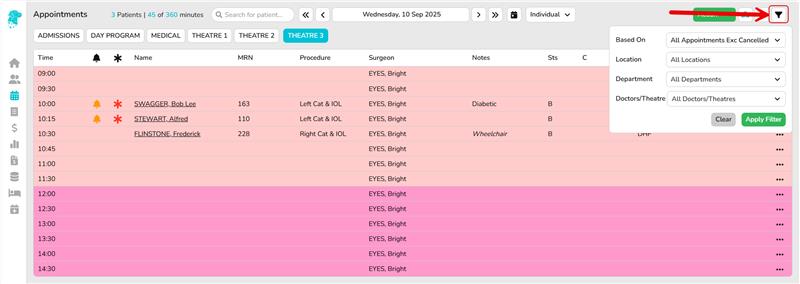
The next icon allows you to filter the view based on the specific hospital status.
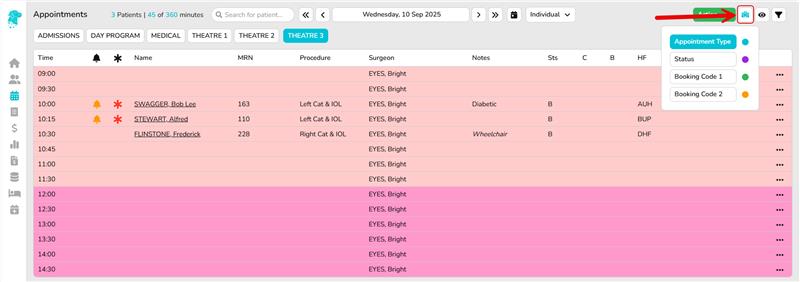
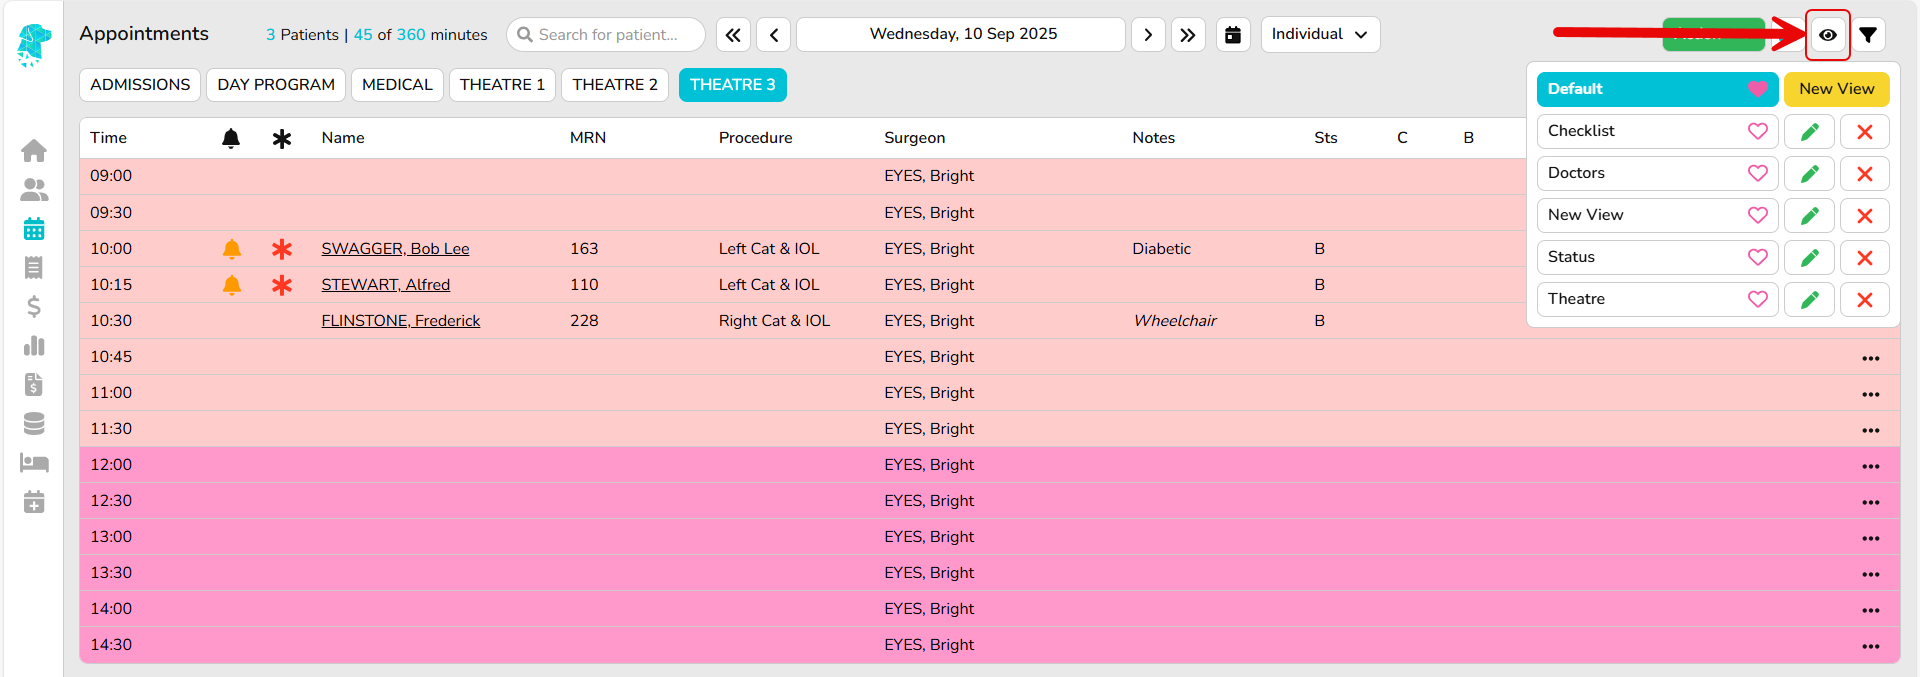
The eye icon allows you to customize the view to meet the specific requirements of each hospital’s department, displaying only the information relevant to you.
Finally, the filter option provides four categories – Based On, Location, Department, Doctors/Theatres, allowing you to customize the view accordingly.