Hospital Invoicing / Billing an Episode – Simple
Once the episode is complete, an invoice can be raised to a health fund or patient.
For an invoice to be raised, the episode needs to be:
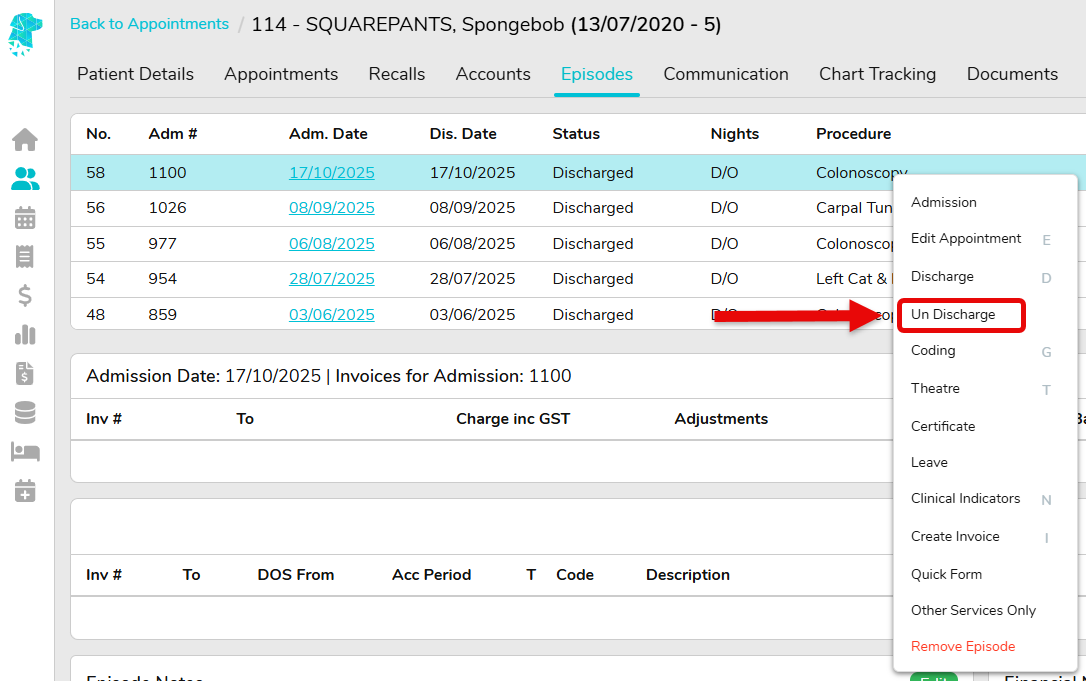
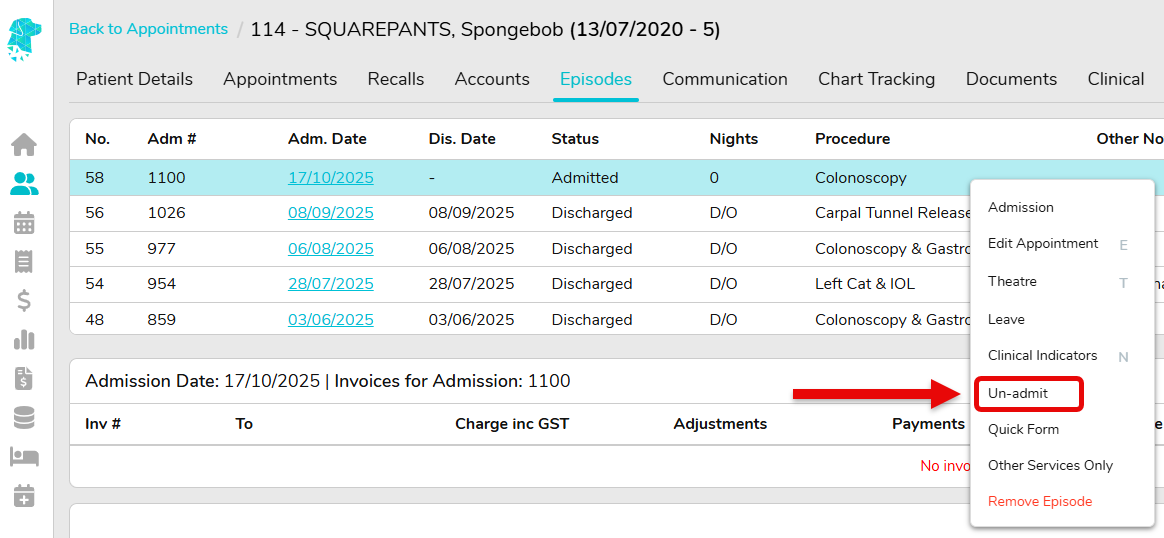
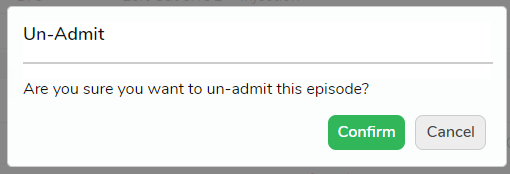
– Admitted
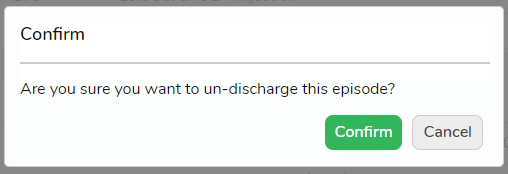
– Discharged
– Theatre Complete tick box checked (depending on the facility requirements)
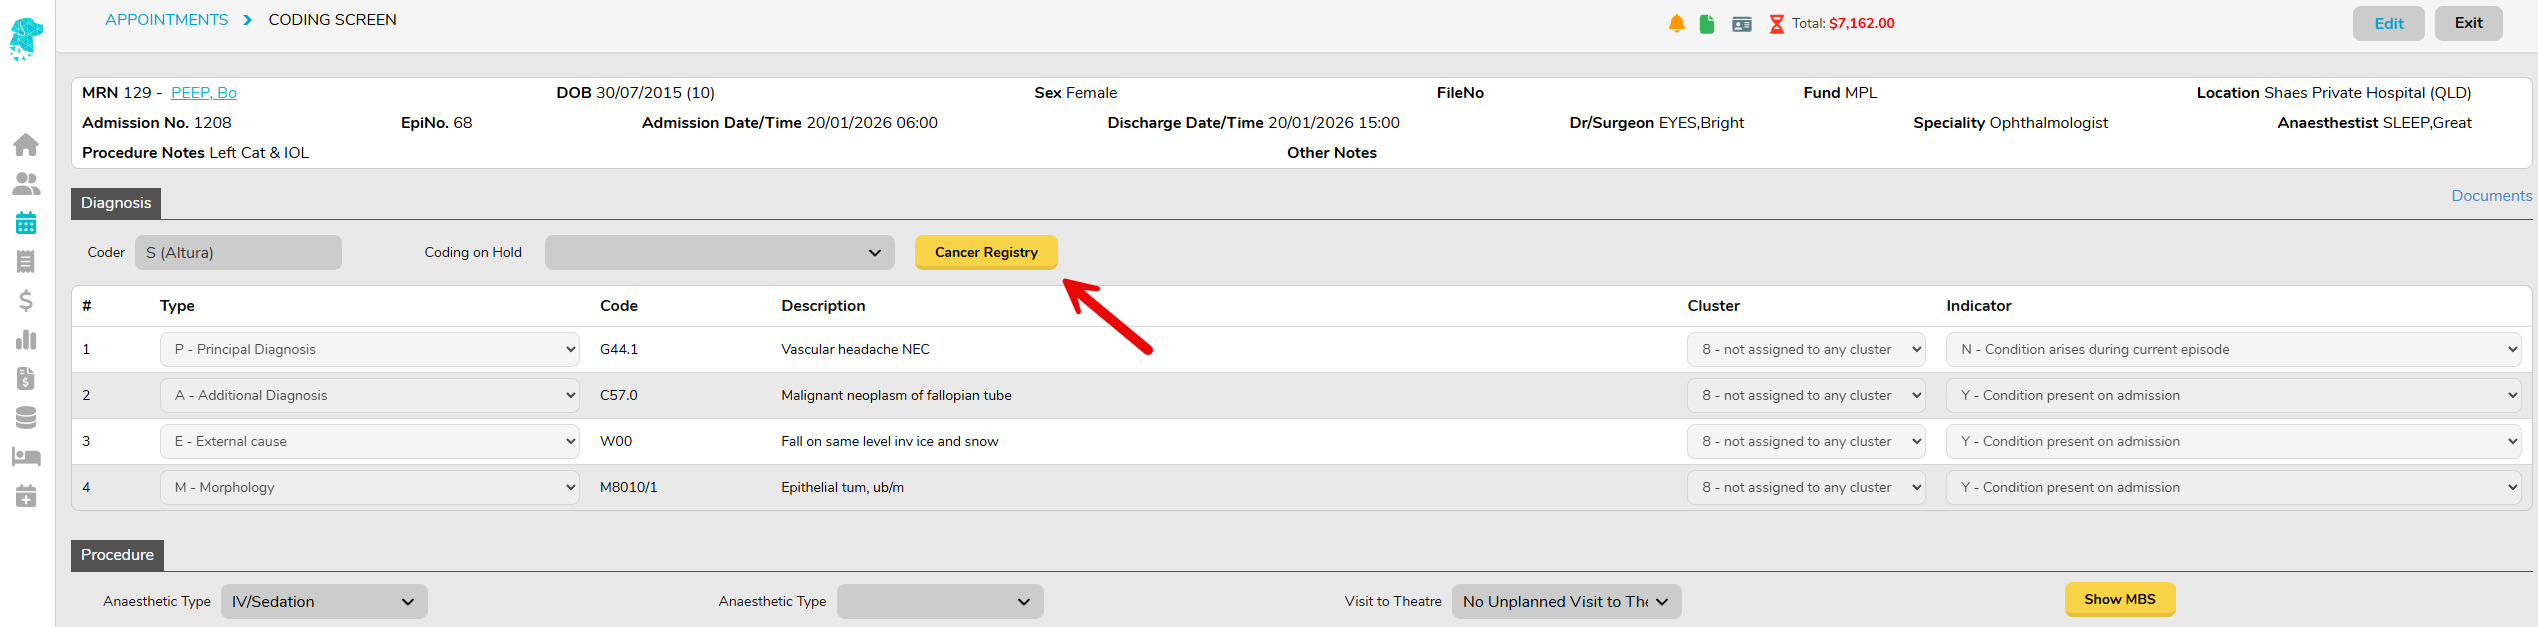
– Coding Grouped (depending on the facility requirements)
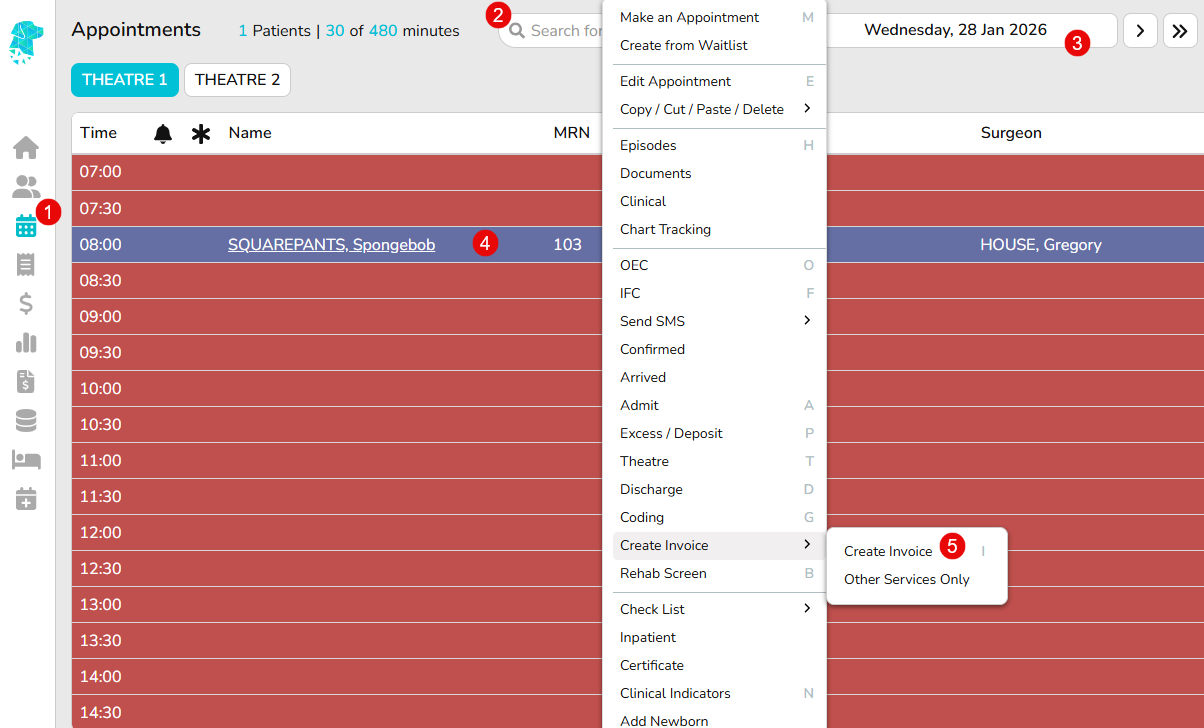
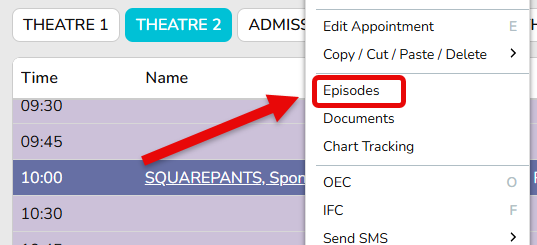
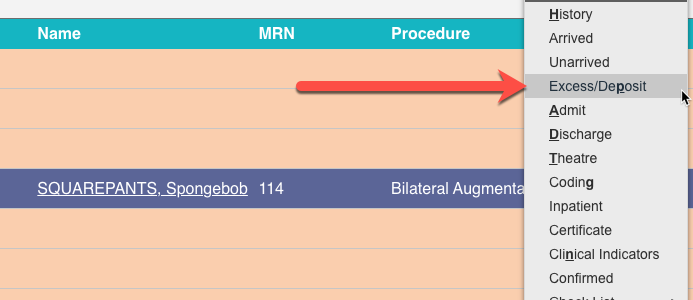
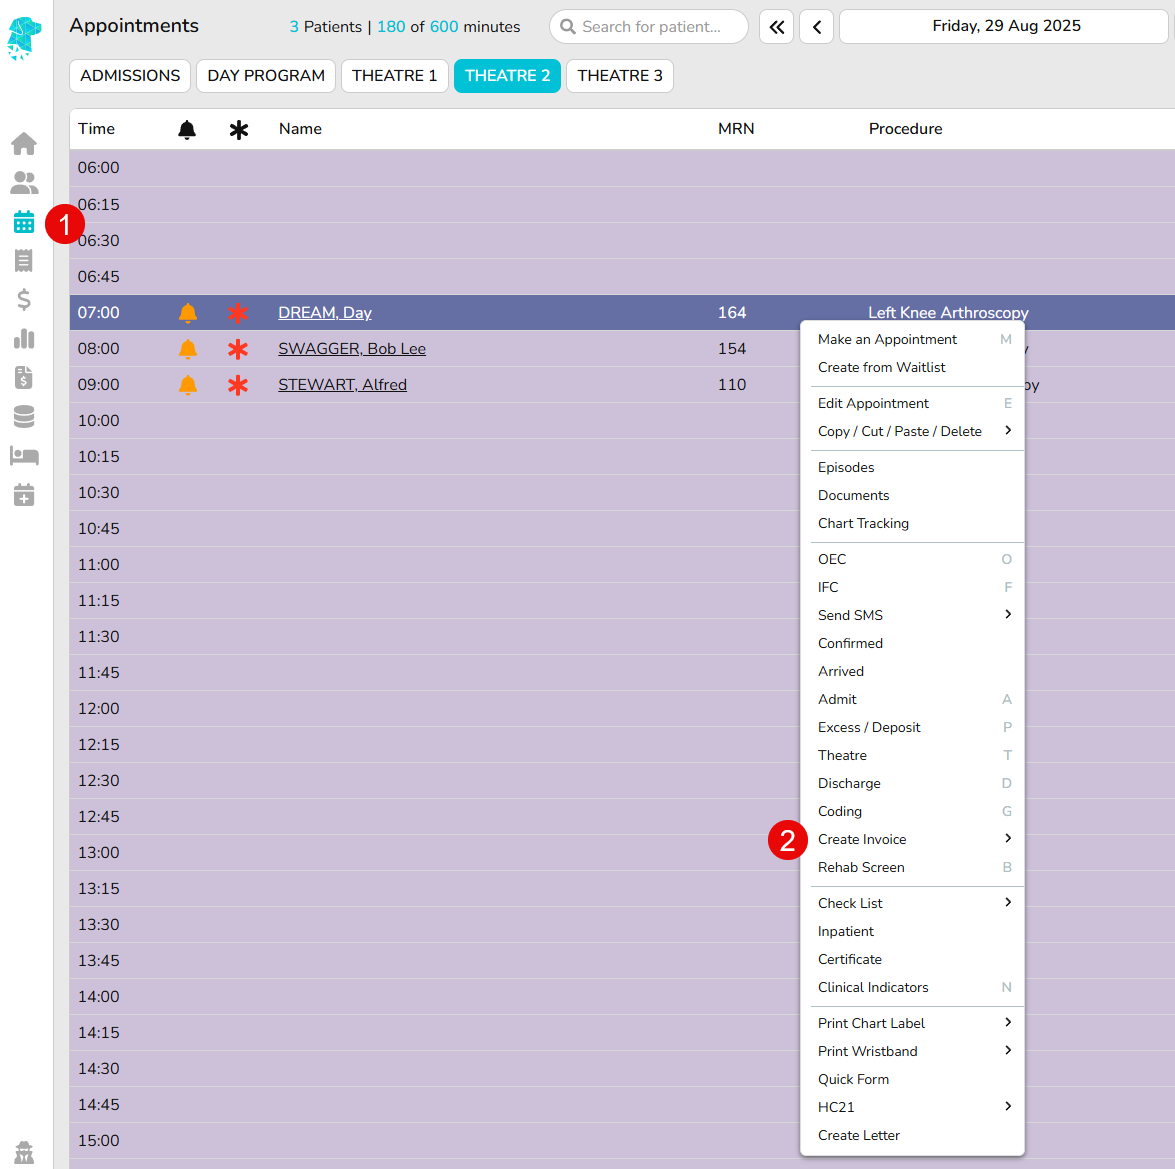
- Open the Appointments Screen and locate the required episode
- Right Click to reveal the menu & select Create Invoice
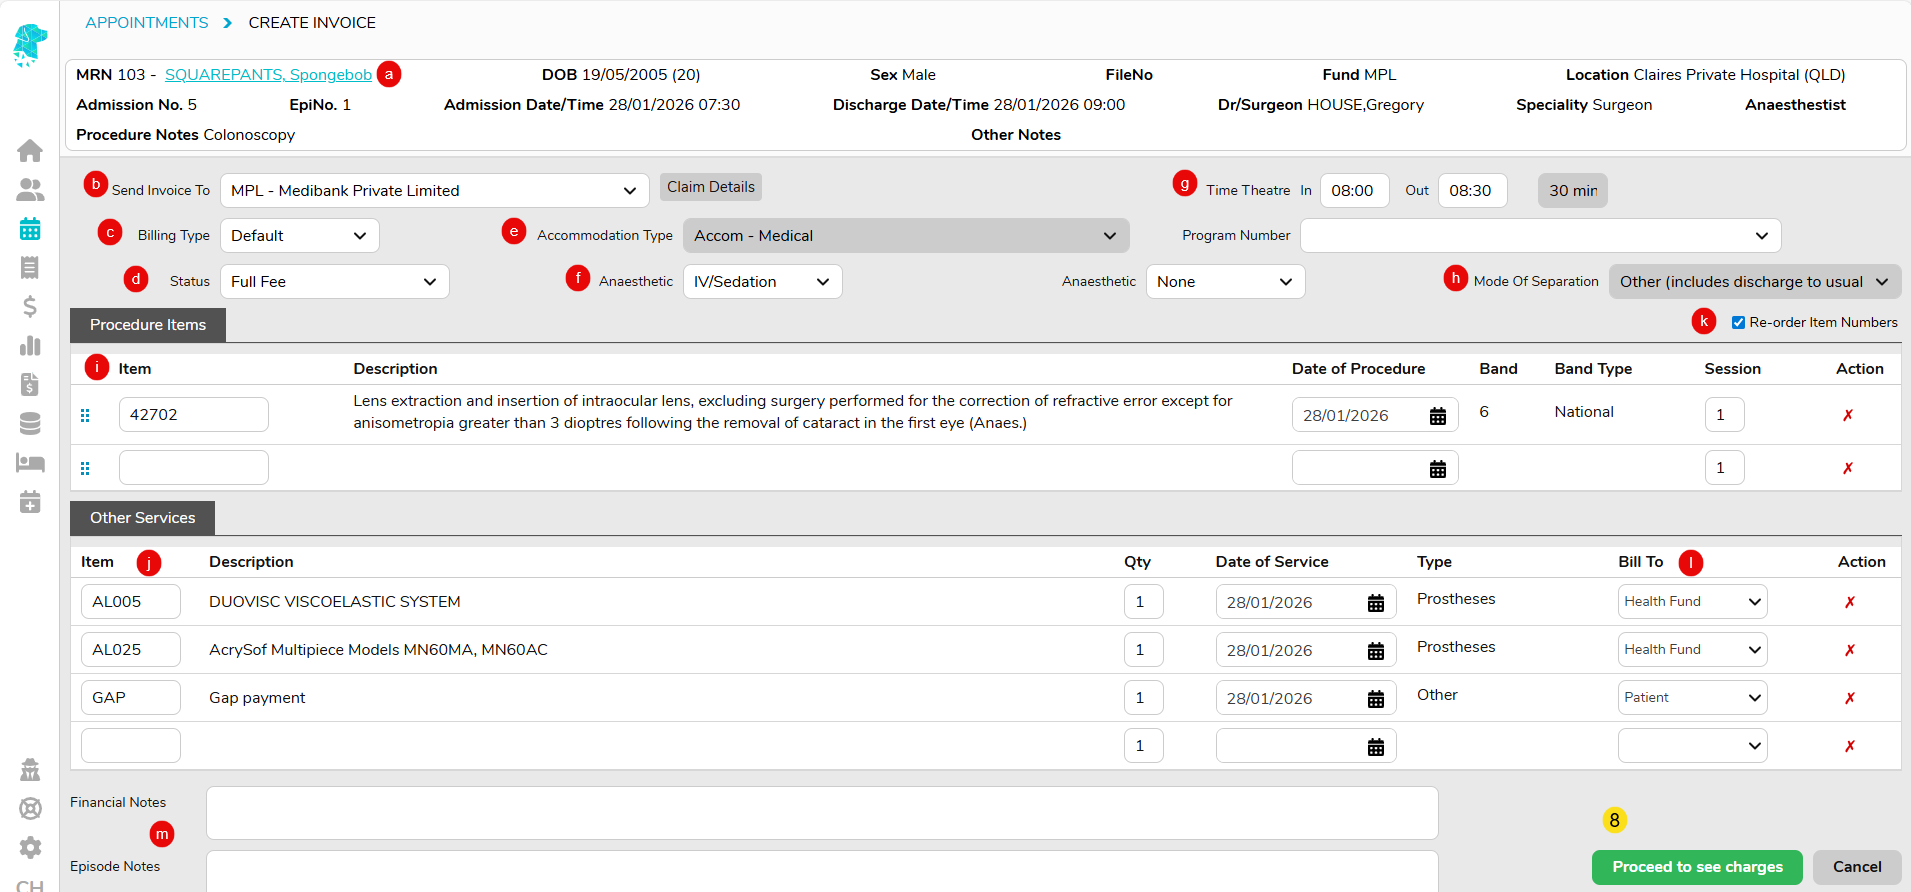
- The Create Invoice page will display with the following necessary information:
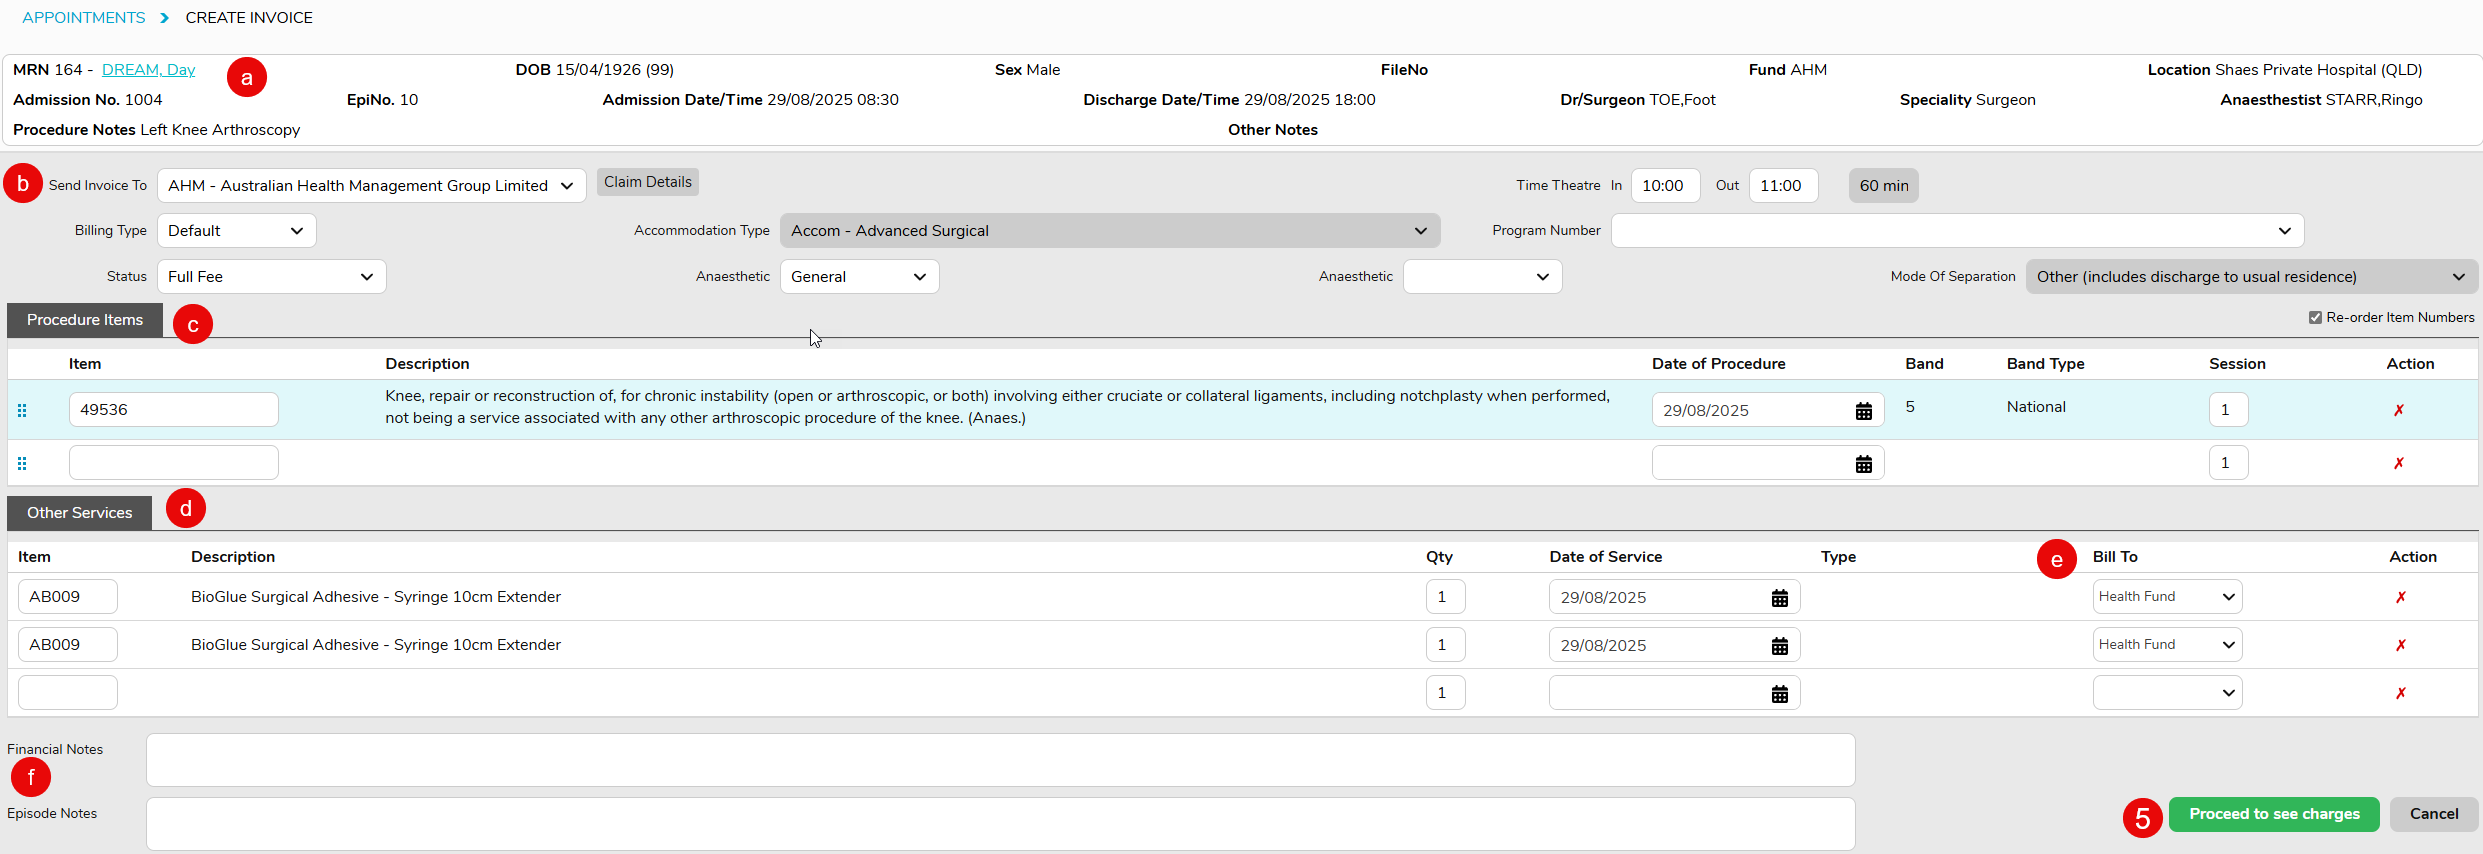
- All patient information specific to the episode
- Billing information including:
Billing Type
Theatre Times - Procedure Items being billed (drawn from Theatre Screen if entered)
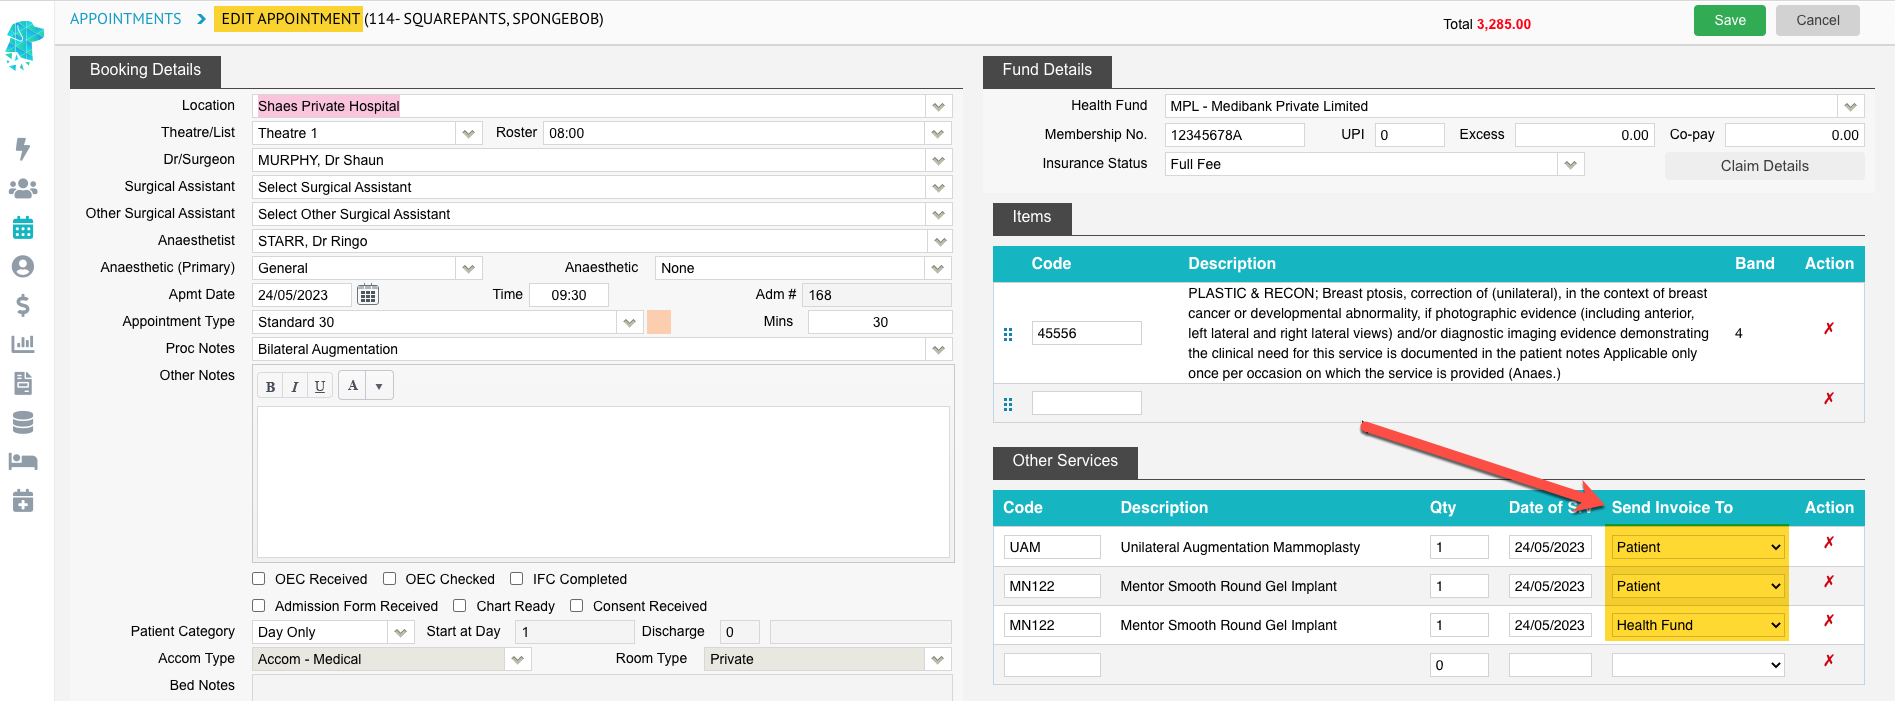
- Other Services being billed (drawn from Theatre Screen if entered)
- The Bill To feature allows other services to be billed to the patient or a third-party company, even if the main invoice is being billed to a health fund. Selecting Patient from this dropdown will create a separate invoice/invoice number for the patient account
- The Financial Notes & Episodes notes fields will reflect notes that have been entered into the patients’ Episodes screen.
- As long as all required information has been previously entered into the Theatre Screen, there should be few reasons that anything on the Create Invoice page needs to be amended
- Click Proceed to see charges
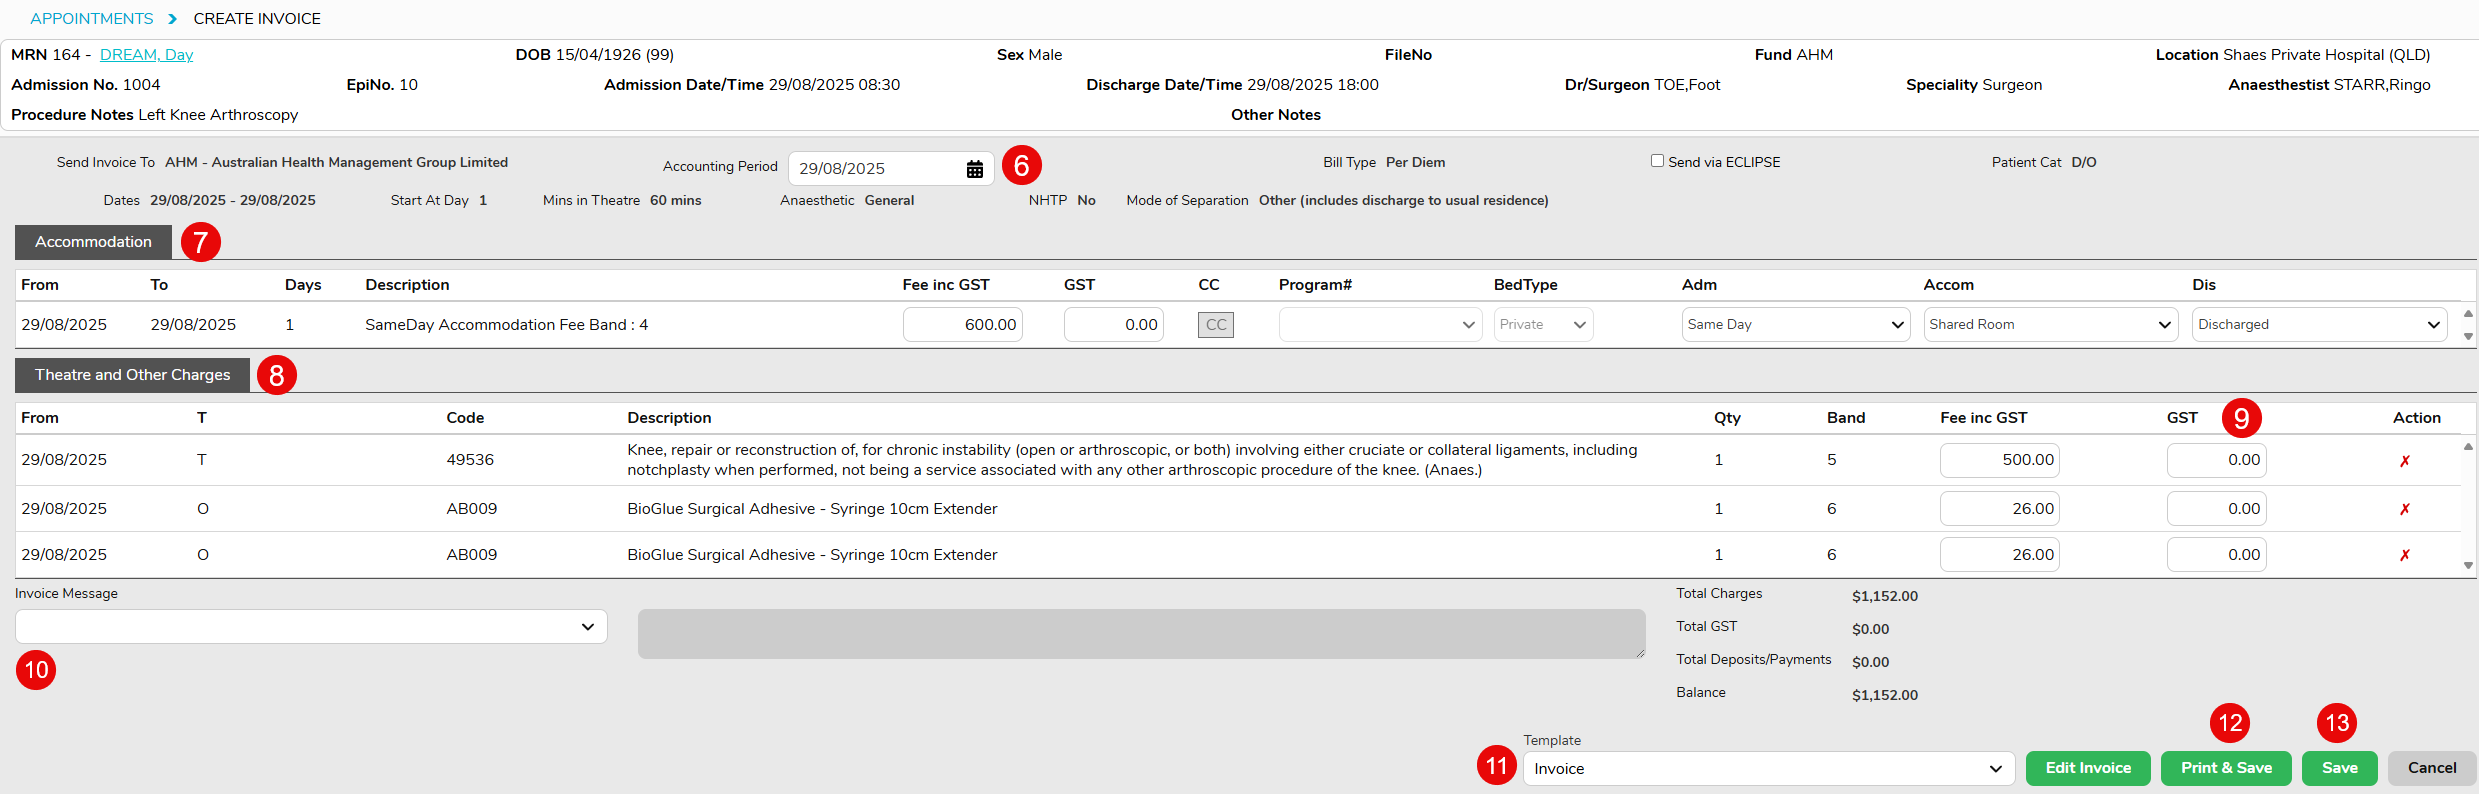
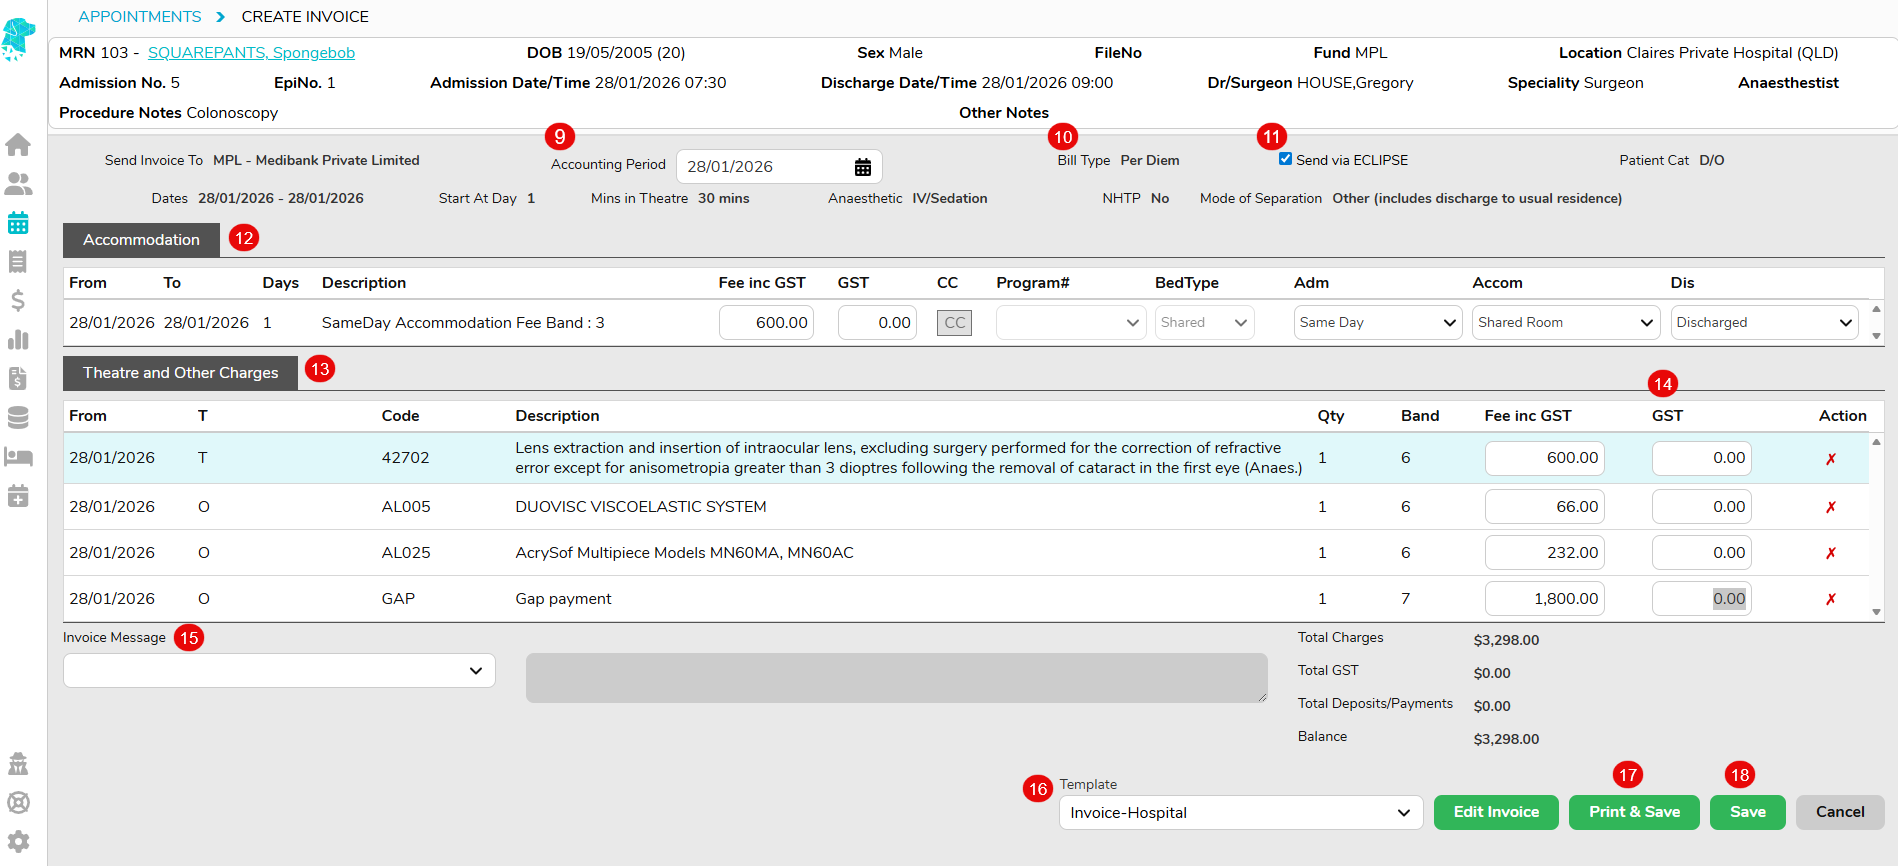
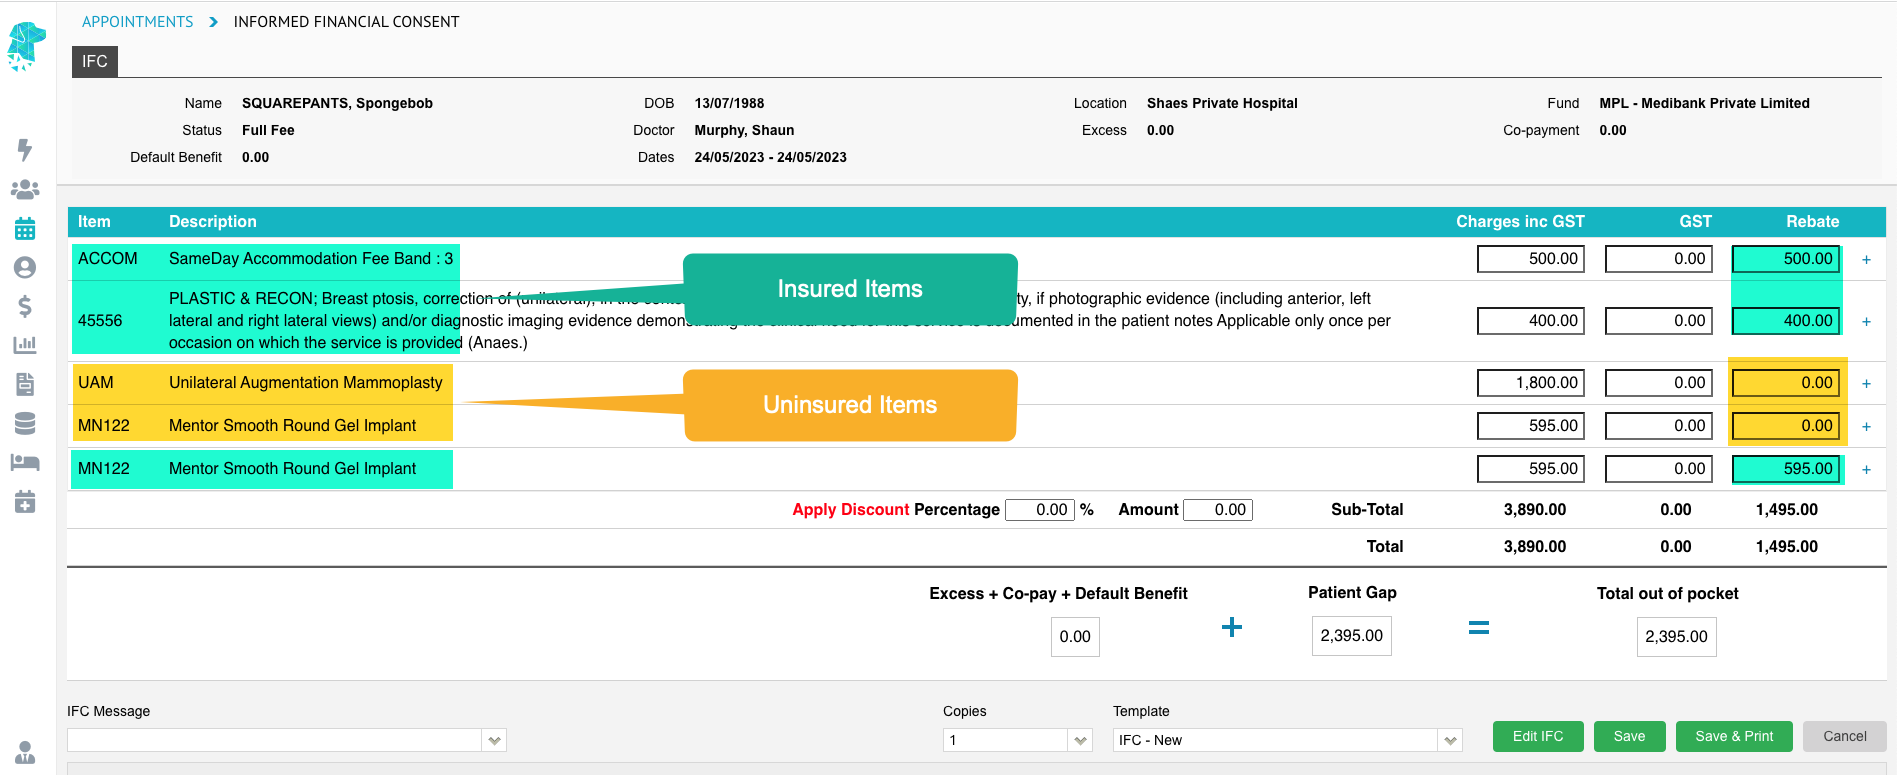
- The invoice information is displayed, including:
Accounting Period (That the revenue will be applied to)
Bill Type
ECLIPSE transmission status - The Accommodation charges will be shown
- The Theatre & Other Services Charges will be displayed
- GST can be amended with a Right Click in the GST Field
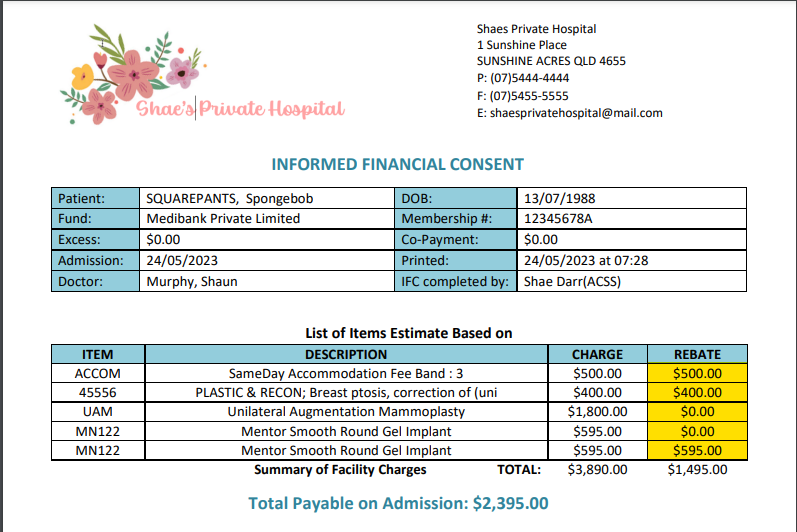
- Custom Invoice Messages are able to be added. (Invoice Message Templates can also be added in Settings > Invoice / IFC Messages, so that they can easily be selected from the dropdown list)
- Invoice template can be selected
- Print & Save can be selected when the invoice isn’t able to be sent via ECLIPSE & the user requires a printed or PDF copy of the invoice
- Save can be selected when the invoice is able to be transmitted electronically via ECLIPSE & the user does not require a hard copy of the invoice
Once the user has selected Save for an invoice that can be transmitted electronically via ECLIPSE, they will then need to send this invoice by following the FYDO wiki instructions
Claiming Hospital – Not Yet Sent
For a more detailed explanation of FYDO invoicing please see:
Hospital Invoicing / Billing an Episode Detailed