Sending Bulk SMSs
FYDO allows you to contact patients via SMS to assist in efficient workflow. These can be sent one at a time or to a whole list of patients. The system gives the ability to pre-populate the SMS with information regarding the admission/episode e.g., date of admission, time of admission, health fund excess amount etc
Use these instructions if you would like to send a Bulk SMS to a number of patients at once:
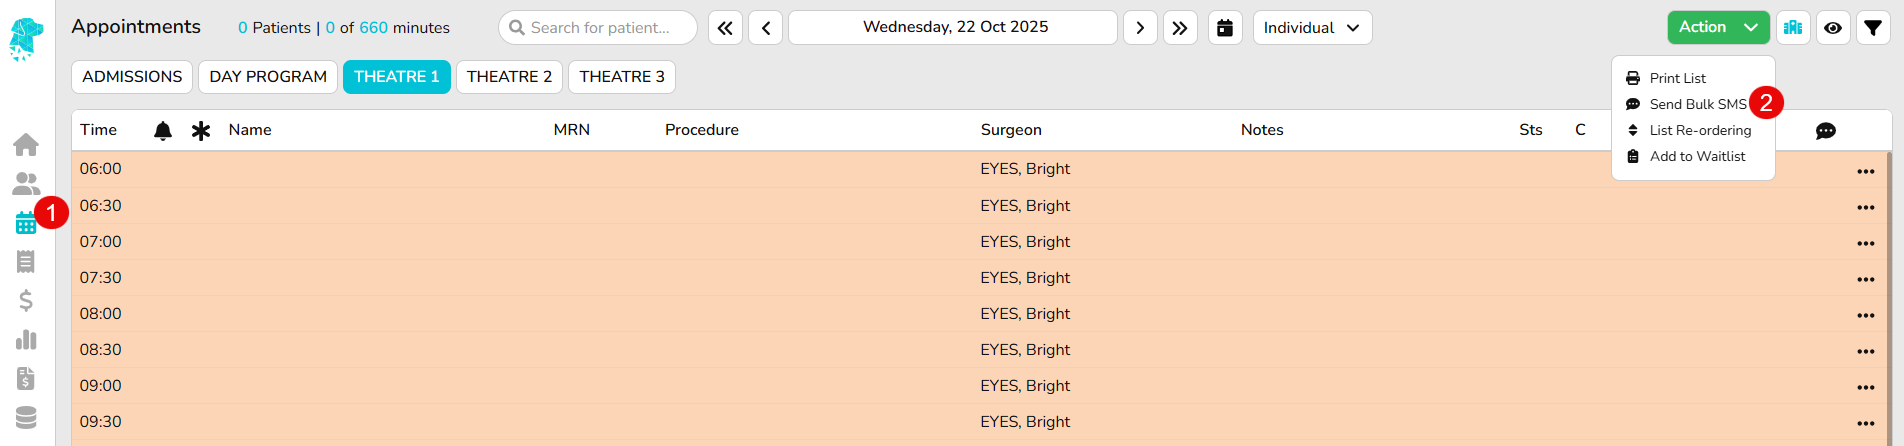
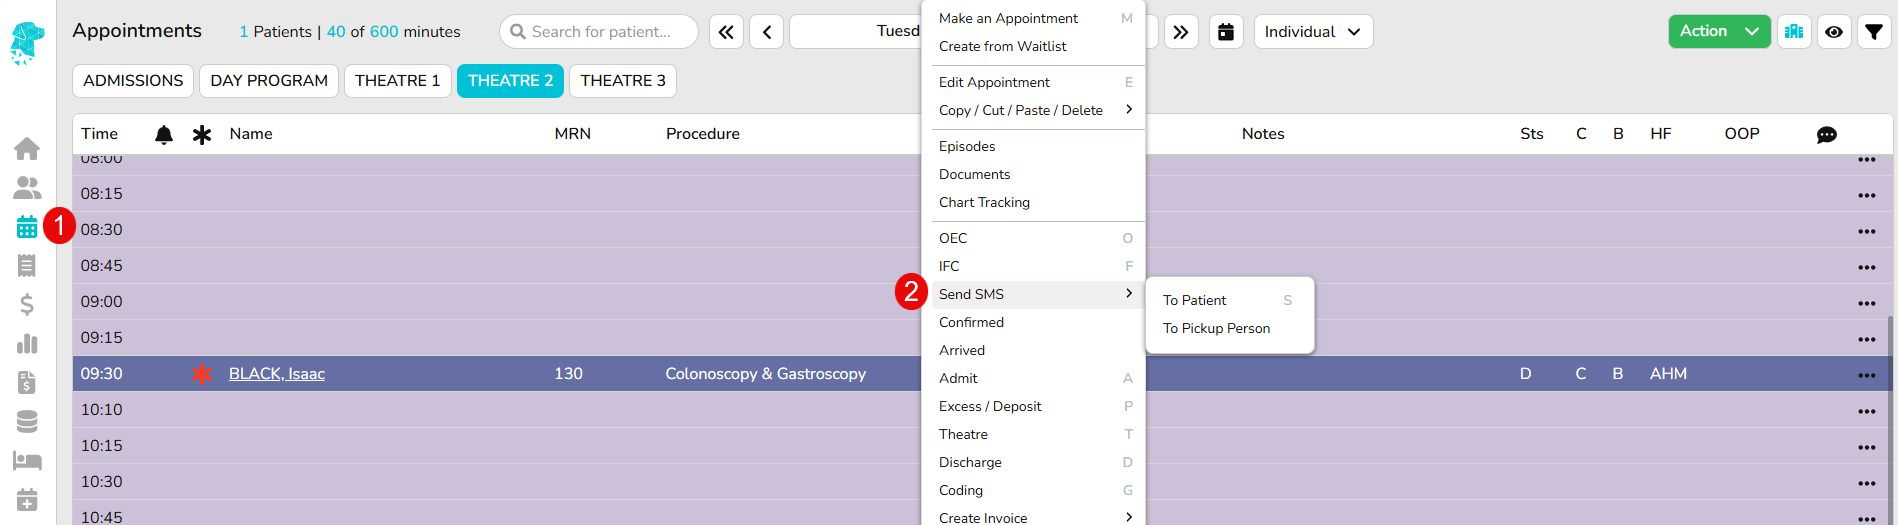
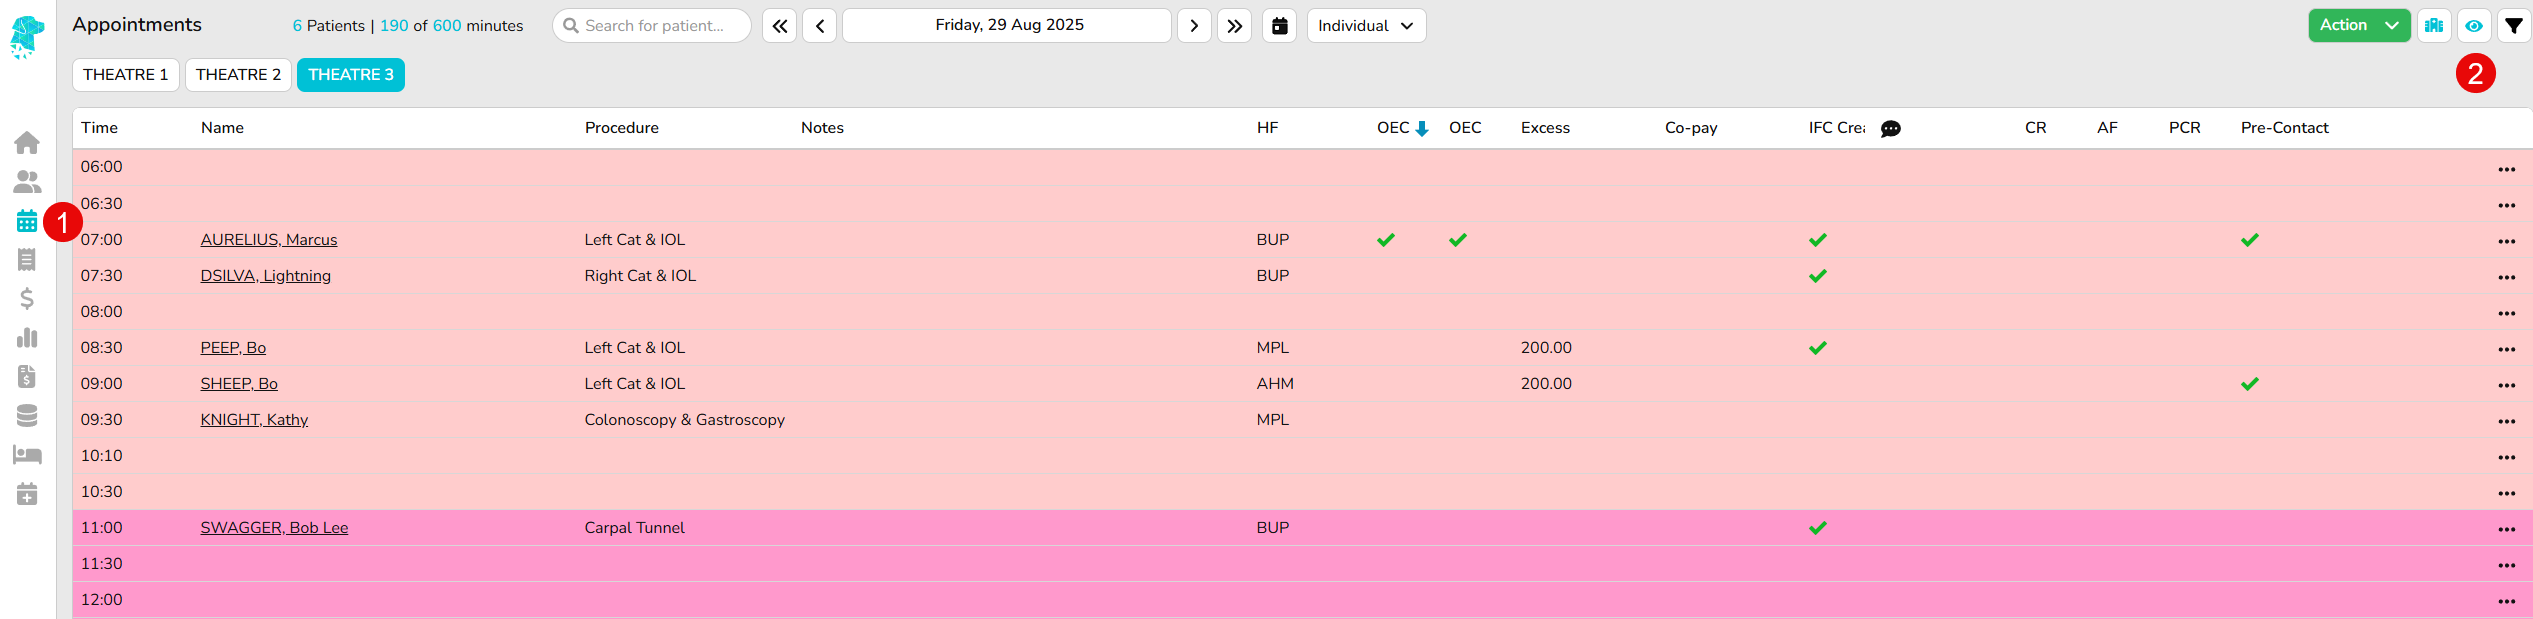
- Open the Appointments Screen & navigate to the required date & theatre
- Use the Actions dropdown on the right of the screen to select Send Bulk SMS
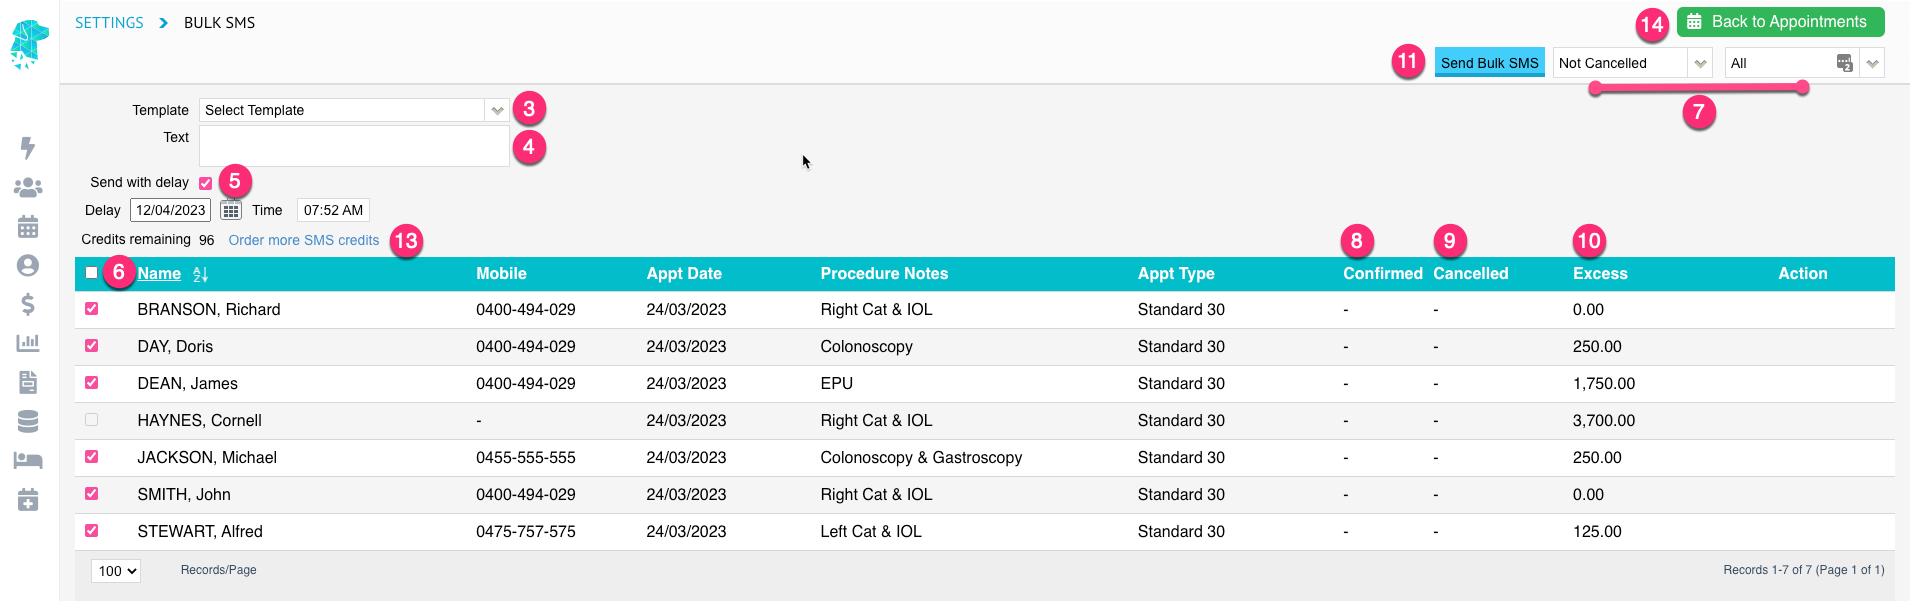
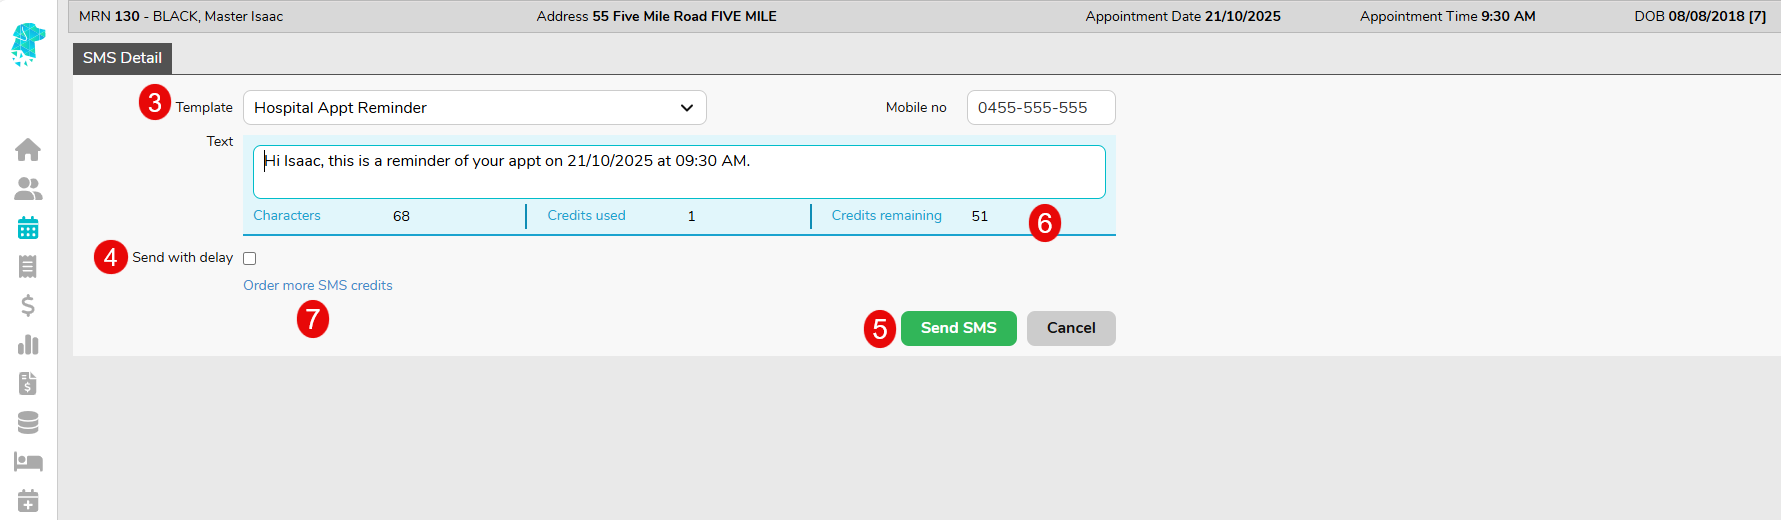
- Use the Template dropdown box to select from the preloaded SMS templates in your system (For help with customising these contact Altura Health or visit https://wiki.fydo.cloud/sms-templates/)
- Or free type in the Text box to customise the text message
- The Send with delay tick box allows the text to be scheduled for a later date & time. If this feature is being utilised enter the Date & Time that the text will be scheduled to send. However, there is no need to use this feature if the text is intended to be sent in real time
- All patients with a valid mobile phone number will be selected by default. Use the tick box at the top of the column to easily select or de-select all patients’ at once. Or use the tick box for each patient to individually select or de-select
- Use the drop-down boxes in the top right to assist in filtering to the desired patient demographics
- Confirmed gives information regarding previous SMSs sent. To assist in determining if they still require an SMS
- Cancelled gives information regarding the patients’ cancelled status. However, the screen opens to show Not Cancelled patients’ only. This column is only relevant if the filter has been set to include the cancelled patients’, using the drop-down boxes in #13
- The Excess column displays the amount that has been entered into the Excess field of the patients episode
- Once all relevant information has been completed, & all desired patients’ have been selected, click Send Bulk SMS
- You will be asked to confirm that you wish to send the SMS, click Yes
- The Credits Remaining on the account are displayed on the screen & once the credits get low use the Order more SMS credits option on this screen to be re-directed to the Order SMS Credits screen where you can follow the prompts
- Back to Appointments button returns the user to the appointments screen
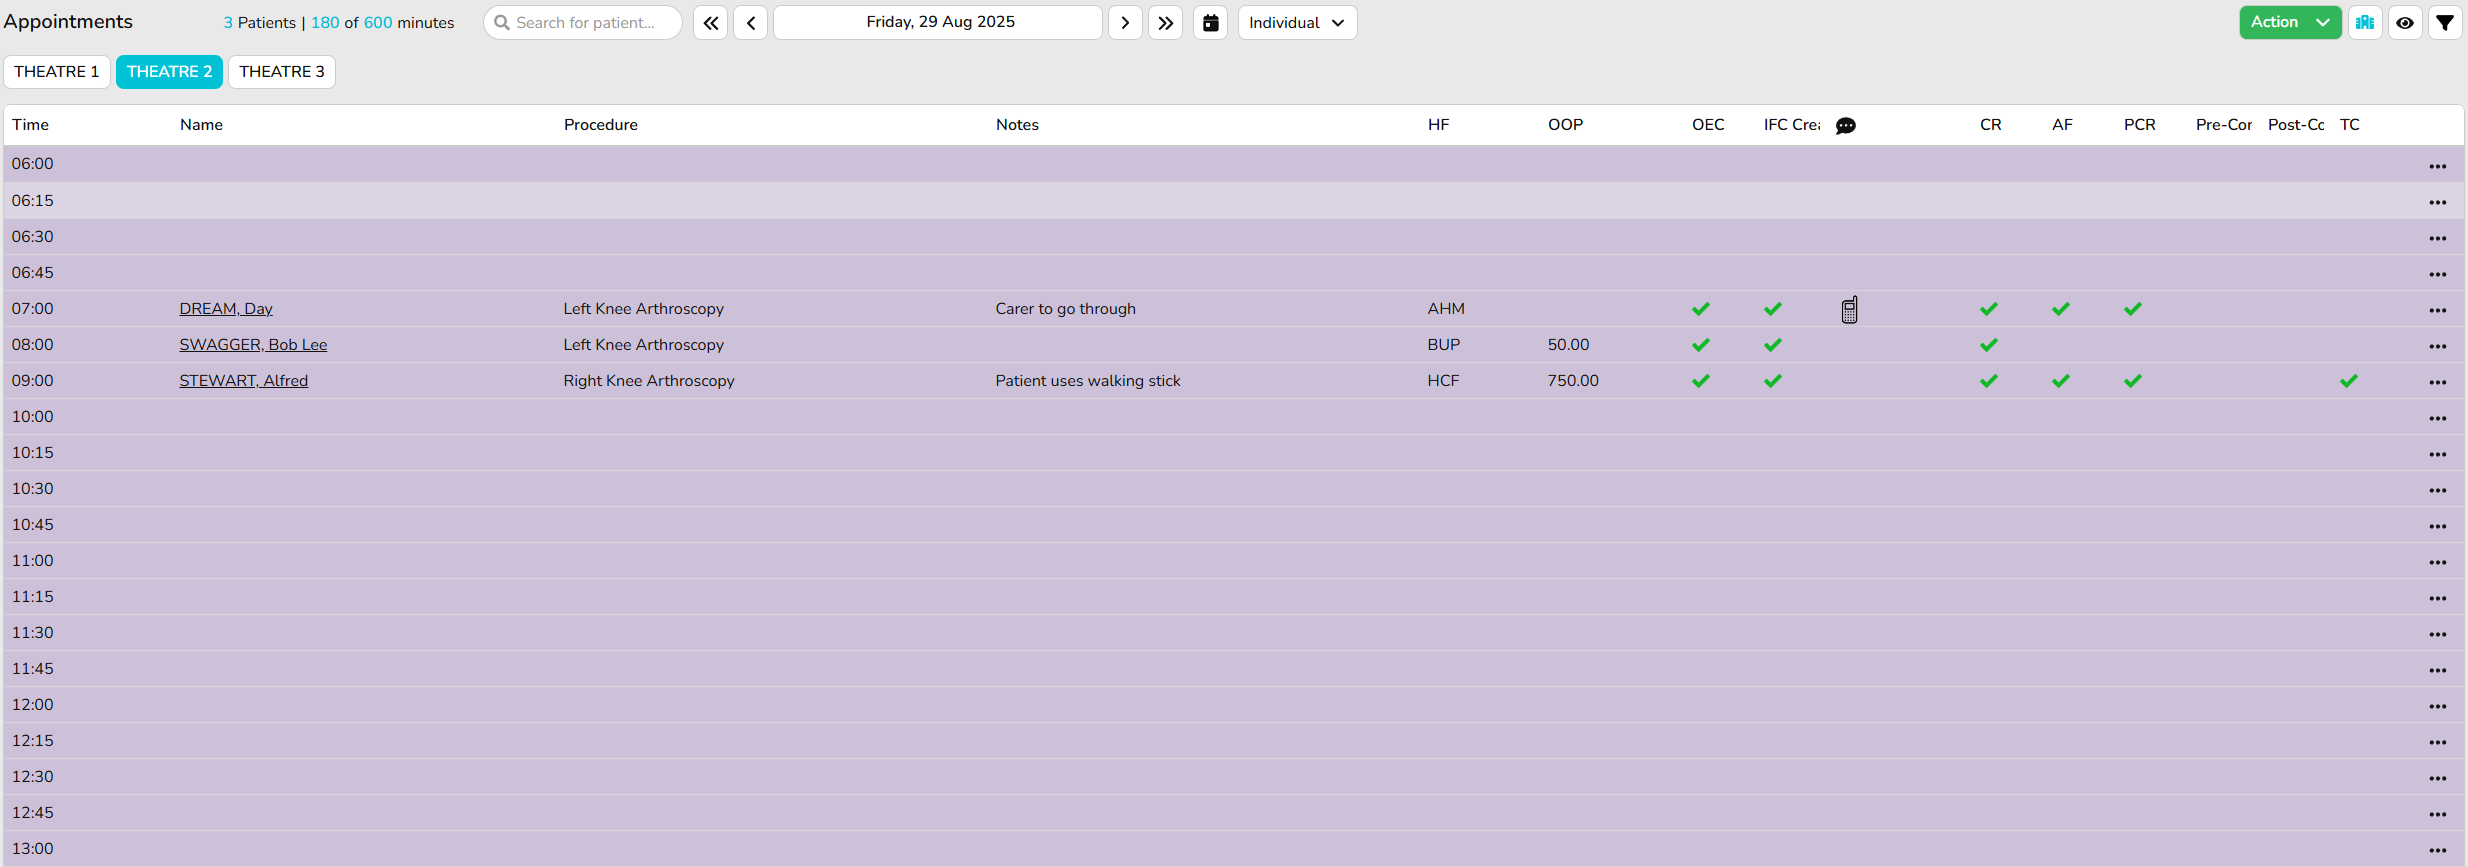
Once the patient has been sent an SMS there will be a visual cue on the Appointments screen. The icon will change depending on the status of the SMS sent. The icons represent the following:
· ![]() This icon will display once the SMS has been sent but not yet delivered to the recipient
This icon will display once the SMS has been sent but not yet delivered to the recipient
· ![]() This icon will display once the SMS has been delivered
This icon will display once the SMS has been delivered
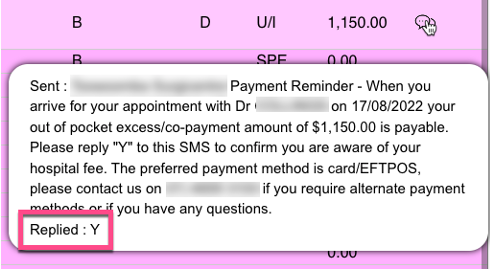
· ![]() This icon will display once the recipient has replied
This icon will display once the recipient has replied
Hover over each of these icons, in the appointments screen, to display the information that the SMS contained. Once a reply has been received it will also be displayed below the message.