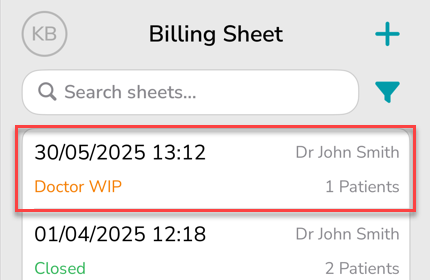
From the main Billing Sheet screen, locate the sheet you would like to delete. Note: You can only delete a sheet if its status is Doctor WIP.
To delete a billing sheet:
Hold down on the sheet you wish to delete
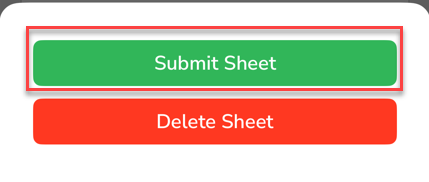
Tap Delete Sheet on the pop-up that appears
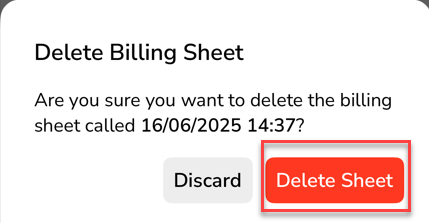
Confirm by tapping Delete Sheet again in the second pop-up
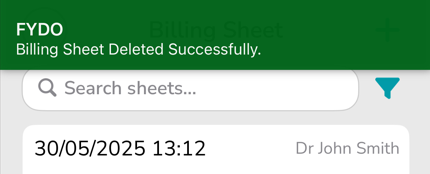
Once deleted, you’ll see a green confirmation banner: “Billing Sheet Deleted Successfully”
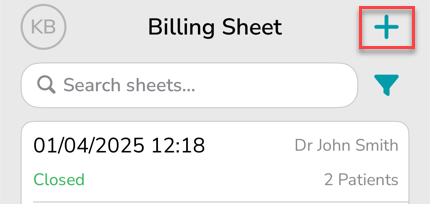
How to Create a Billing Sheet
Tap on the Sheets icon at the bottom of the screen. This is where you can create, view and manage all billing sheets.
On the Billing Sheet screen, tap the + icon in the top right corner.
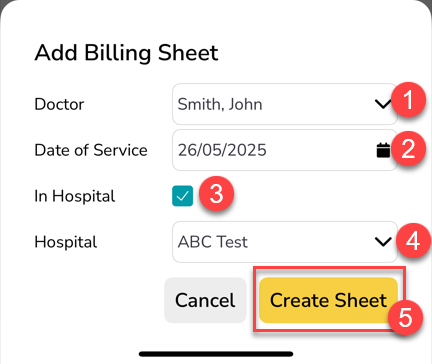
On the Add Billing Sheet window:
Doctor – select from the dropdown
Date of Service – set the date using the calendar
In Hospital – tick if applicable
Hospital – if In Hospital is ticked, select a hospital from the dropdown
Tap Create Sheet
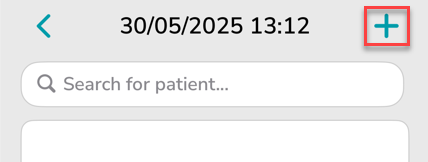
Inside your newly created sheet, tap the + icon in the top right corner.
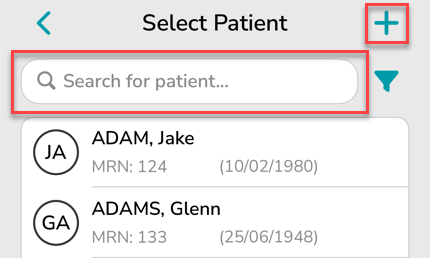
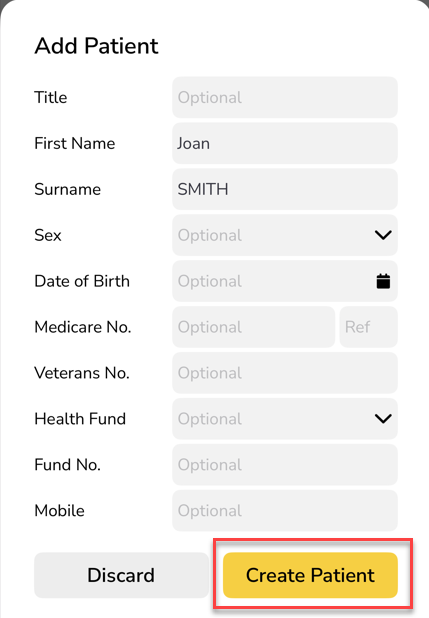
Use the search bar to find an existing patient or tap the + icon in the top right corner to create a new patient.
If you’re creating a new patient, enter the details for the patient. At a minimum, you must add:
First Name
Surname
Other fields such as Date of Birth, Medicare Number, Health Fund, etc are optional. After the patient details have been entered, tap Create Patient.
After selecting a patient or creating a new patient, you’ll be taken to the Billing Information screen. Here you can review and edit the following fields:
Doctor
Tick In Hospital or Surgical Assistantif applicable
Hospital
Add Gap Amount, Referring Doctor or a Note to Billing Team – optional
Once done, scroll down and tap Add Item Numbers.
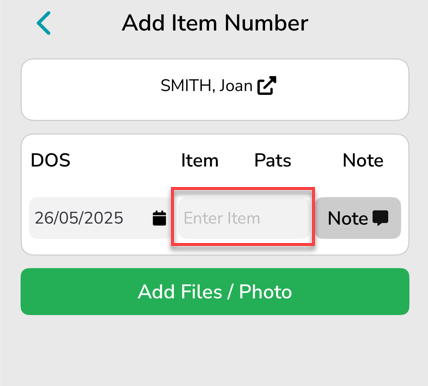
On the Add Item Number screen:
Confirm the Date of Service (DOS) is correct. If it needs to be changed, simply tap the date field to make any changes before continuing.
Tap the Enter Item field
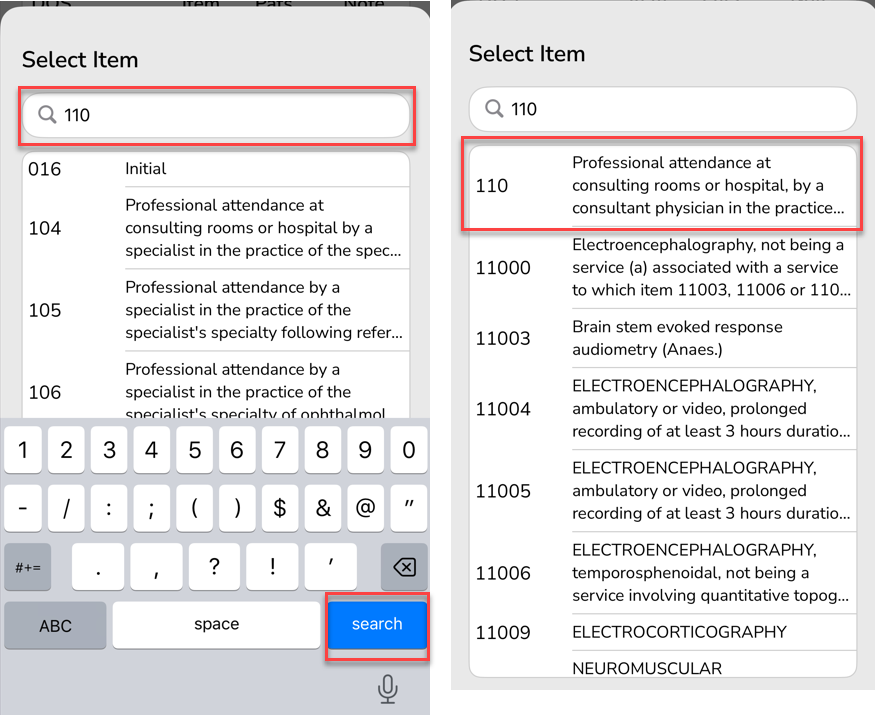
Type the item number (e.g. 110) and tap Search
Tap the appropriate item
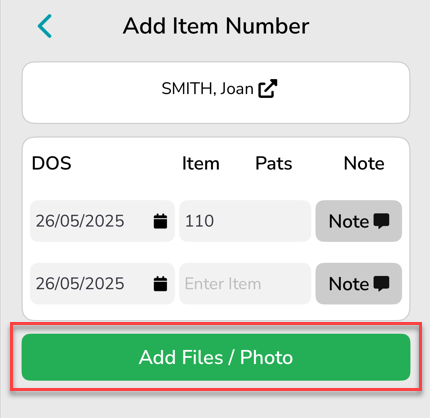
Optional: Add a Note or more Items
You can tap Note to add a specific item note (e.g. Time of Service 9am)
To add another item number for the same patient, tap the blank Enter Item field and repeat the process above.
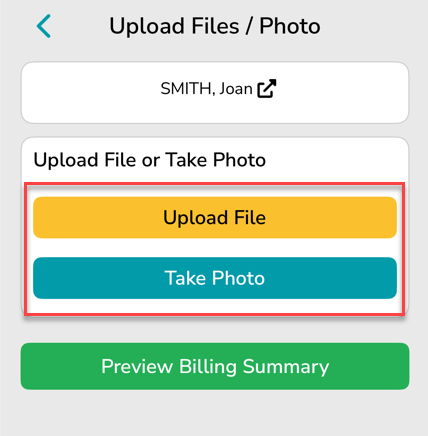
Once all the required Dates of Service and Items have been added, tap Add Files / Photo.
After adding item numbers, upload files or photos where required — such as documents that include the patient’s following details:
Referral information
Date of Birth (DOB)
Medicare Number
Health Fund details
Work Cover / Third Party details
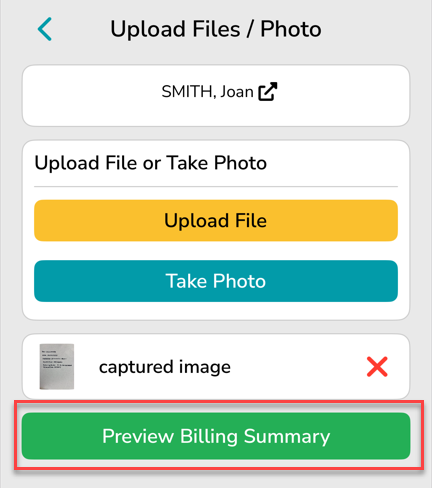
If this is an existing patient and no details need to be updated or added, you can skip ahead to Preview Billing Summary.
Once uploaded, tap Preview Billing Summary.
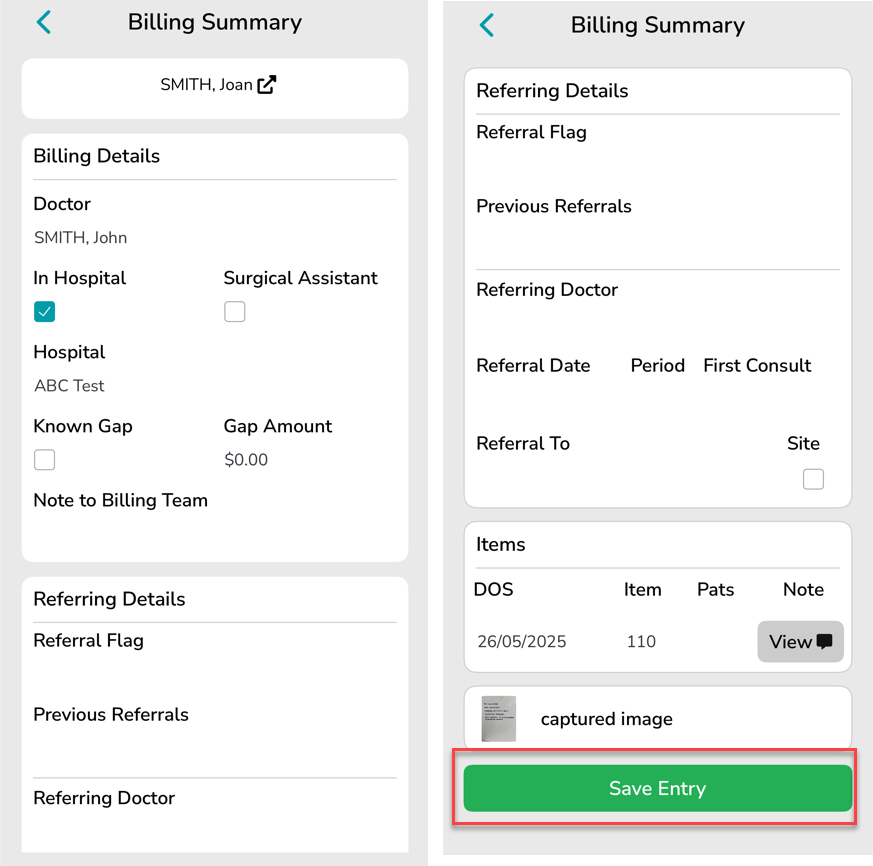
On the Billing Summary screen:
Review all information entered – Billing Details, Referral Details, Items and any attached files/photos
Tap Save Entry to add the patient to the billing sheet
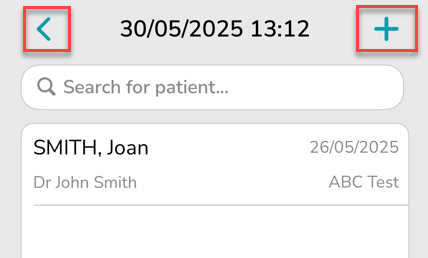
After saving the entry, you’ll return to the Billing Sheet screen. From here, you can either:
Tap the + icon in the top right corner to add another patient
To finalise and submit the sheet, tap the < icon to return to the main Billing Sheet screen and follow the steps in How to Submit a Billing Sheet
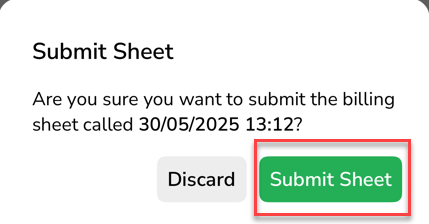
How to Submit a Billing Sheet
From the main Billing Sheet screen, locate the sheet you would like to submit (status will show as Doctor WIP).
To submit a billing sheet:
Hold down on the sheet you wish to submit
Tap Submit Sheet on the pop-up that appears
Confirm by tapping Submit Sheet again in the second pop-up
Once submitted, you’ll see a green confirmation banner: “Billing Sheet Submitted Successfully” The status will now show as Submitted with the date.
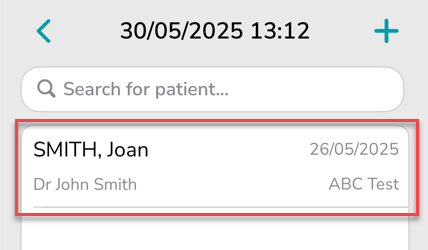
How to Delete a Patient from a Billing Sheet
From inside the Billing Sheet, locate the patient you would like to delete.
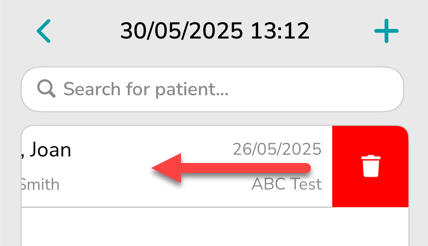
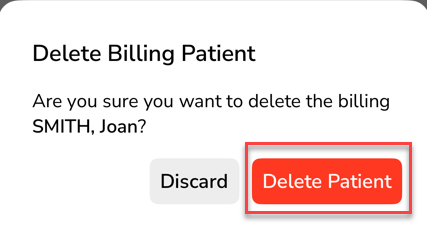
To delete a patient:
Swipe left on the patient you wish to delete
Tap the Trash Can icon
Confirm by tapping Delete Patient on the pop-up that appears
Once deleted, you’ll see a green confirmation banner: “Billing Patient Record Deleted Successfully”
How to Sign In on the Mobile App
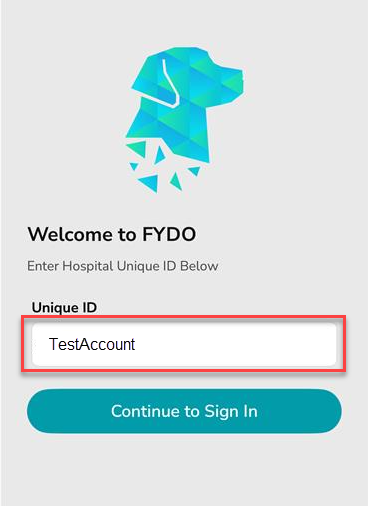
When you first open the FYDO Mobile app, you will be brought to the screen below.
Enter your Unique ID and tap Continue to Sign In
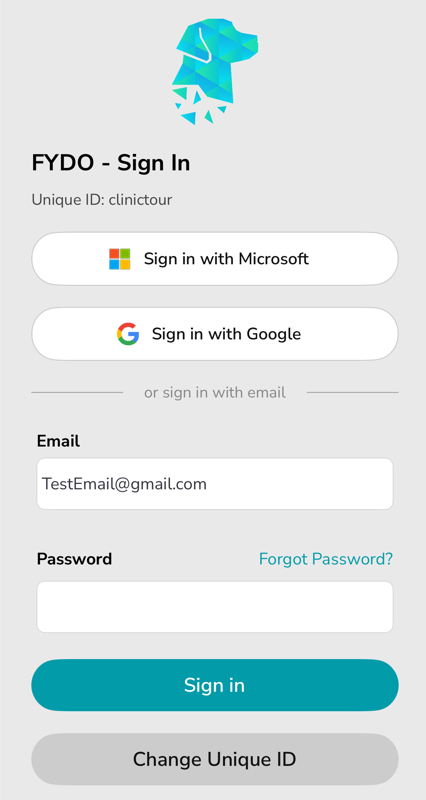
You’ll now be taken to the Sign In screen.
Enter your email and password, then tap Sign In. If you created your account with a Microsoft or Google account, tap Sign in with Microsoft or Sign in with Google and follow the prompts.
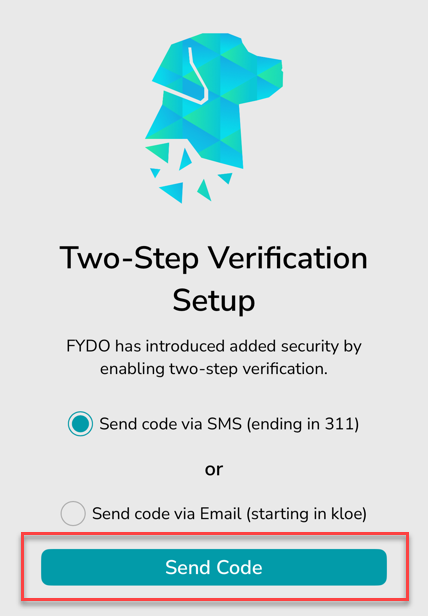
The next screen you’ll see is the Two-Step Verification setup.
Tap Send Code to receive a verification code via SMS. If you prefer to receive the code by email, select Send code via Email, then tap Send Code.
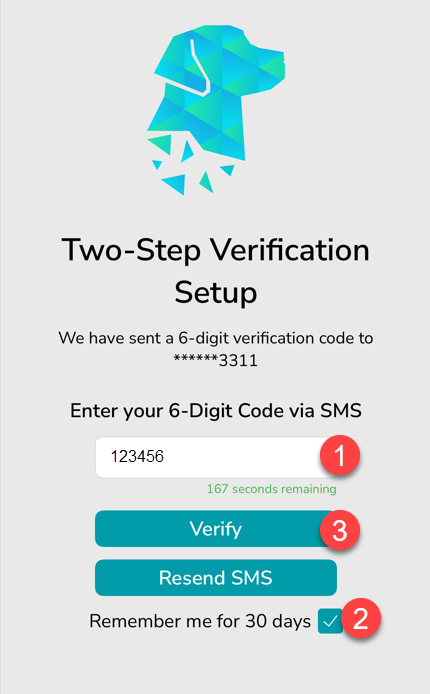
Enter the code you received via SMS or Email, tick “Remember me for 30 days” (optional) and tap Verify.
It’s time to choose your PIN for quick and secure access.
Tap the white circles under New PIN to enter your chosen PIN number.
All done! You’re now logged into the FYDO Mobile App