Eclipse Clinic Billing
Set up your patient and ready to bill? Read ahead to find out how to submit claims to Health Funds via Eclipse.
Important Note: If you have not submitted an Online Patient Verification (OPV) yet for your patient, or you do not know how, see our wiki page here!
To get started, from the Patient Record, we are going to click on the Bill Patient button.
You can also use the hotkey ‘B’!
![]()
This will take you to the Clinical Billing page
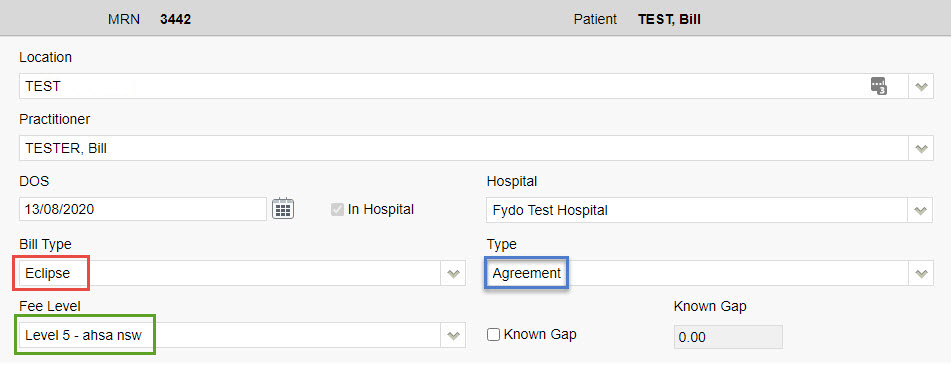
While you may notice that there are more fields than shown above, for Eclipse we will only be focusing on a few.
Please note that most of these fields are drop down menus.
- Location: The Location the service took place. If you only have one it will be defaulted.
- Practitioner: The Practitioner who performed the service.
- DOS: The Date of Service.
- In Hospital: A tick-box to indicate if this service was performed in a Hospital, this is required for Eclipse
The main fields to ensure are correct for Eclipse are the highlighted ones above, and outlined below:
- Bill Type: The type of billing; be sure to select Eclipse
- Fee Level: Which fees this billing will use. Will default based on the patients record.
- Type: Needs to be set to either Agreement or Scheme depending on the fund.
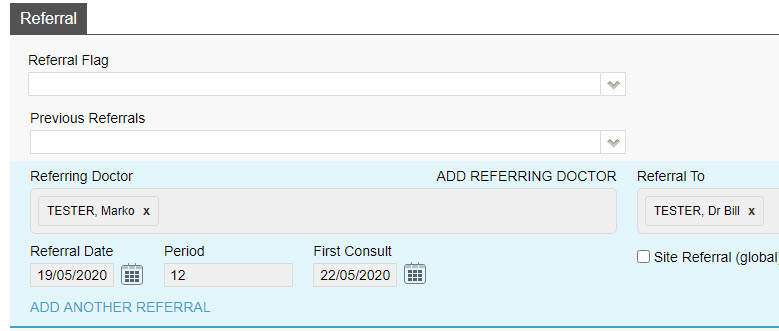
The last step before we can begin our billing is to enter any needed referral information. If this does not apply to you, skip to the next section: Adding Items
Otherwise, simply fill out the Referral section as seen below. If you only have one referring doctor for this patient, they will be automatically selected here (provided it has not expired)
If you don’t see a Referral you have added, be sure to check the Previous Referrals drop down menu!
Once you are done with the above segments, click on the green Add Items button in the bottom right hand corner of your screen.
![]()
Clinic Billing
You will arrive at the Clinic Billing page. Here we can see a brief overview of previous information for the patient, and where we can bill an invoice.
Billing is as easy as typing in the item you need and selecting it. There are two different ways to search for the item as shown below:
- Search for the item number itself.
- Search for a word in the description. This can either be at the start, or anywhere within the description!
Don’t forget, for Eclipse you can easily change the Date of Service within the invoice by using the handy calendar!
Once you have entered all your items as desired, click on the Review Charges button to proceed to the final page of billing.
![]()
Clinic Review Charges
You may notice that this page looks nearly identical to the previous Clinic Billing page. The only real difference is that you can no longer add or change items, and there are additional buttons at the bottom.
You will also be able to see the Total Charges for the items you have billed like so:

There are a few different options on this screen:
![]()
- Edit Item And Charges: Realised you have made a mistake? click this button to go back to the previous page and fix it up!
- Cancel: Cancel out of this billing, this will take you back to the Patient Screen.
- Save: Save this invoice, prompting the final confirmation before it is send to Claiming – Medical. If Save & Print is selected, it will also be printed.
Upon selecting one of the two save options, you will see the final stage of the billing, the Claimant Screen.

Please note that most of the fields are optional, so if you do not wish to fill them out, simply click on the green Send Electronically button.
![]()
Otherwise, you can fill them out accordingly, and select if an IFC was issued.
All done! A batch has now been created within Claiming – Medical and will be ready to send off.
If you do not know how to send a batch, see our handy guide here!