Setting Up Email Footers in FYDO
FYDO allows facilities to set up email footers in two ways:
- Universal Email Footer — applied as the default email footer for all users.
- User-Based Email Footer — applied to an individual user’s emails.
Important Note
If a user has their own user-based email footer set up, this will override the universal email footer.
This means facilities can set up a universal email footer for all users, while still allowing individual users to customise their own footer if required.
In order to utilise any emailing features in FYDO, the user first has to set up the email feature by following the instructions in the below wiki page:
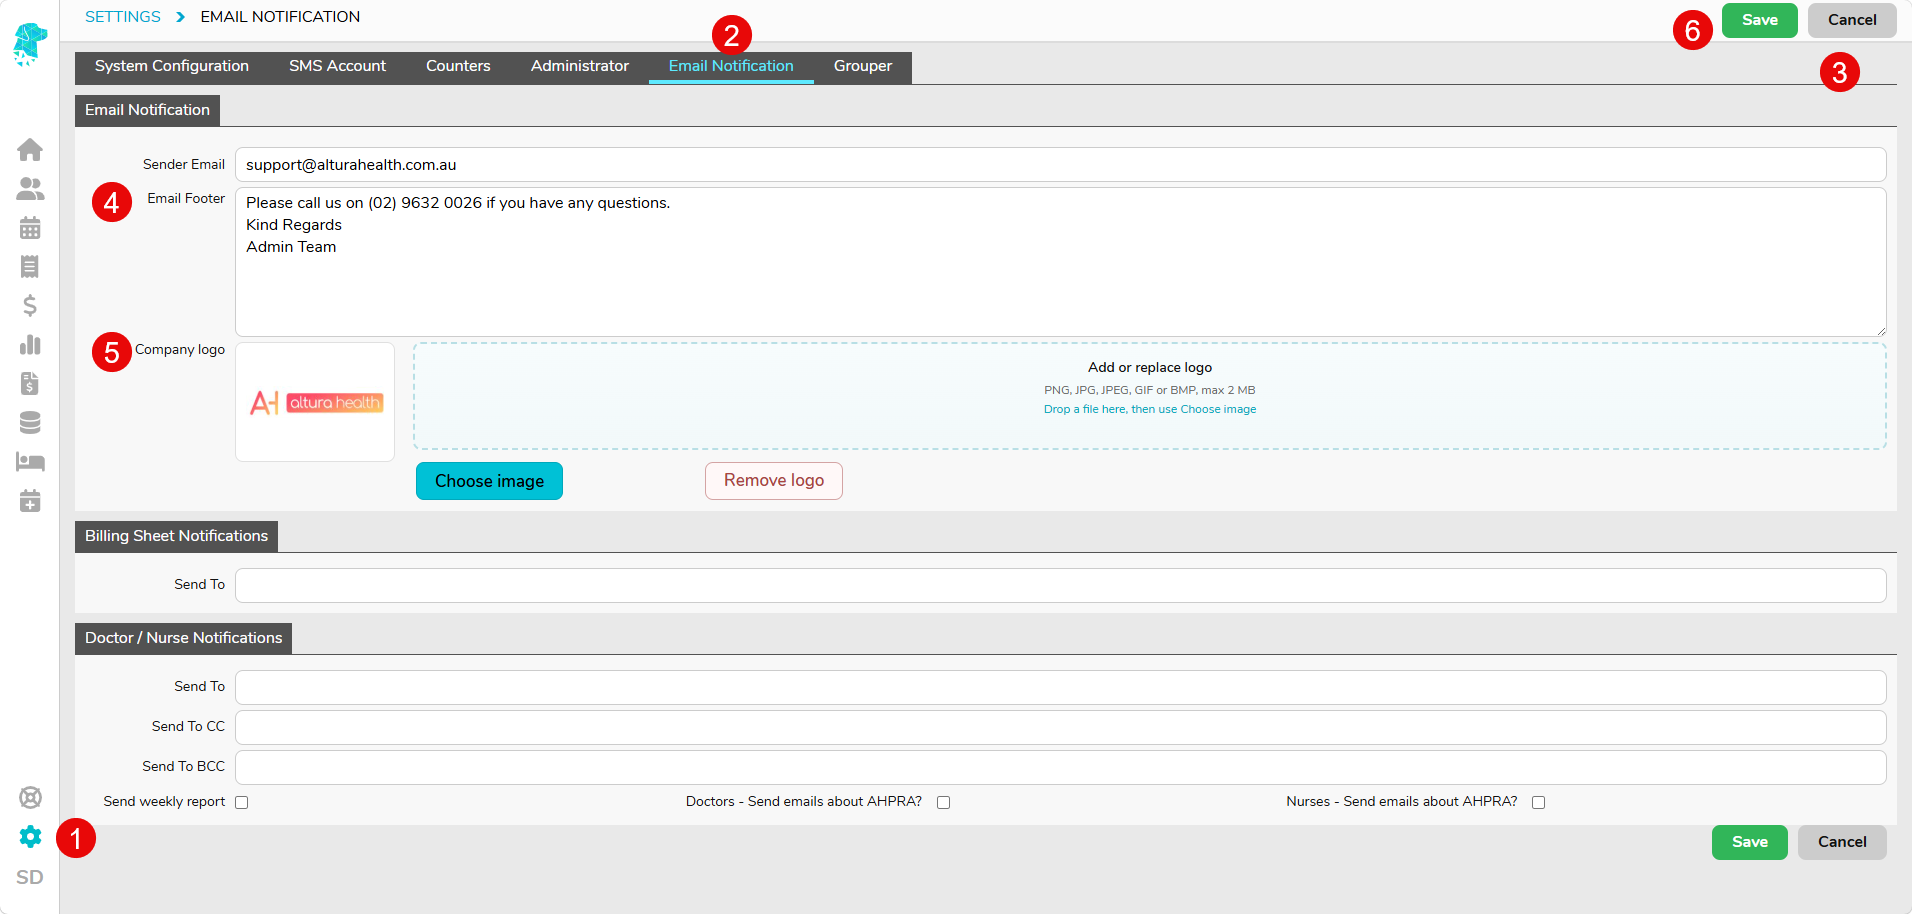
Part 1: Setting Up a Universal Email Footer
The universal email footer will apply as the default footer for users who have not set up their own individual email footer.
- Go to Settings and select System Configuration.
- Select the Email Notification tab.
- Click Edit.
- Enter any text required in the Email Footer field.
- Drag and drop, or import by selecting Choose Image, the logo into the Company Logo section, if required. Ensure the file format for the logo meets the requirements displayed on the screen.
- Once all relevant information has been entered, click Save for the logo preview to update.
The universal email footer will now be used as the default footer for outgoing emails, unless the individual user sending the email has their own user-based footer set up.
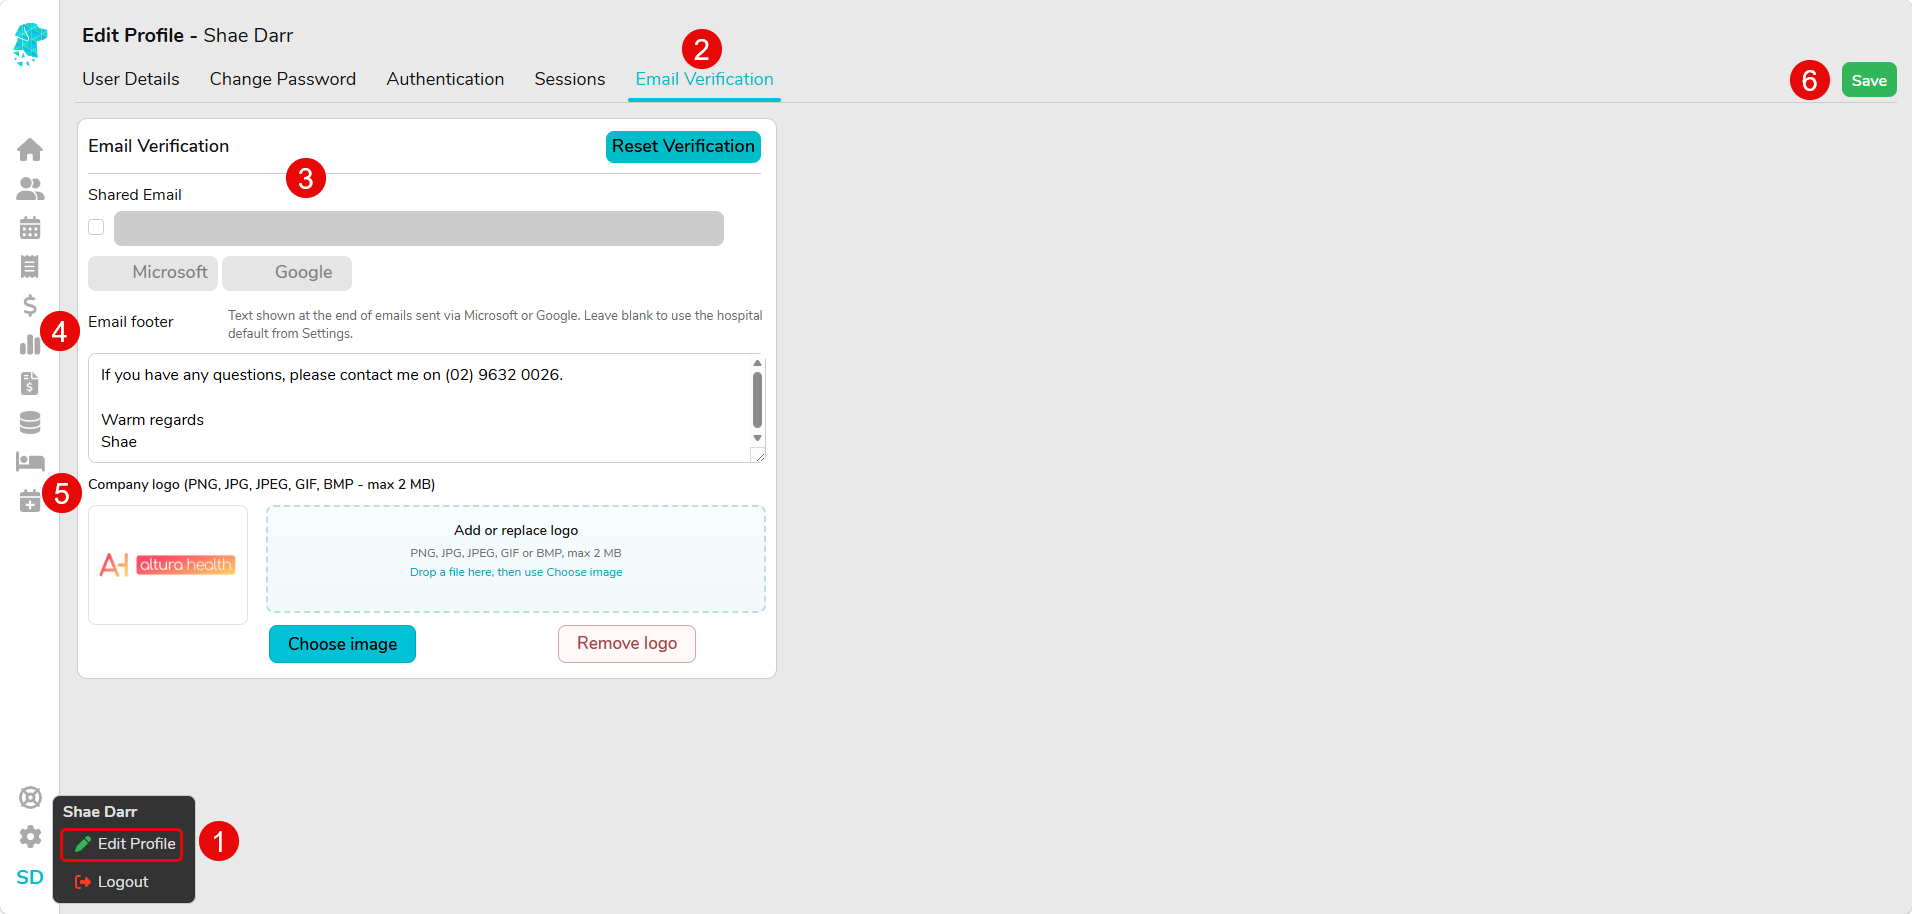
Part 2: Setting Up a User-Based Email Footer
A user-based email footer is set up from the individual user’s profile. This allows each user to have their own email footer and logo if required.
- Hover over your User Initials, in the bottom left corner of your screen, and select Edit Profile.
- Go to the Email Verification tab.
- This is where you will need to verify your email address, if you haven’t already, in order to send emails from FYDO, as per the below instructional wiki page:
Setting up to Email from FYDO - Navigate to the Email Footer field and enter any text required.
- Drag and drop, or import by selecting Choose Image, the logo into the Company Logo section, if required. Ensure the file format for the logo meets the requirements displayed on the screen.
- Once all required information has been added, click Save for the logo preview to update.
Emails sent by this user will now include their individual email footer and logo. This user-based footer will override the universal email footer set up in Settings.
Sending an Email to Check the Footer
Once the email footer has been set up, you can test how it appears by sending a document from FYDO. Further instructions on how to send different documents from FYDO via email can be found below:
Emailing Documents from FYDO
Emailing a Hospital Invoice from FYDO