My Health Record – Uploading a Discharge Summary
Once your hospital is set up to upload Discharge Summaries to My Health Record (MHR), users will be able to follow these instructions in order to complete that task.
Removing Discharge Summaries will also be covered.
To upload a patient’s Discharge Summary, ensure the MHR Consent box is selected in the associated appointment.
If the MHR Consent box is ticked on the patient screen, it will automatically be selected when the appointment is scheduled.
If the patient withdraws their consent for the Discharge Summary to be uploaded for a particular episode, the box on the Edit Appointment Screen should be unticked.

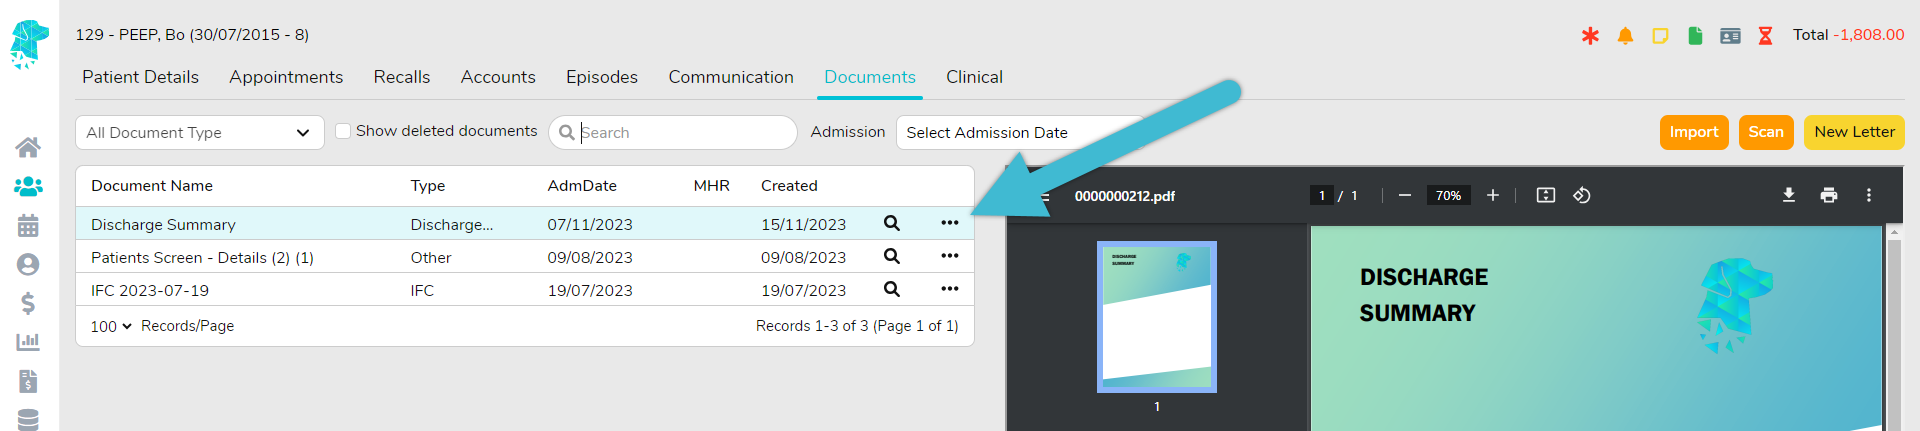
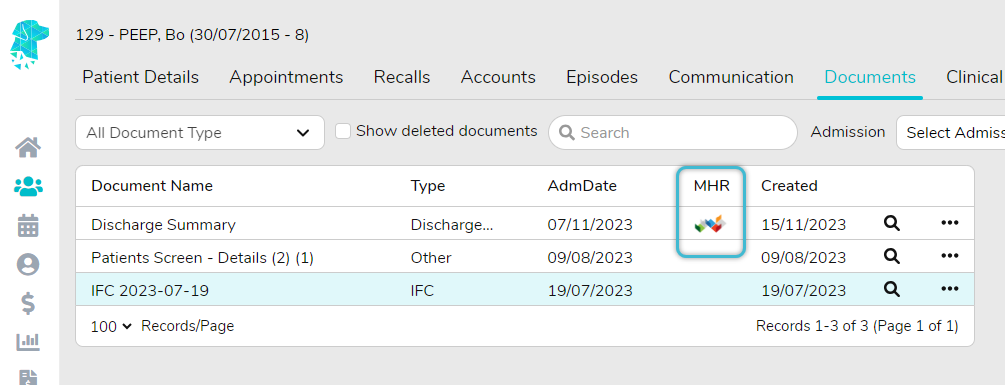
Once it is established that the MHR Consent box is ticked, navigate to the patient’s Documents.
Utilise the Import or Scan feature to import a document into FYDO:

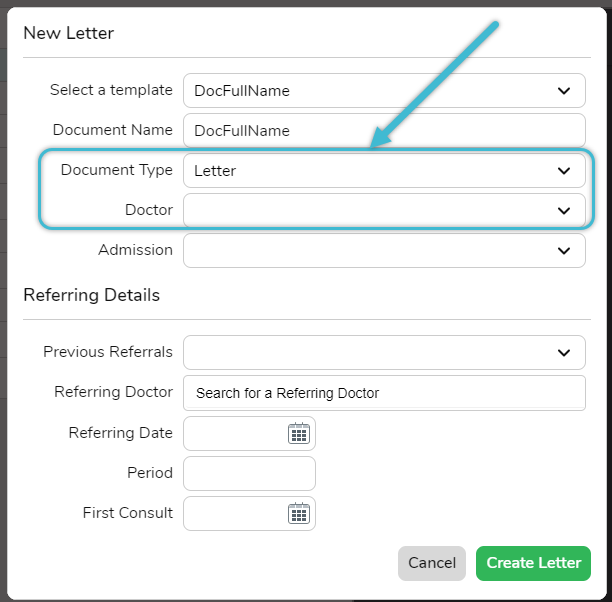
If you would like to use the Create Letter feature in FYDO to generate a Discharge Summary, do this from the Right-Click Menu on the Appointments Screen to ensure all episodic data is loaded into the document.
Ensure that the document is saved with a Document Type linked to MHR Template > Discharge Summary (DISSU). This may need to be set up for your facility in Documents > Documents Types. (Reach out to our support staff for assistance with this)
A Doctor with a successfully verified HPI-I will also need to be allocated.
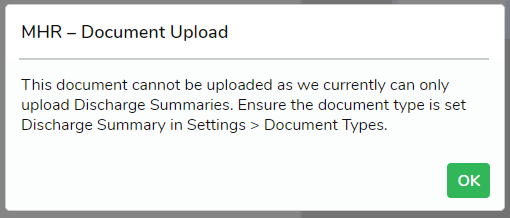
Attempting to upload a document that is not assigned a MHR Template type of ‘Discharge Summary’ will trigger an alert message. Only Discharge Summaries can be uploaded to MHR through FYDO.
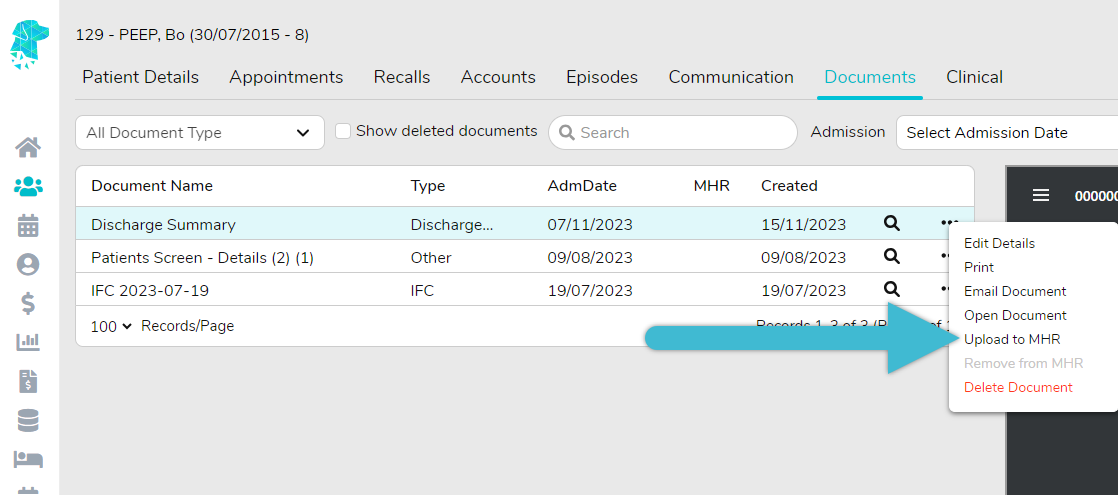
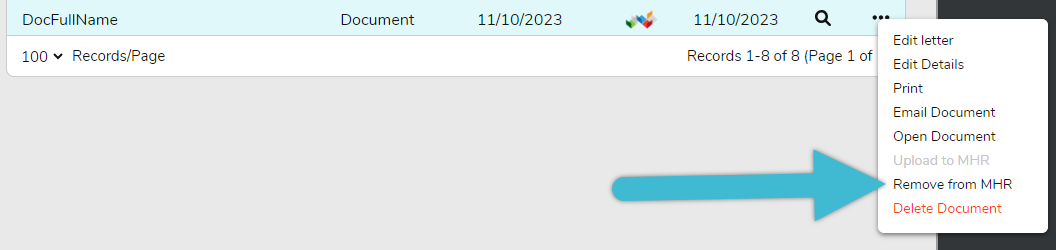
After the required document is uploaded, click the three dots to display the Menu.
Select Upload to MHR.
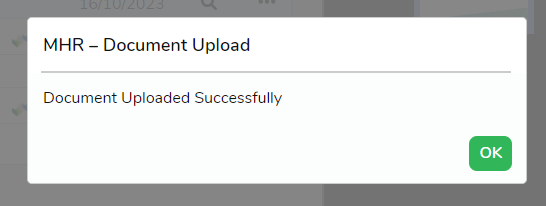
A confirmation message indicating a successful upload will be displayed.
Documents that have been uploaded can be identified by the MHR symbol.
Documents can be removed from MHR by following the same process above and selecting Remove from MHR.
Confirm the removal by clicking Yes.
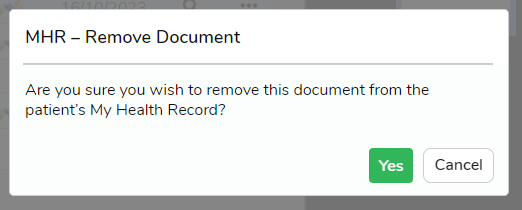
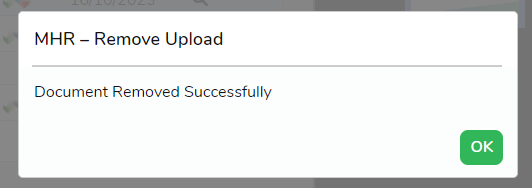
A confirmation of successful removal will be displayed.
For more helpful information related to My Health Record visit our associated wiki pages to:
Add your organisations HPI-O to FYDO here.
Add your doctors HPI-I to FYDO here.
Check a patients IHI in FYDO here.

